
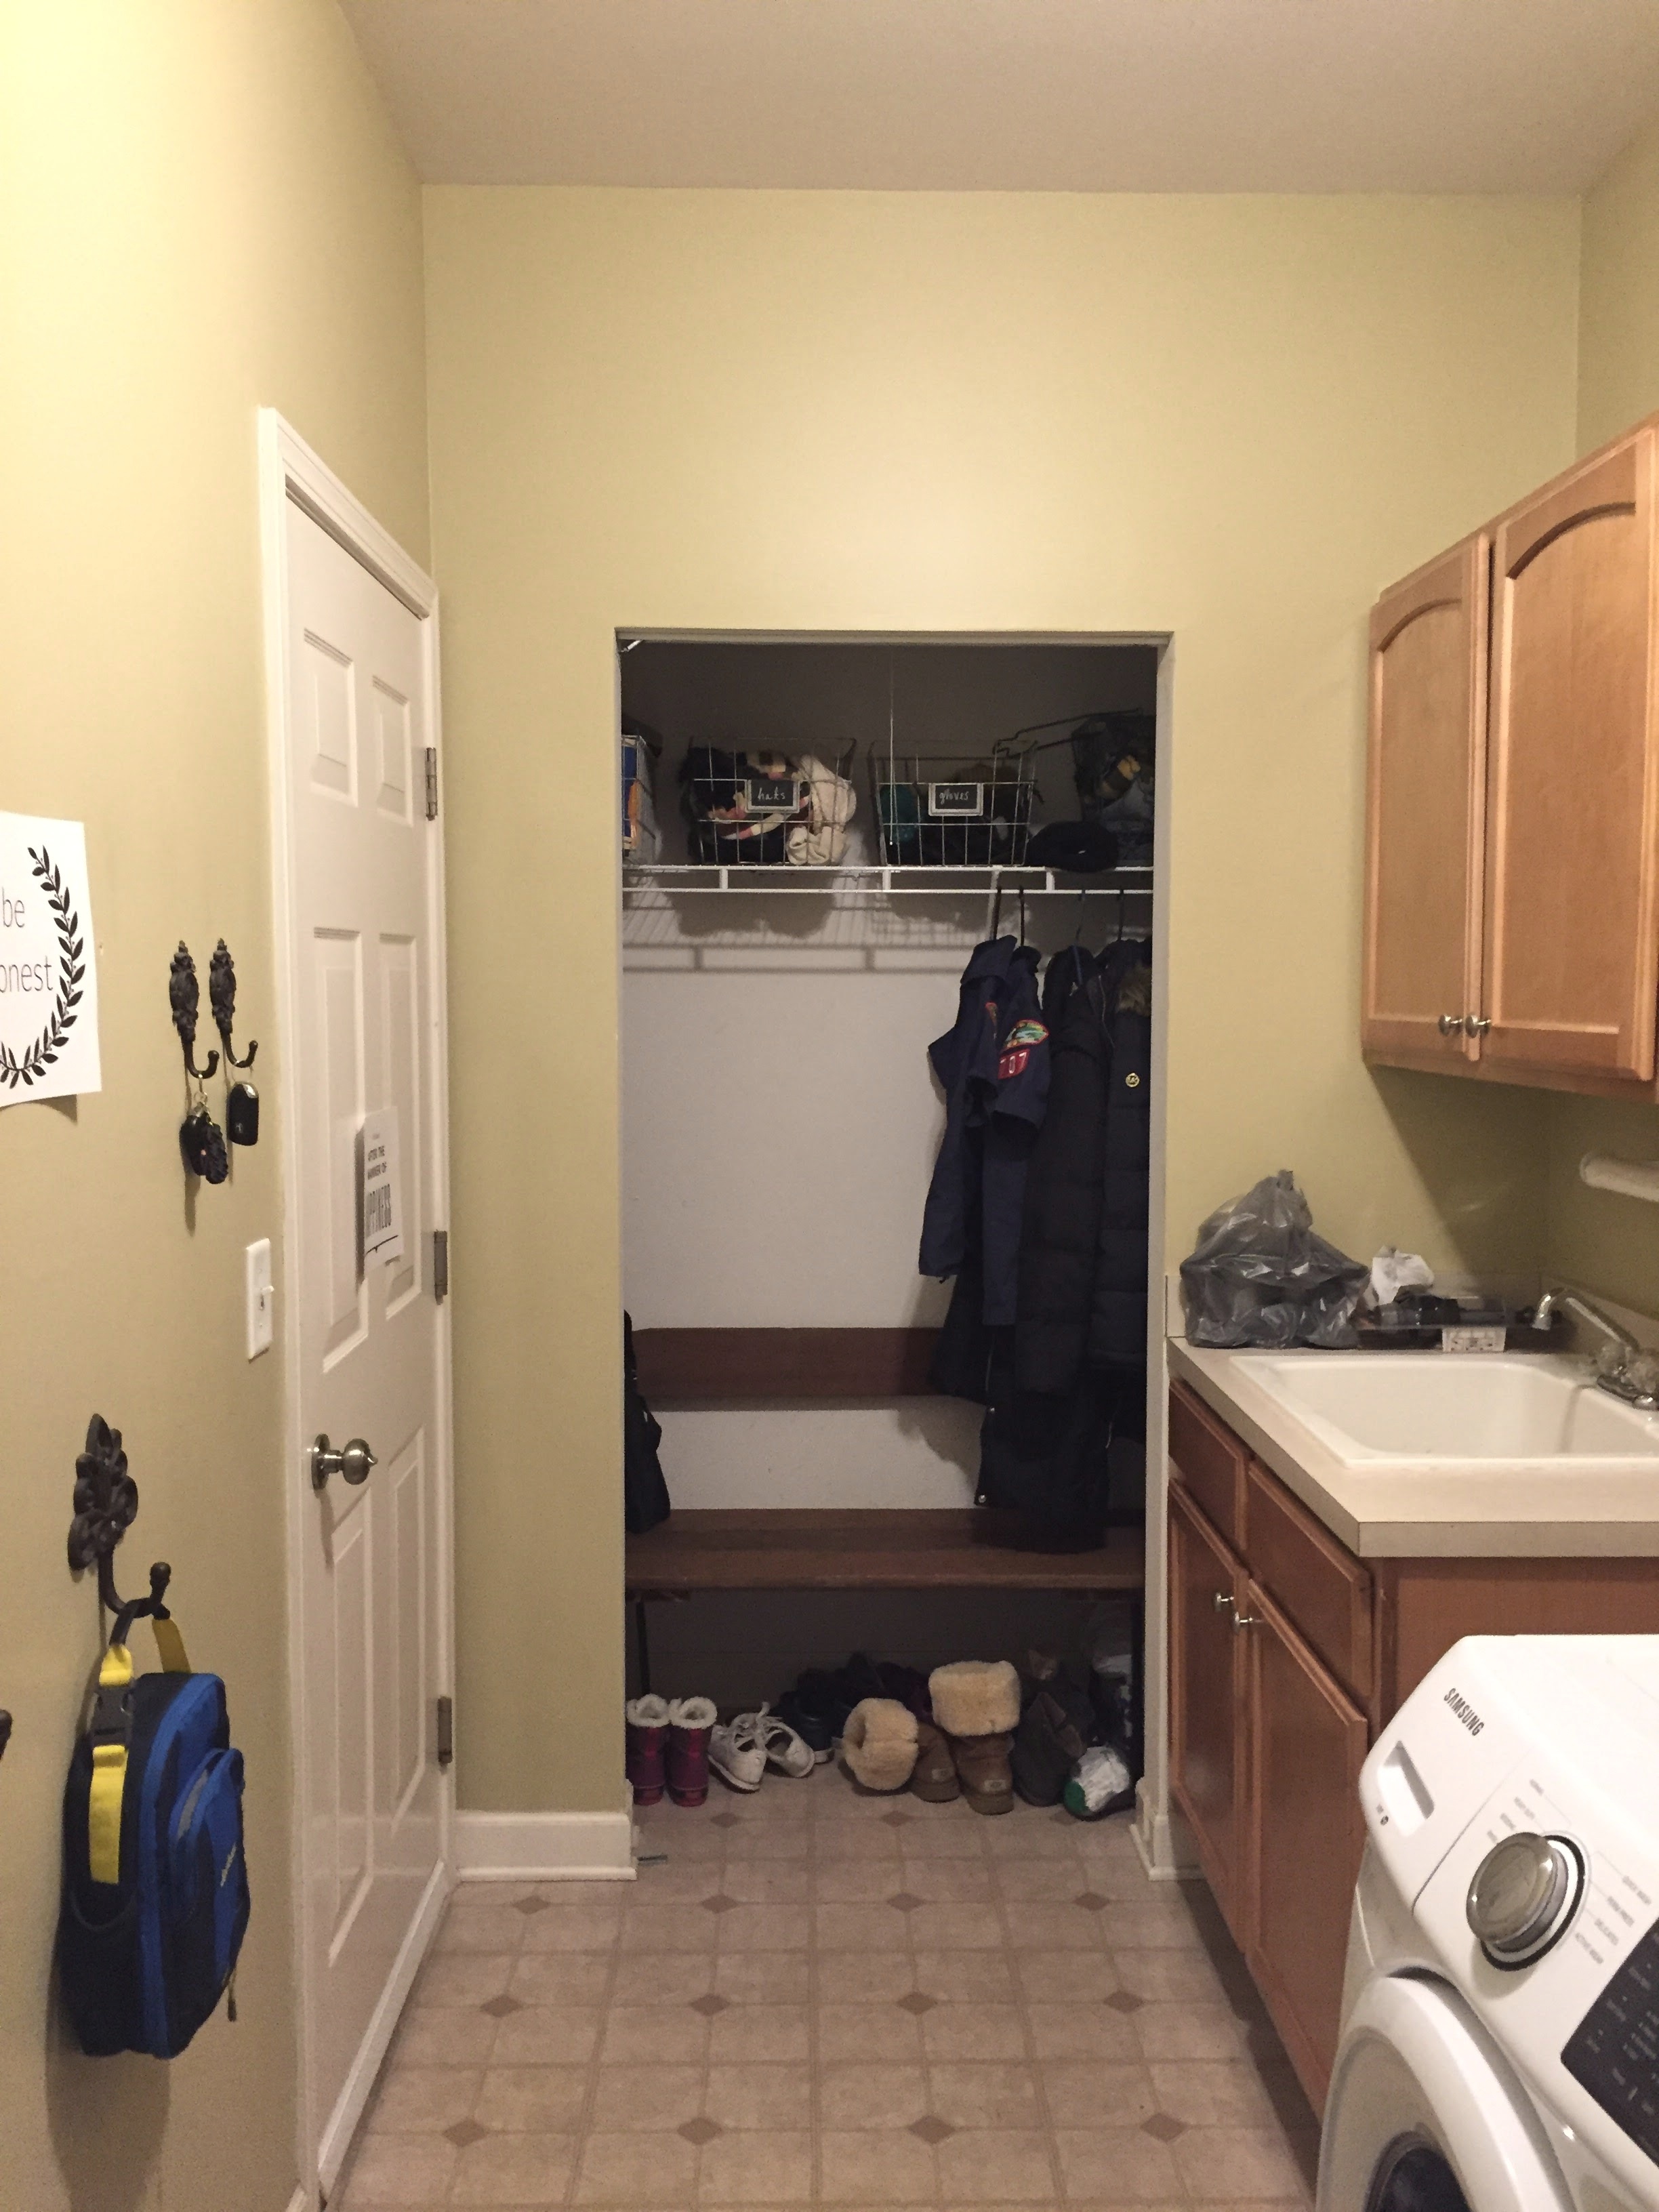
I have been wanting to makeover our laundry room since we moved in. It had faded vinyl tiles and always felt very dark and cramped. There was only one small ceiling light and no windows. I would love for every room in my house to feel open and bright-exactly the opposite of our current laundry room. Because there is an entrance to our garage in that room, it’s actually a sort of mud room/laundry room/entrance which made it the most used room in our house. And I liked it the least ahhh! We knew that this would be a big project because we would need new floors and I also wanted to take down the wall between the closet and the rest of the room. So this project got set aside to many other smaller, more affordable projects. But finally it was time to take on this project yay!
So let’s start with the befores. Yikes! (And I made no effort to clean up before I took these haha!) Early on I took off the bi-fold doors on the closet because it was easier to access everything inside. Also, the kids always needed a place to put on their shoes so I threw a bench in there. The first thing we did was take down the wall of the closet. We made sure there was nothing structural or electrical in there before we started at it with a sledge hammer.
We then knocked through the back wall of the closet in to our garage. We have a third bay in our garage so this ate in to that space. We only use that space for a workshop and storage and so it wasn’t a big deal to take up about two feet by six feet of it. We left the supporting 2×6’s between the garage and the house because we didn’t want to mess with anything structural.
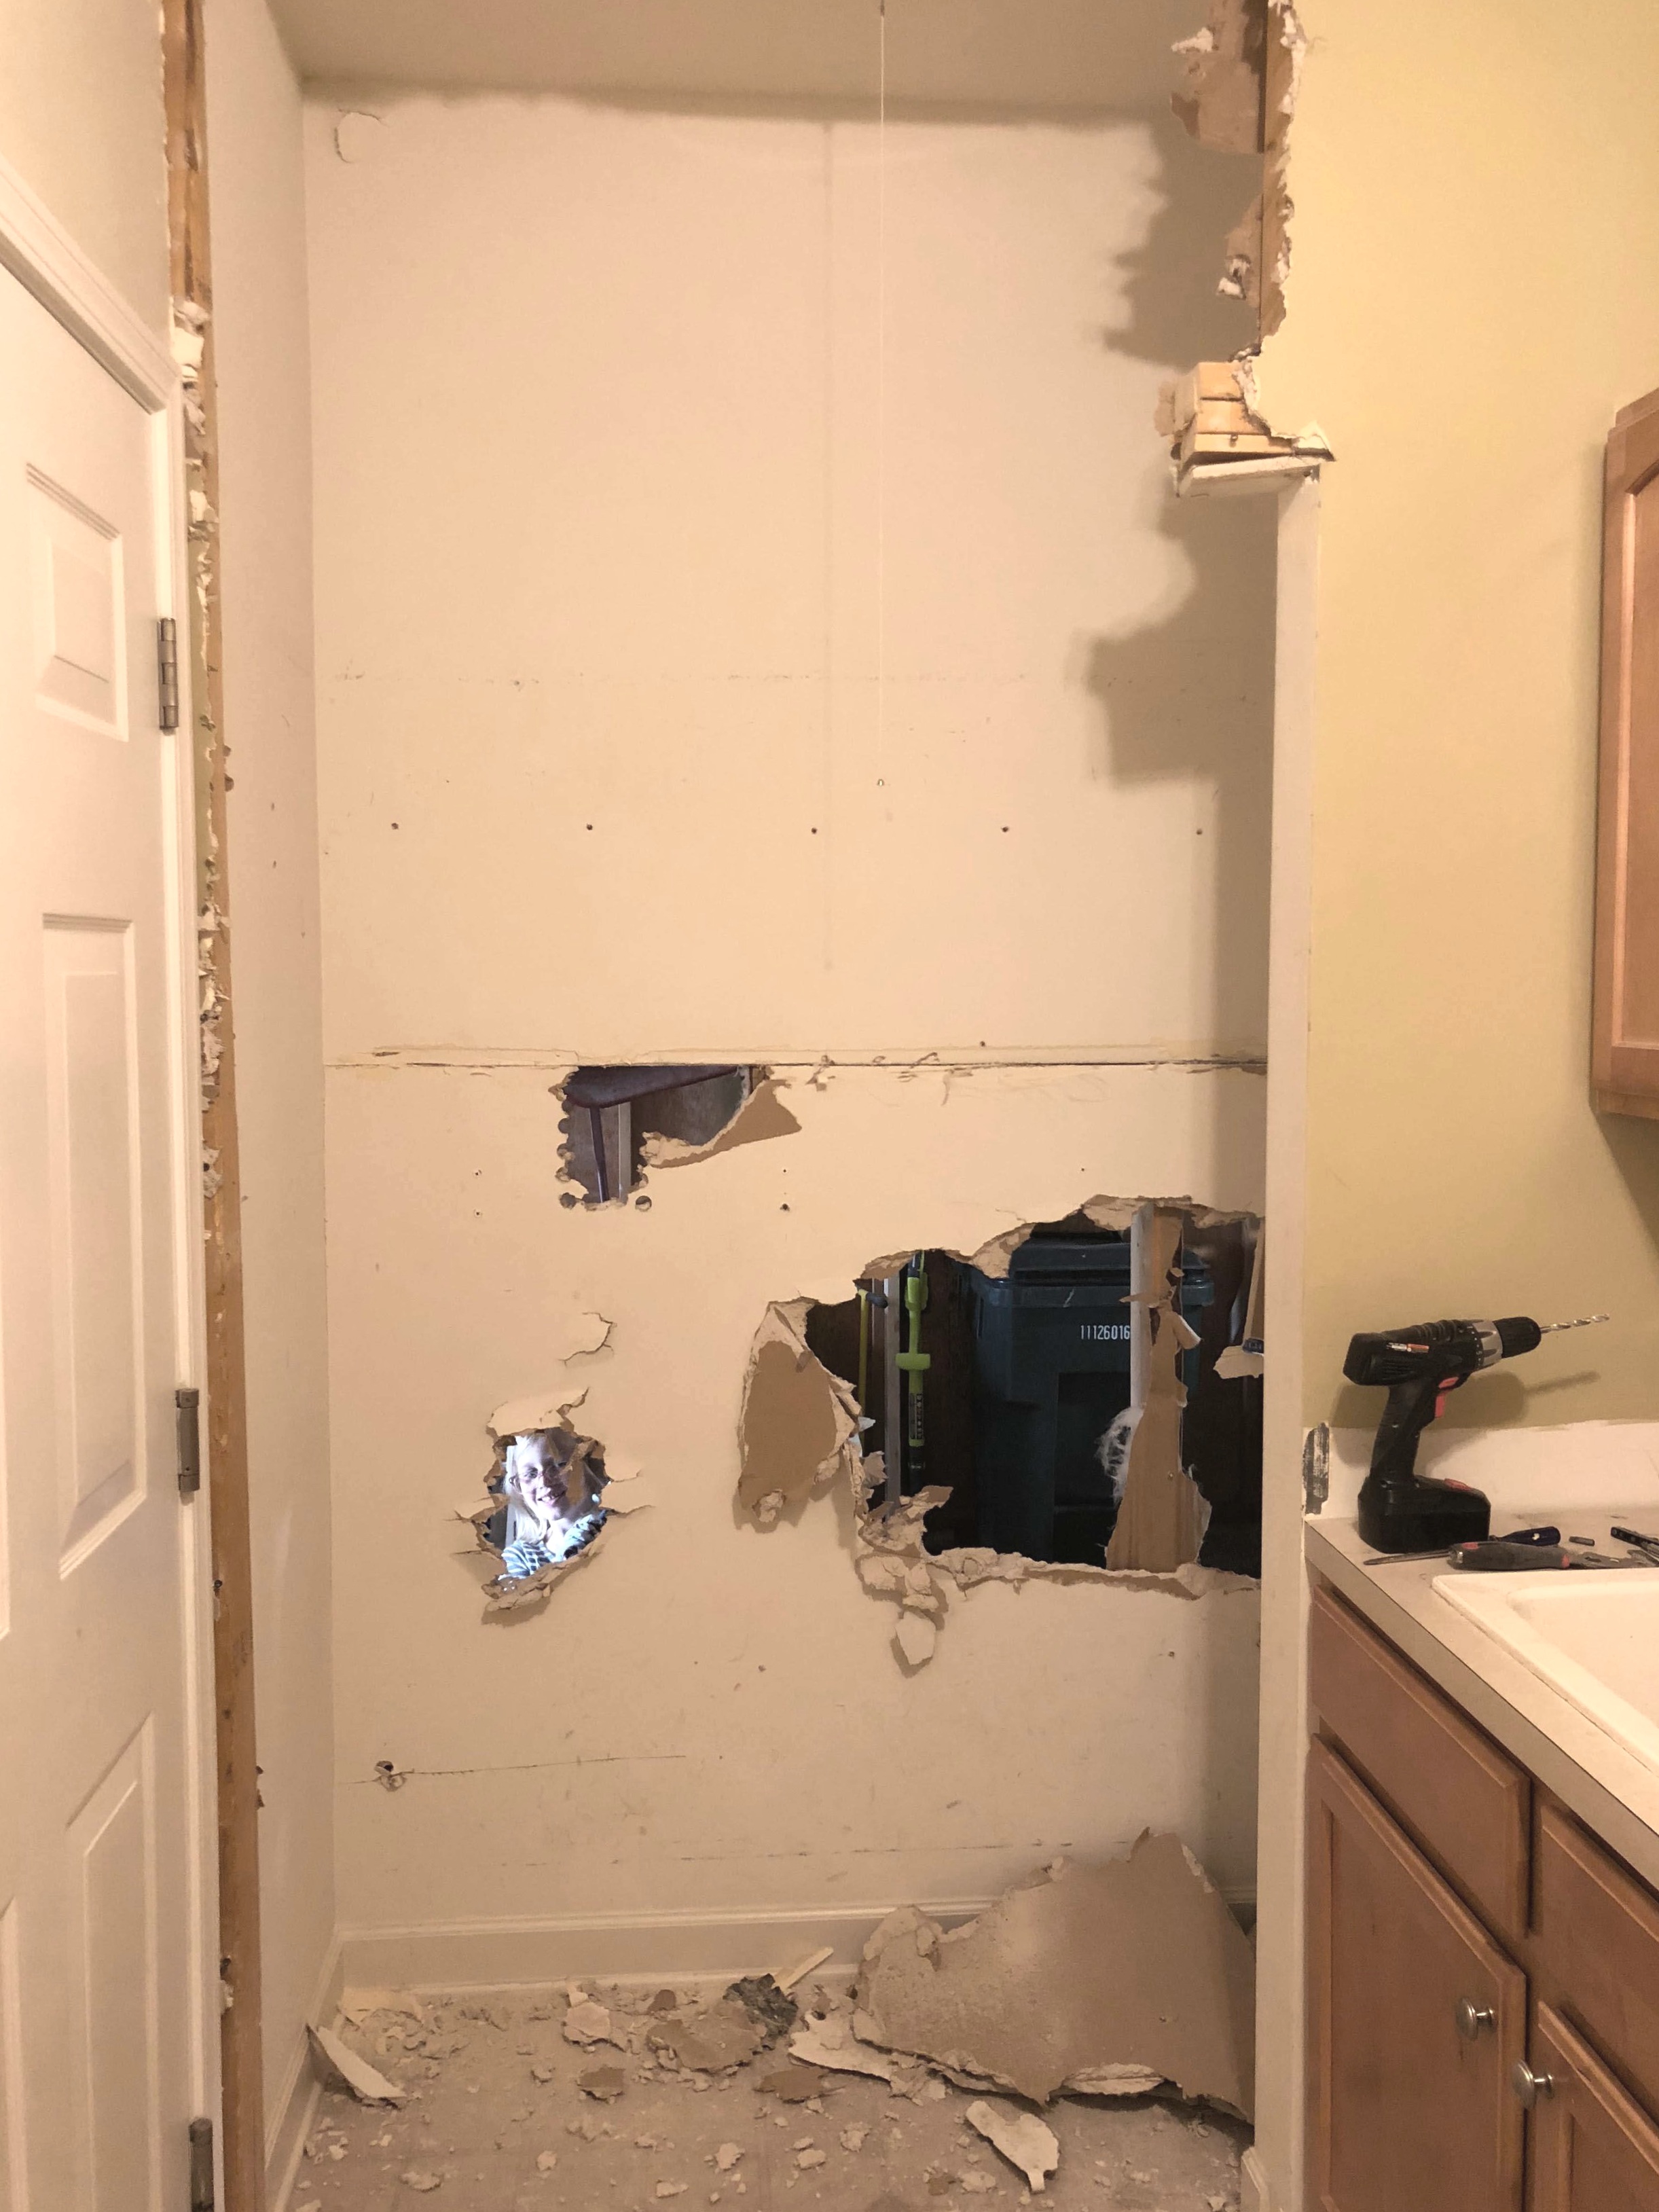
Here you can see it all opened up now.

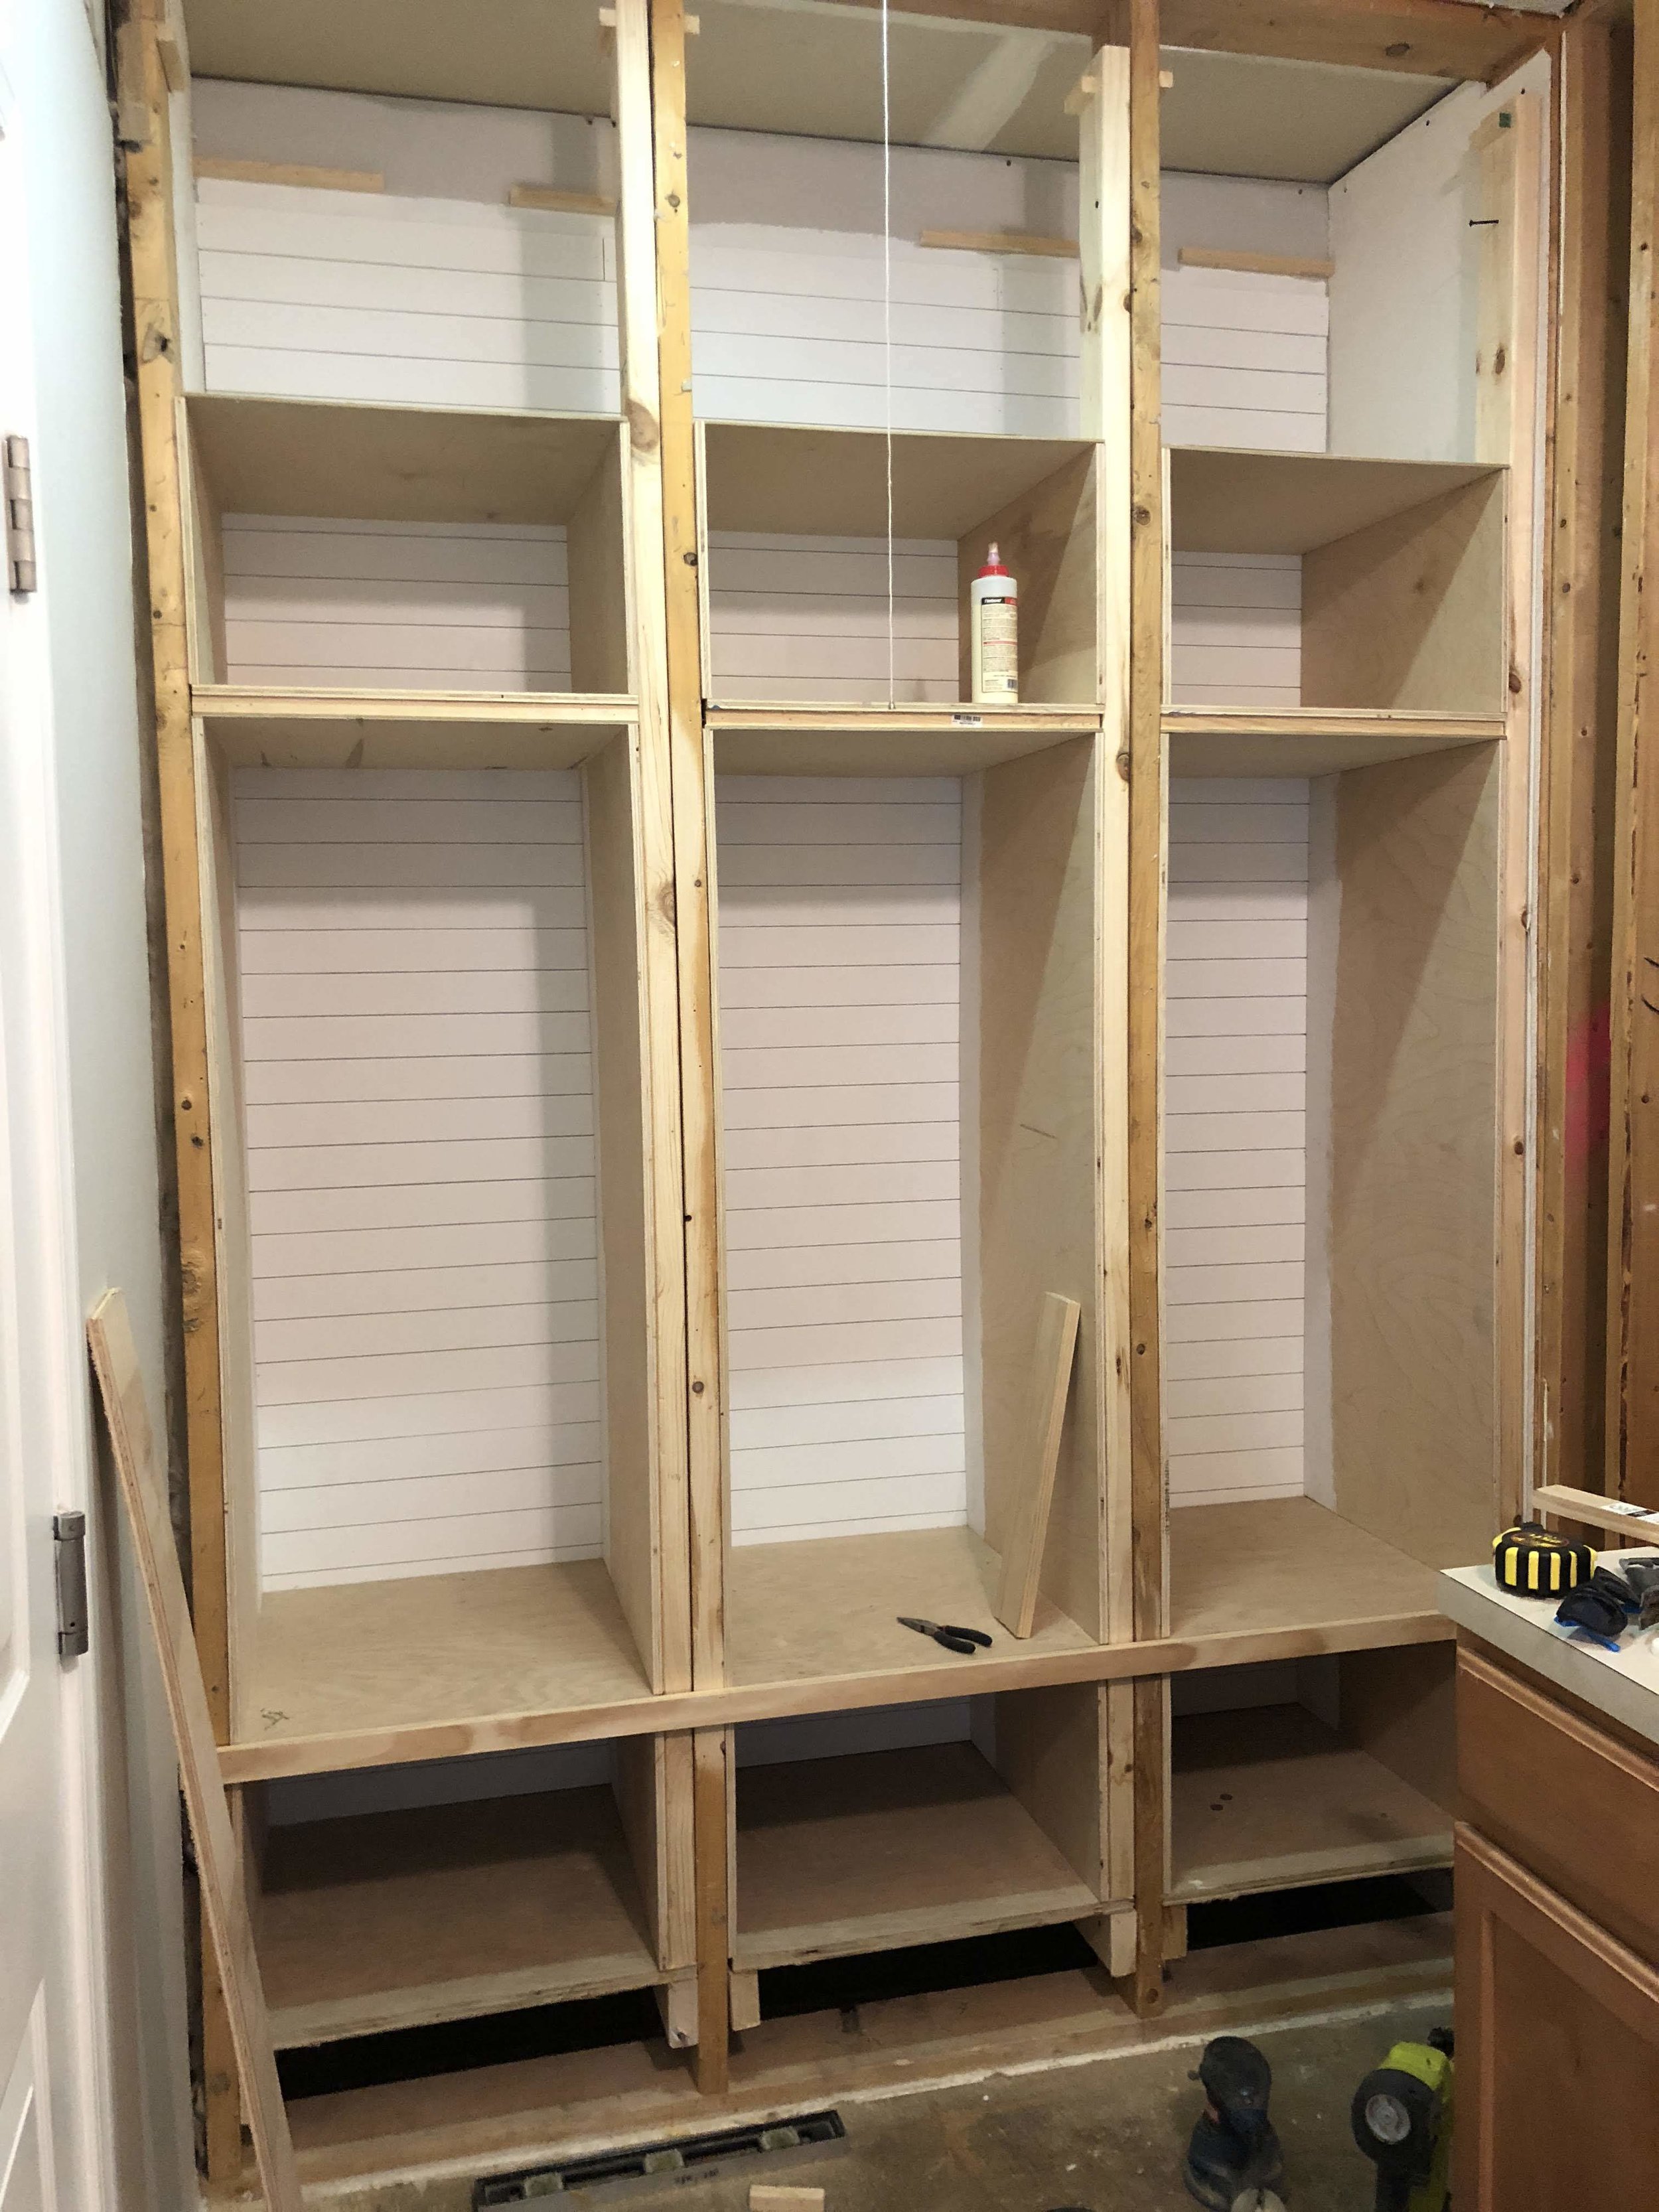
We framed out the cubbies and added insulation and sheetrock to finish it off. We wanted to use the existing vertical beams to frame out the cubbies. We nailed in some planks and slowly started building the cubbies exactly how we wanted.
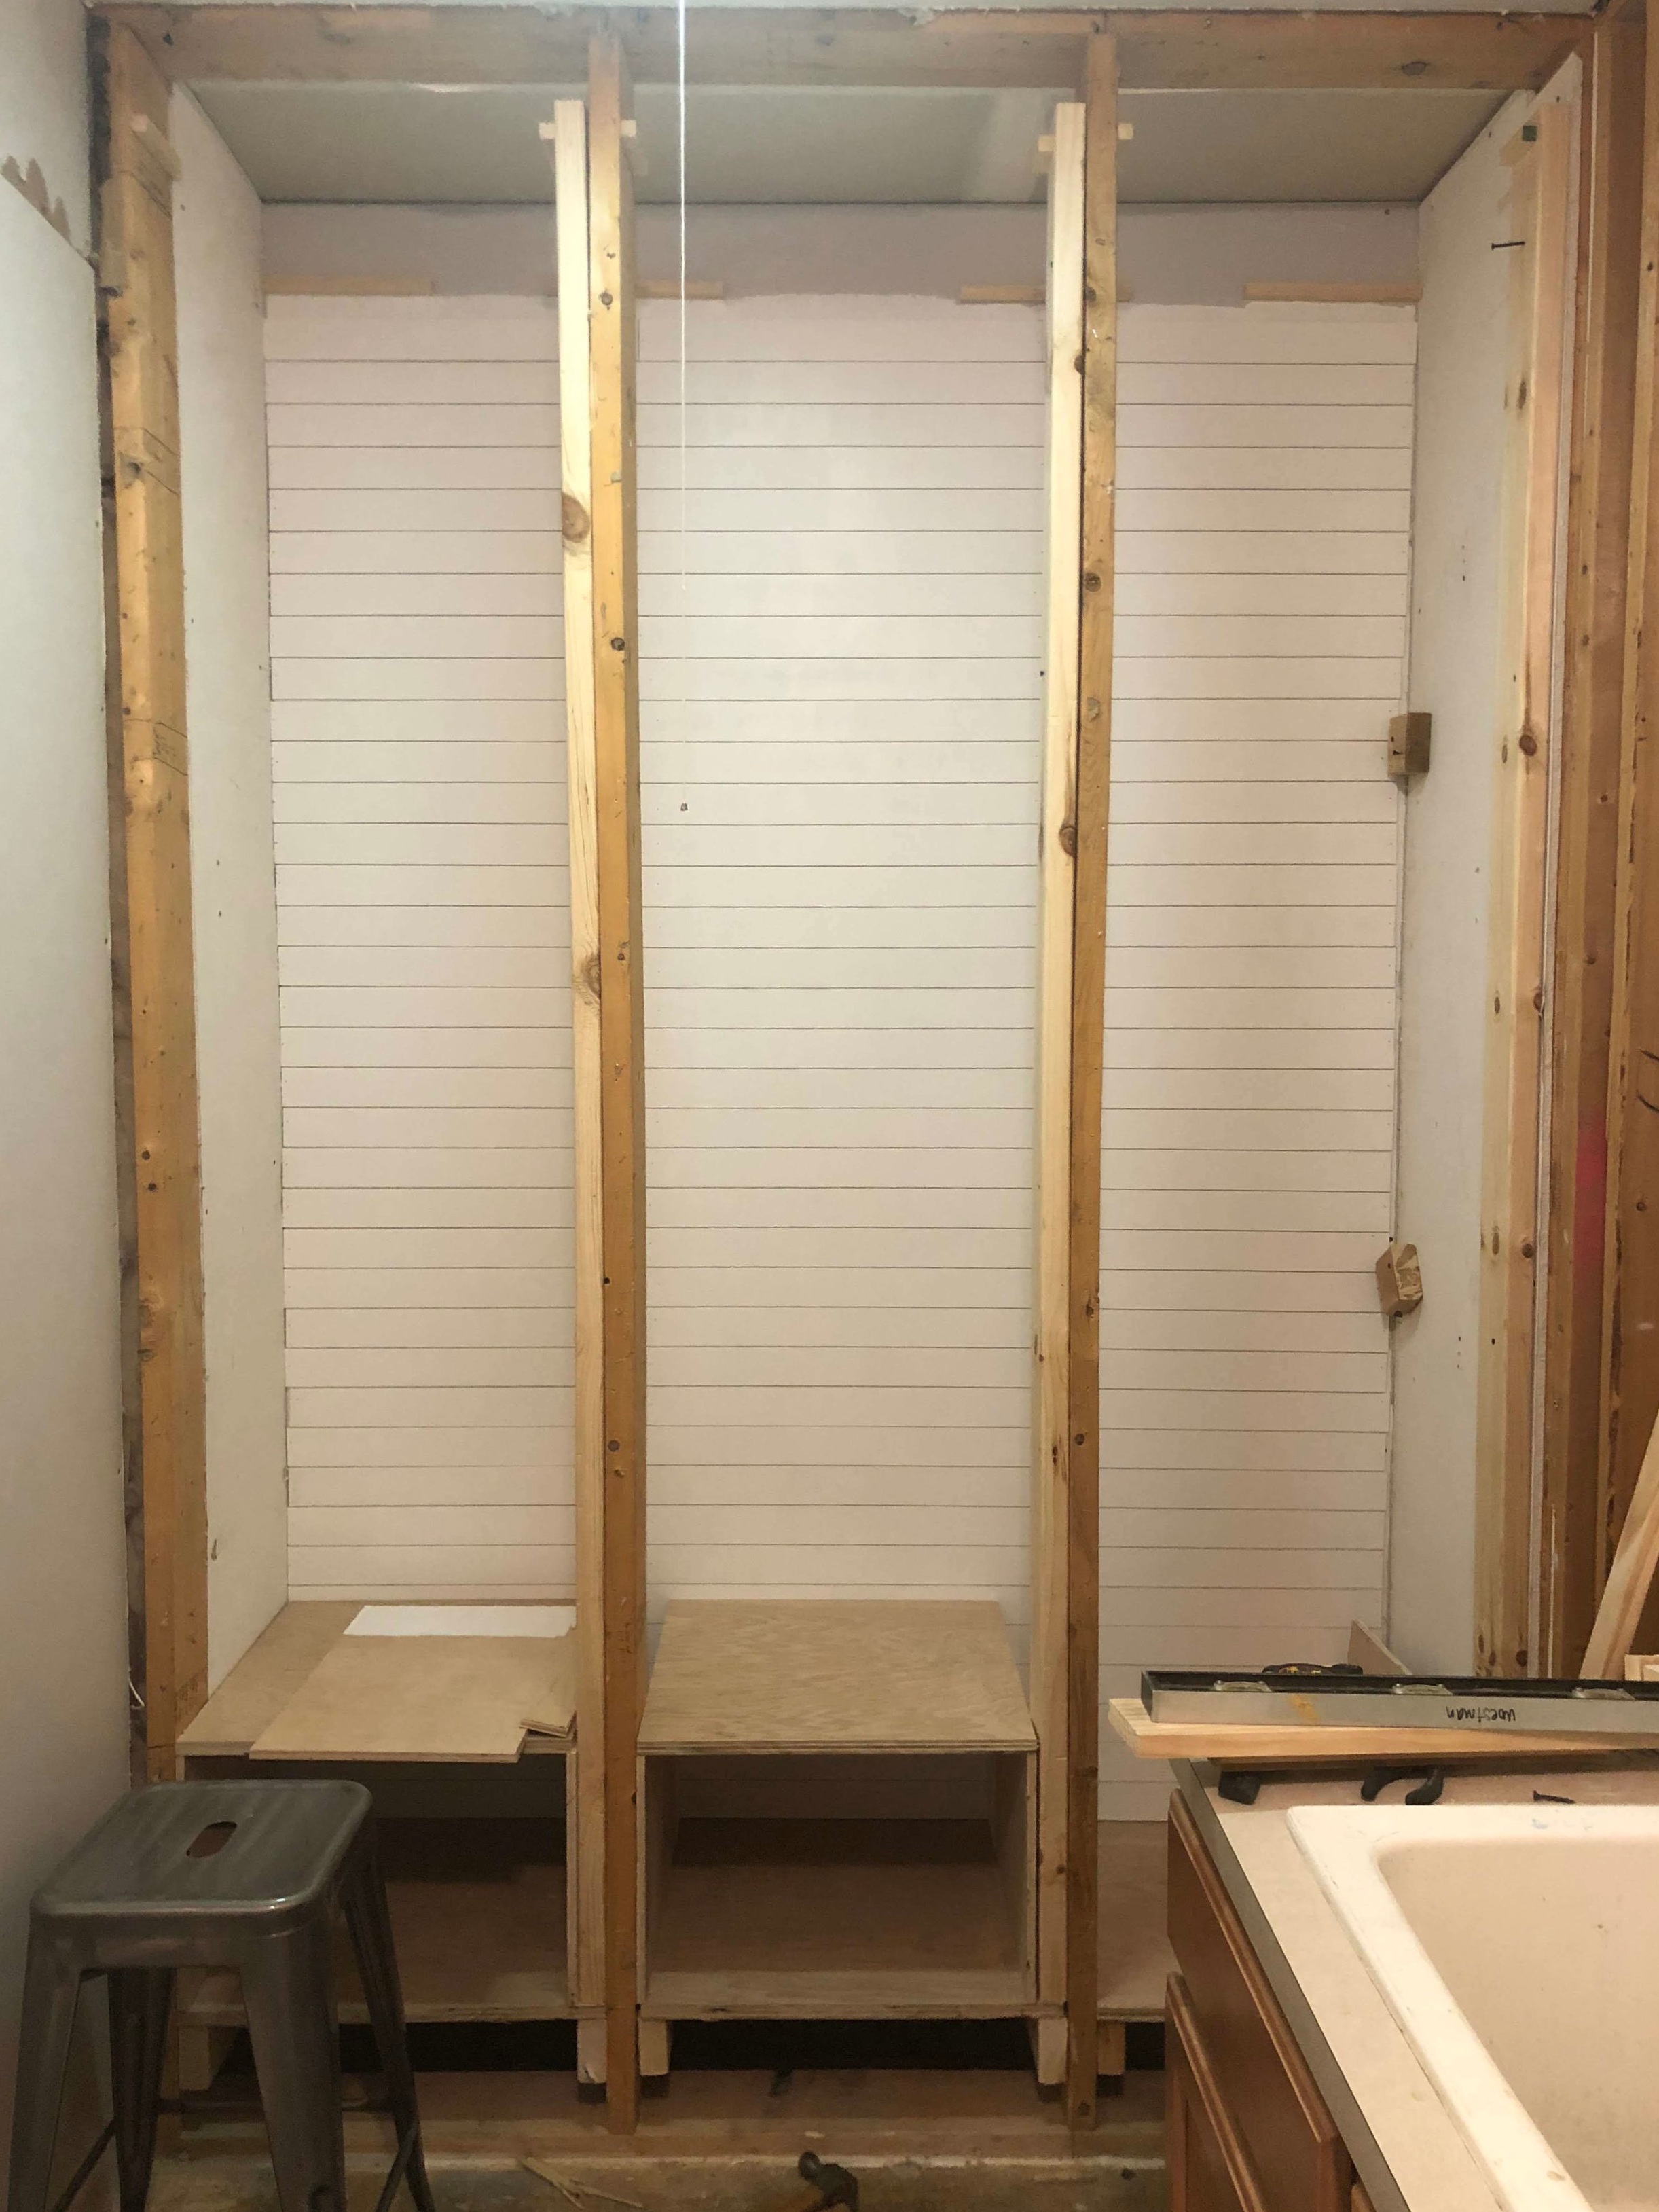
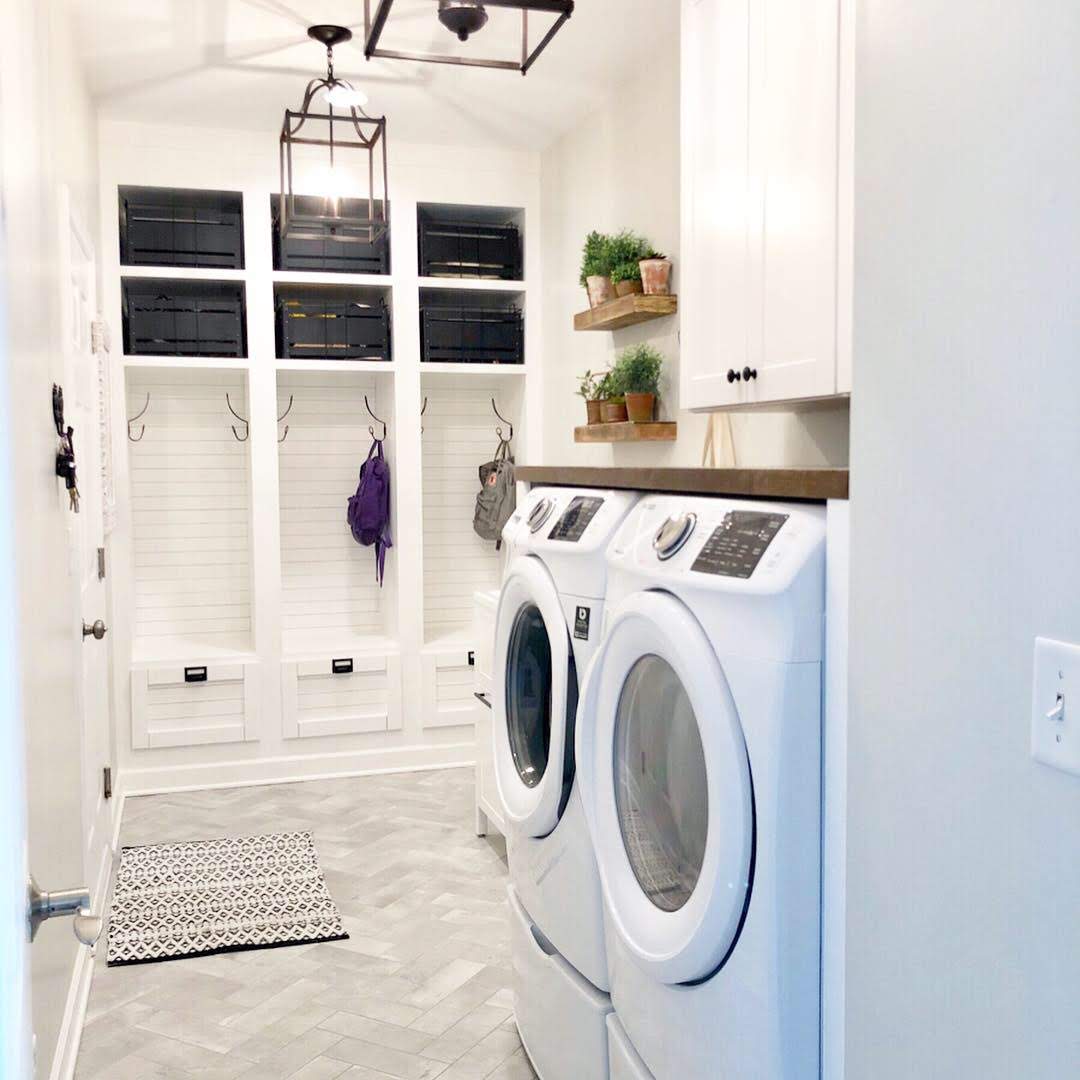
I wanted to make sure we utilized as much of the cubbie space as possible, so we went all the way to the ceiling with storage space. I also wanted the kids to be able to sit on a bench area for when they put on their shoes, so we made sure to add extra support to that lower bench area.
We added two pendant lights and two recessed lights. The previous one light in the middle of the room just didn’t do it for me. I needed this room to be really bright since-again, there are no windows. We chose a 4×12 tile from Home Depot for our floors and had it placed in the herringbone pattern. We also had to do some drywall patching from where we ripped out that closet wall.
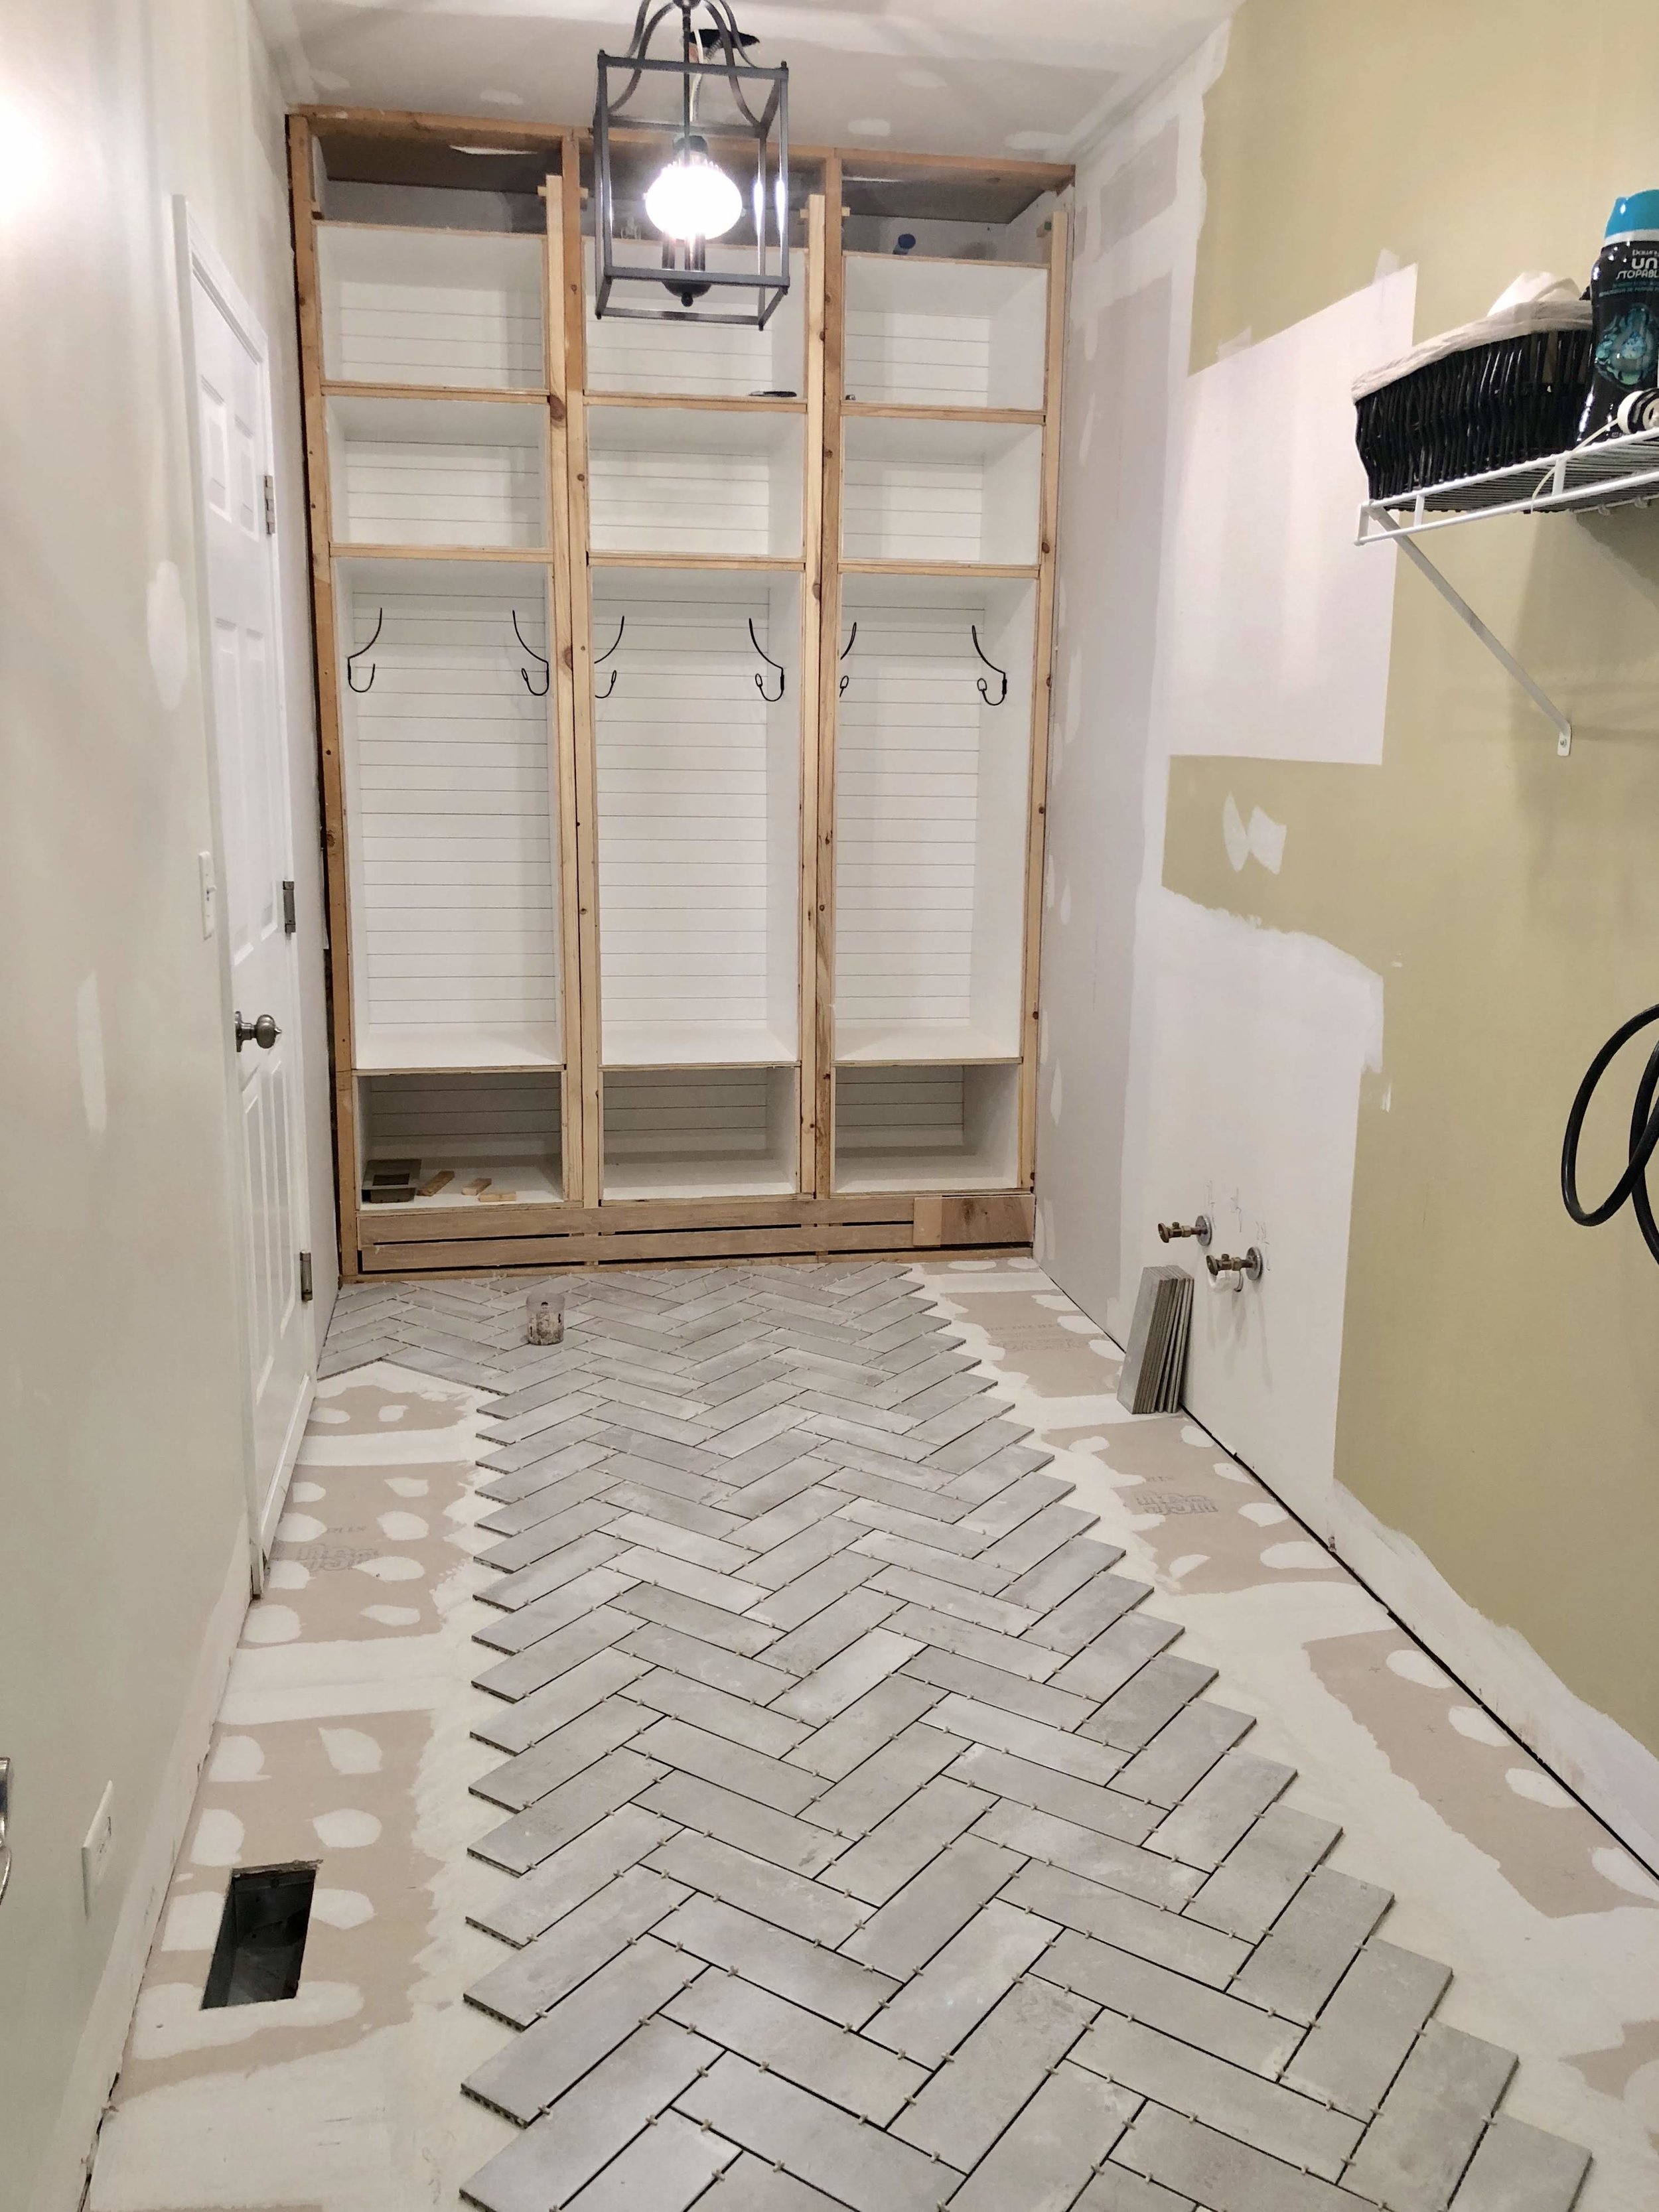

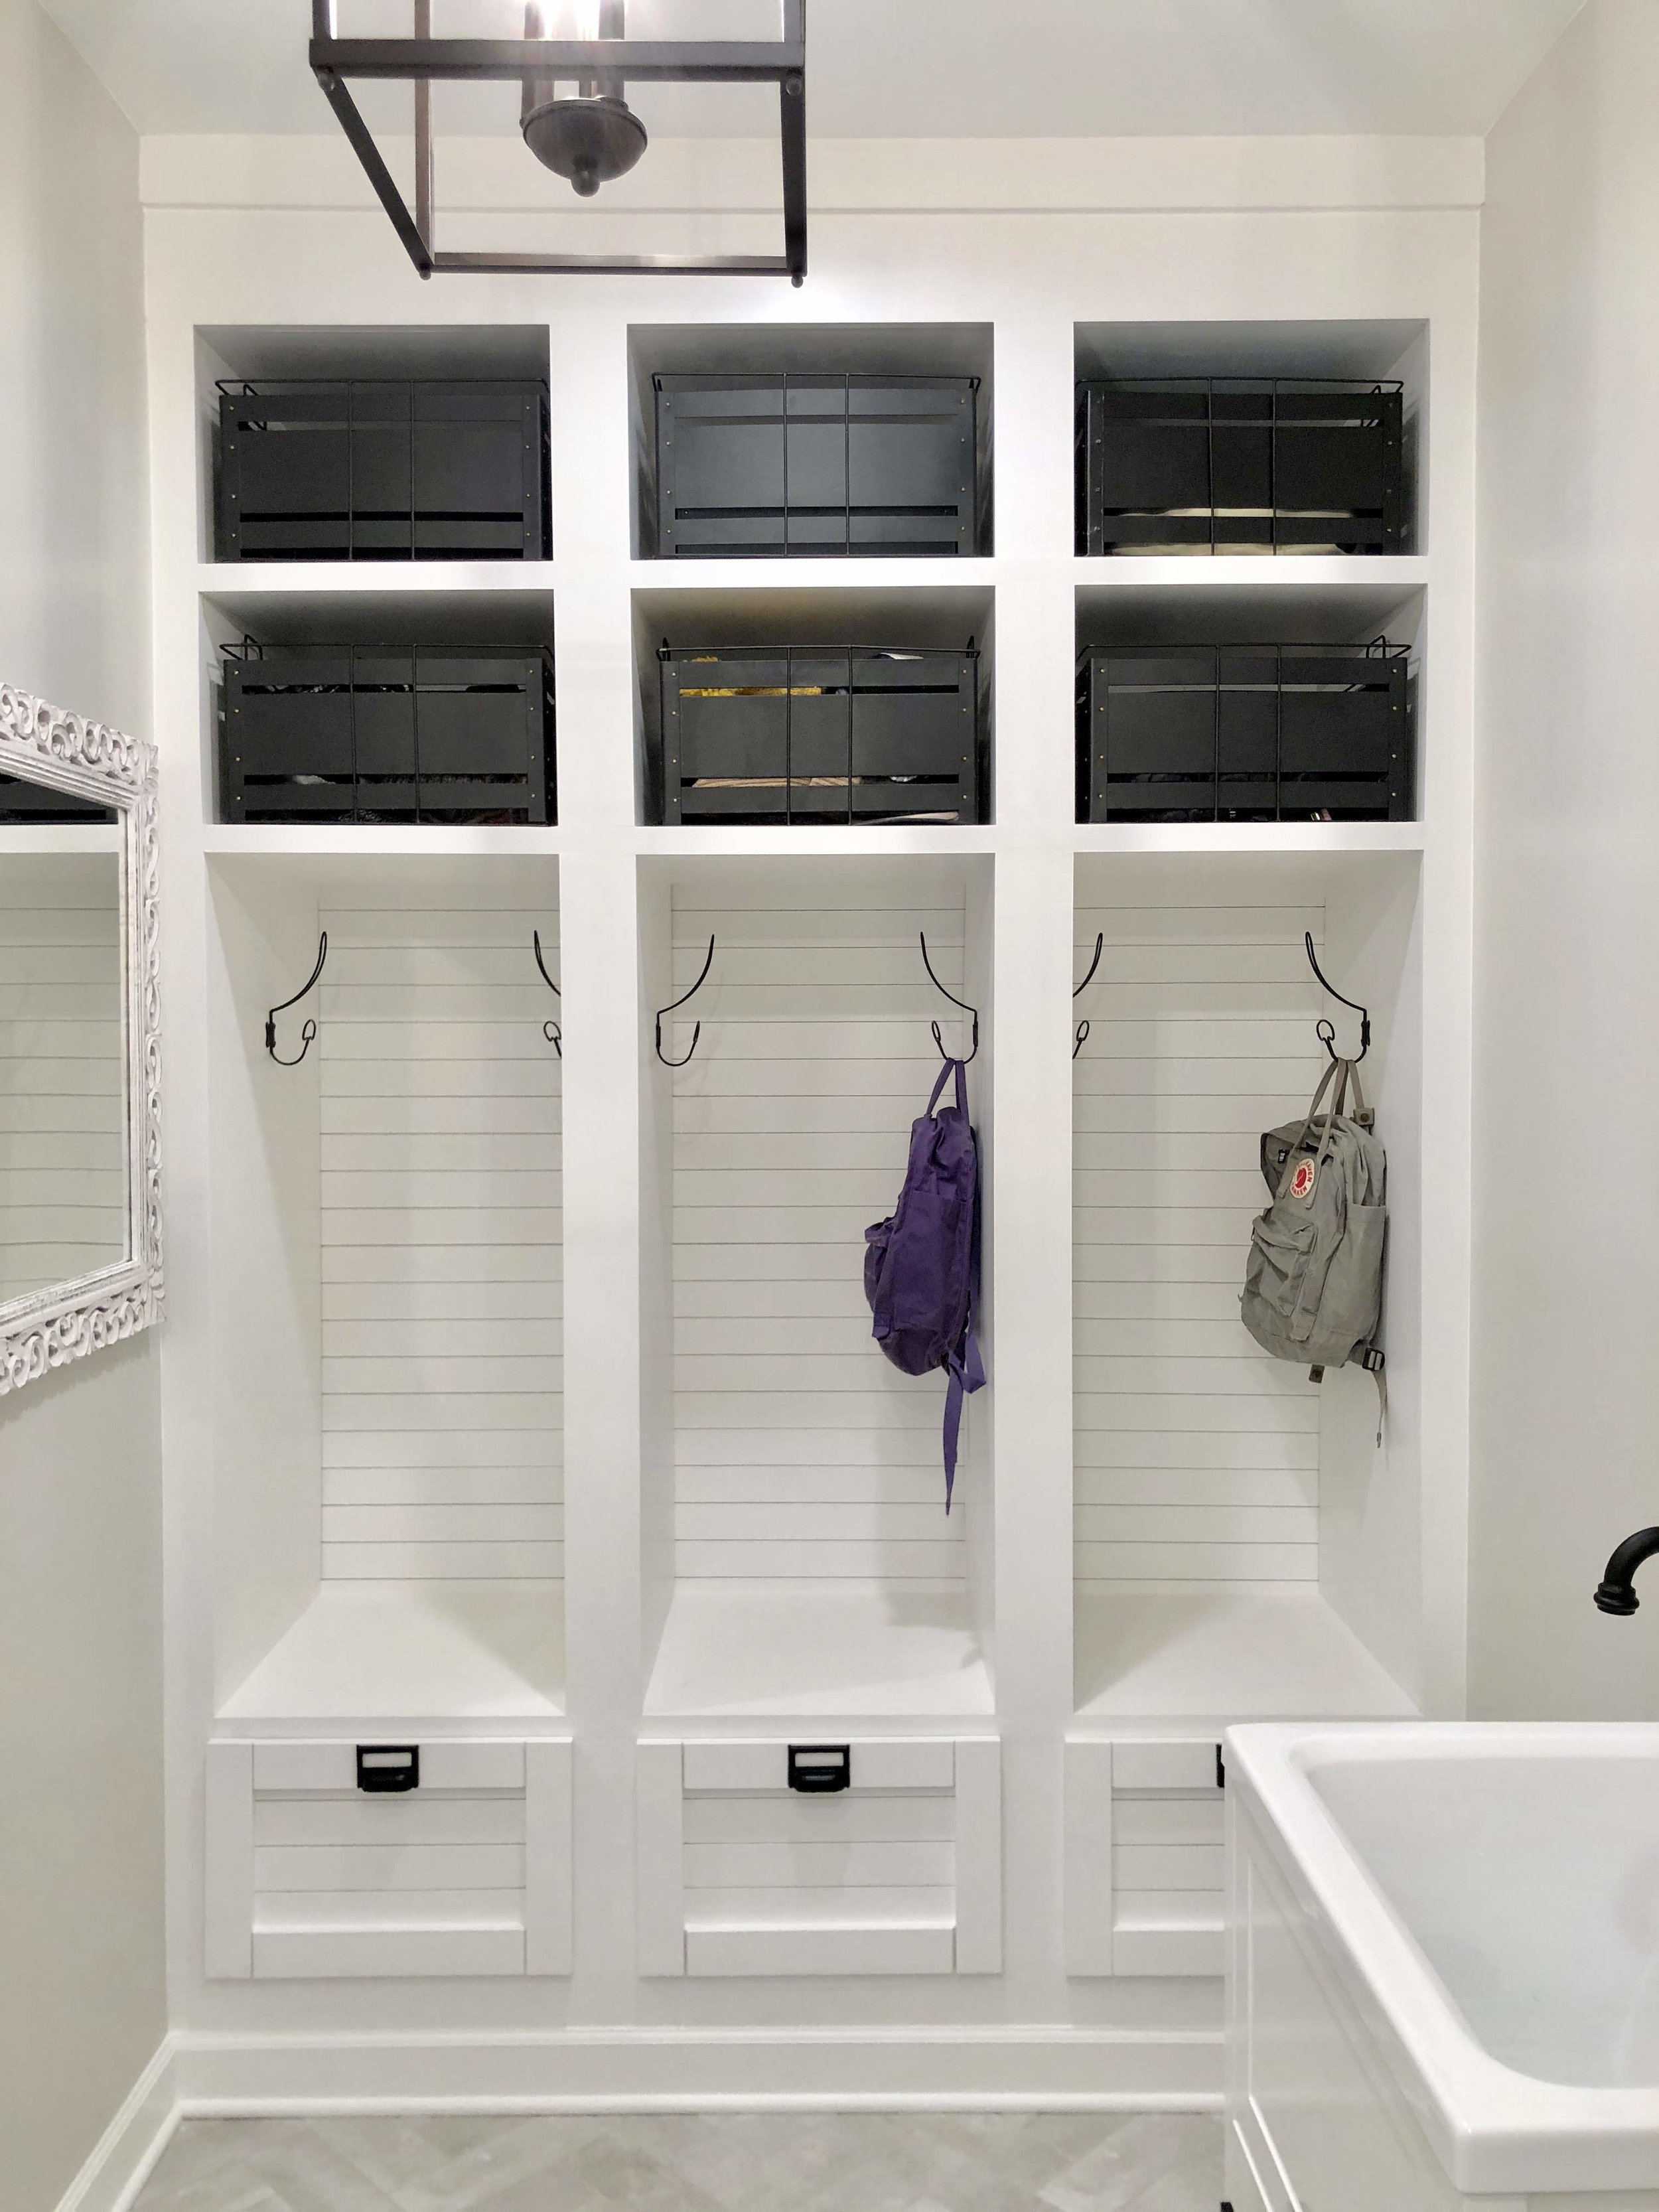
Once the floors were done, we added front trim to the cubbies which was just 1/2 inch pine boards cut to fit what we needed. I also made little doors for the bottom storage to hide all the shoes. We also added baseboard and ceiling trim.
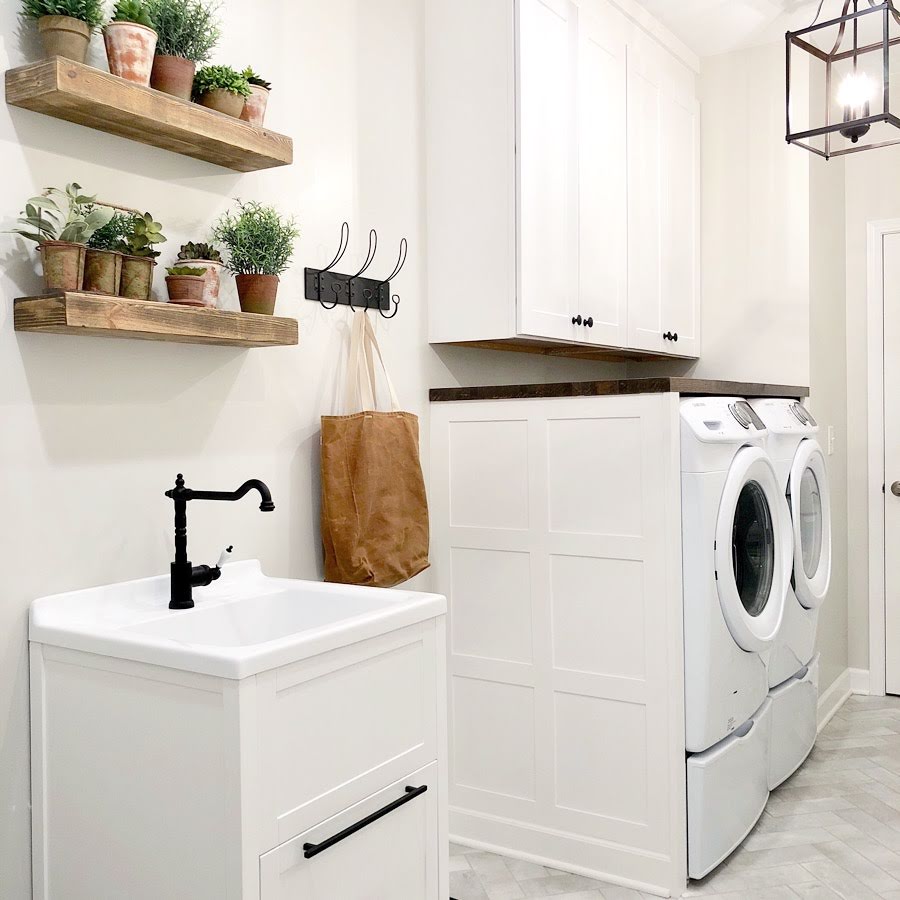
The sink is a utility sink from Home Depot and the faucet is from Ikea. It’s small and just what we needed. I didn’t want a large sink with a counter to take up space.
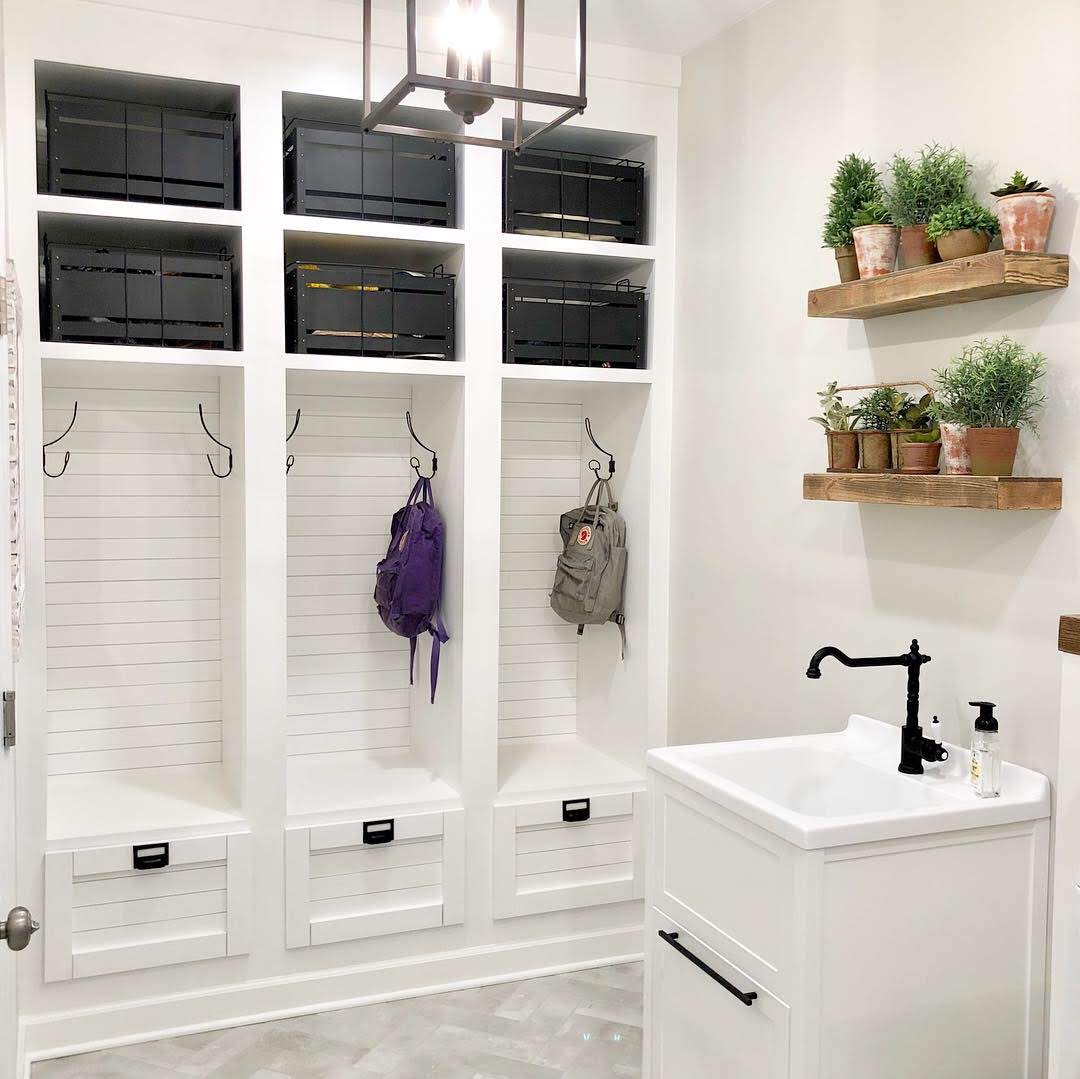
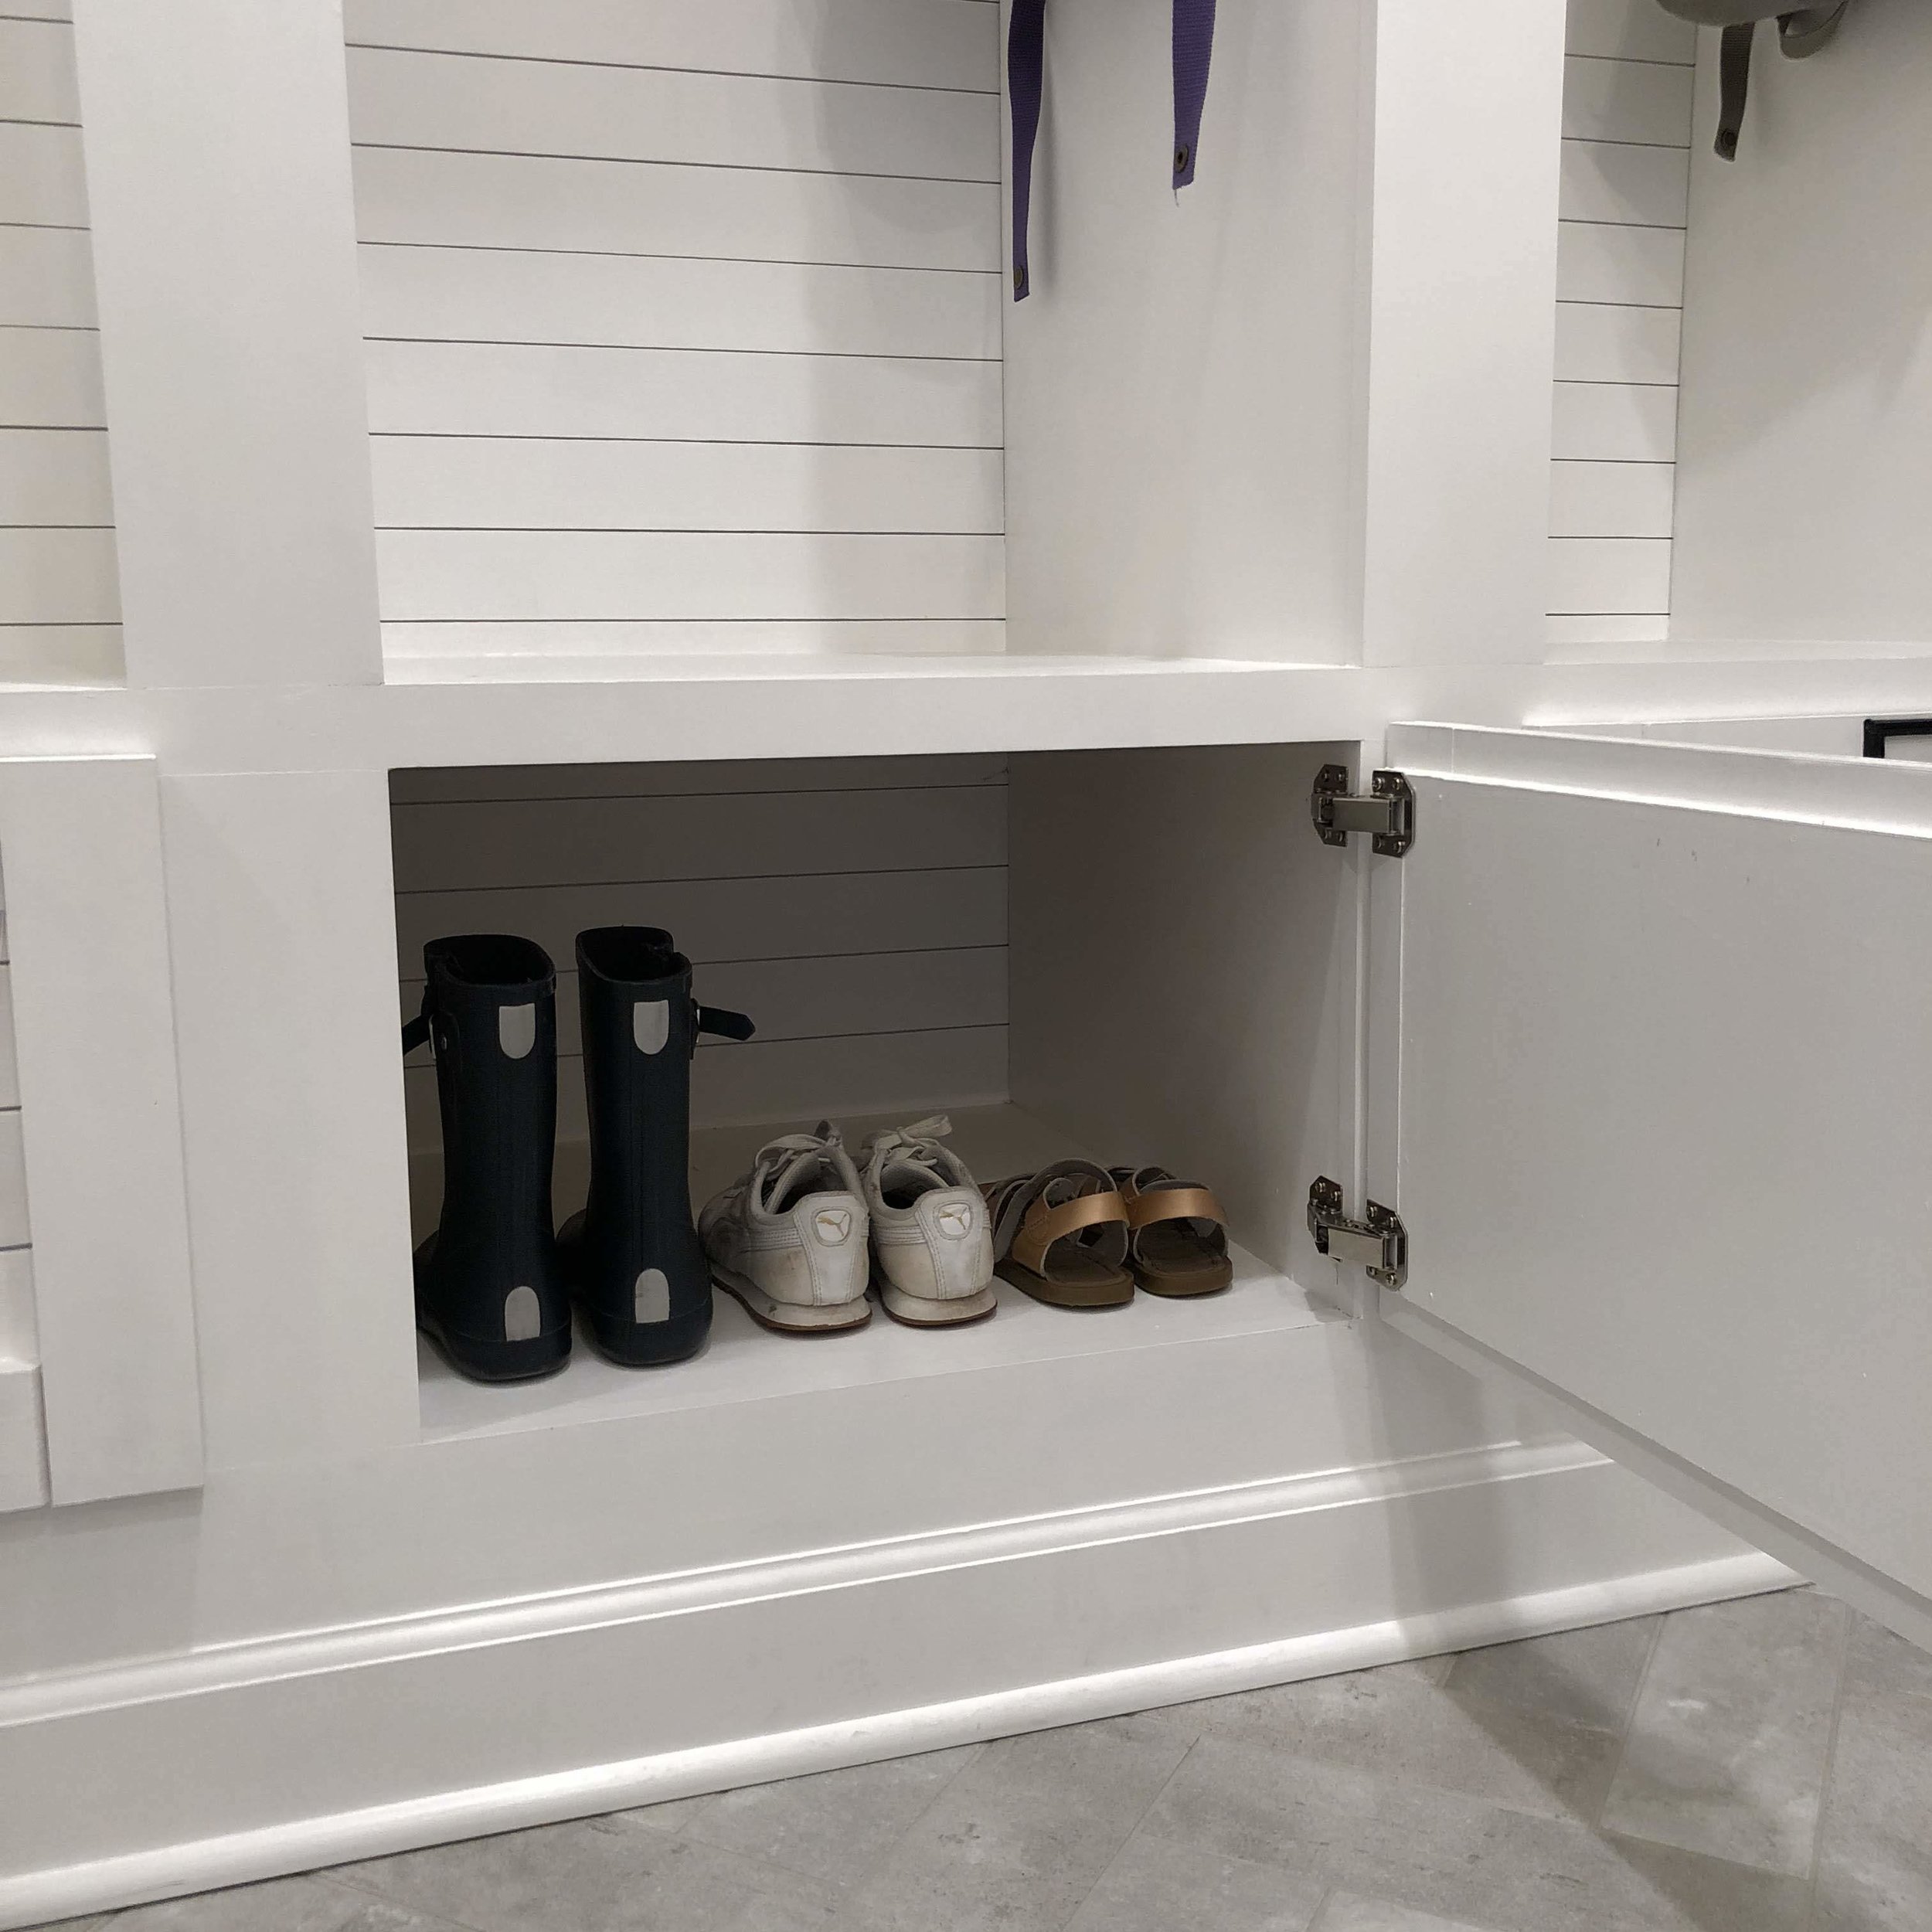
(this is the only time this storage area has looked this neat-it is crazy in there now!)
On the other side of the room we made some changes but they were a lot easier than the cubbies. We hung new cabinets (I have since painted the underside of the cabinets because it bothered me haha!) We put the washer and dryer on pedestals and then I built a semi permeant wall on the left side. I wanted them to look built in but also know that sometimes you need to do maintenance on the washer and dryer. So, we bought a butcher block counter top and I have it resting on some support boards (not the washer and dryer because it would fly right off). And I used a finish nail gun to shoot a couple nails in the underside of the counter top so that if I need to get it off I can just hammer it up and it should pop right off. The semi permanent wall is made from a piece of 1/2 inch MDF, then trimmed out with 1/4 inch trim pieces.
This room is so different than before. It makes me happy to walk in here instead of making me feel stressed out-that’s my gauge for what projects I need to work on next 🙂