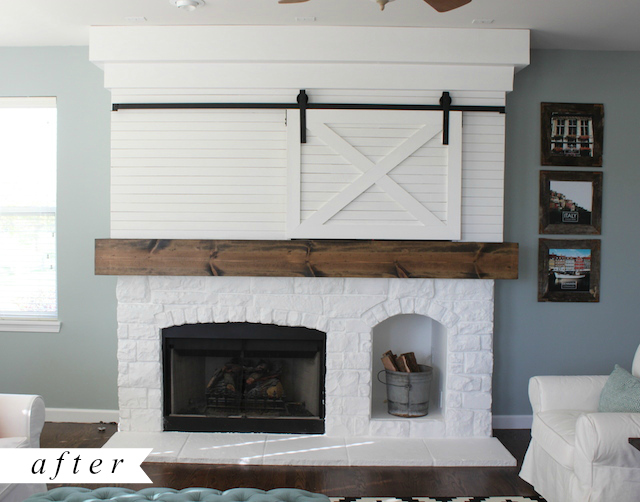
This fireplace is one of my favorite things in my house. I totally revamped it and just love how it turned out. It was just a generic fireplace like all the other ones in houses built 10 years ago, but now it is totally unique to our house. I want to walk through some of the changes I made but first check out the before and after. 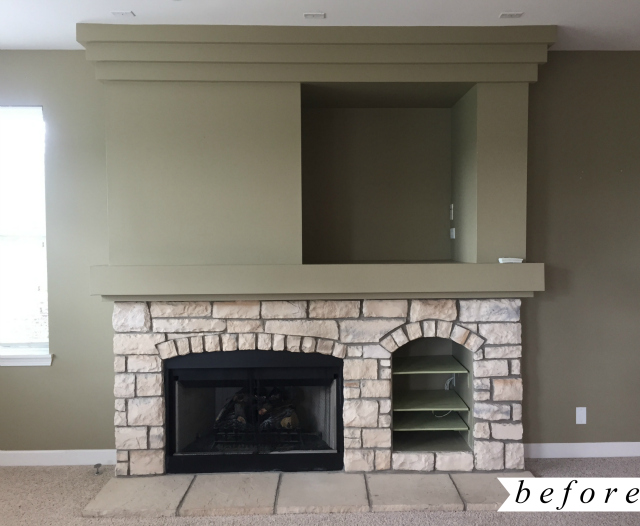
 My kids loved playing in the empty cubby when we were moving in, but soon after we moved in I painted the whole thing white. I removed the built in shelves in the bottom cubby. I painted it with an all over primer first. I also quickly noticed with that coat that I didn’t want to do a bright white. The couches are more of an off white, so I brought home some color swatches and matched the color of the couches to Polar Bear white from Behr. I also realized with that primer coat which was a satin, that the stones when painted with any sort of sheen looked like fake stone. Ours is an actual stone so I wanted to keep that effect. I bought some flat paint to paint over the stone and hearth. I then used an eggshell (in the same color) for the top part. It looked like this picture below for a few weeks until I could finish the rest.
 I liked the all white look, but knew I wanted it to be warmer with some wood around the mantel. I also wanted to get rid of all the tiers. There were three on top and two around the middle. So I got a piece of common board and glued, and screwed it in to place to cover the two tiers. I used Gorilla Glue’s construction adhesive-seriously all over this fireplace! I put wood on the top and front, but not underneath because I figured no one would ever see that. I stained it with Minwax Jacobean.
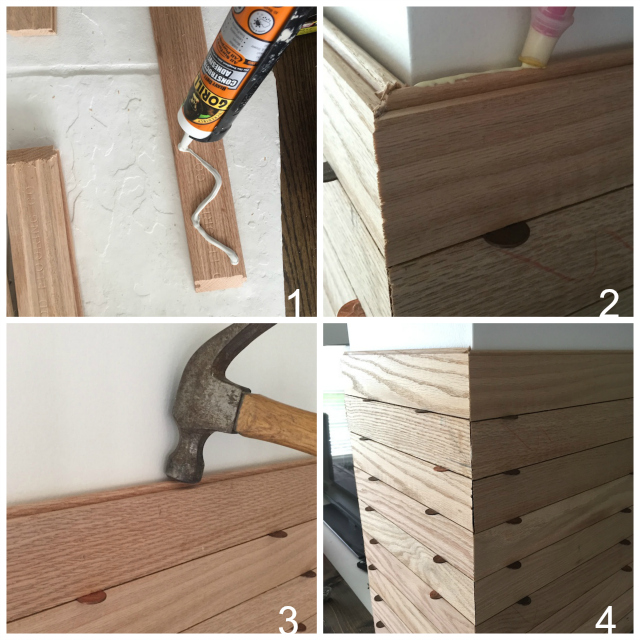
 Then on to the wrapping of the fireplace with planks. So, you may notice there was carpet in this room before, we had the carpet ripped out and hardwoods installed. When they installed the hardwoods, there was leftover wood. It was just sitting in our garage and I wondered what I could do with it all. There was nowhere else we wanted to use it on the floor, so I thought I would use it on the walls. I used it to cover the fireplace and another area in my house I will show you later. Now, I had never really used a chop saw to cut angles before-because angles kind of intimidate me and you can see my corners aren’t perfect, but some wood filler cleaned it right up and it actually turned out okay. Below you can see how I did it. I cut the hardwood, used some glue adhesive on the back, used some wood glue in between the boards, making sure to space them out with a penny otherwise they would be flush like a hardwood floor and I wanted the more obvious plank look. Hammer them down to make sure they are on tight and that’s it. I had thought I would nail them to the drywall, but there were metal pieces in the drywall because of the flue, so just be aware you might run in to something like that. And the adhesive worked great. I did run some longer planks across the entire fireplace to make the opening for the TV smaller. I mean, if TV’s were square that would be great…. but they are rectangle these days so there’s no need for the huge opening.
 I did use a skinny piece of trim where the planks met the wall because my cuts weren’t perfect-oh well 🙂 You can see I also added some more common board to the top of the fireplace. I needed to think of a way to transition the planks to those top three tiers and I didn’t really like the three tiers anyway, they didn’t seem to go with the rest of the fireplace. I asked my husband to cut the wood for me and attach those top two tiers-which was kind of a lot of work because he had to cut the wood for underneath also. As he was doing this he asked, “So I’m covering these white tiers with… white tiers?” And I was like, no more questions, just keep cutting 🙂 When it’s all done, the thicker two tiers just pull in the mantel so much better and make it look more cohesive-especially because the other tiers were drywall and the texture looked different from all the wood and stone.
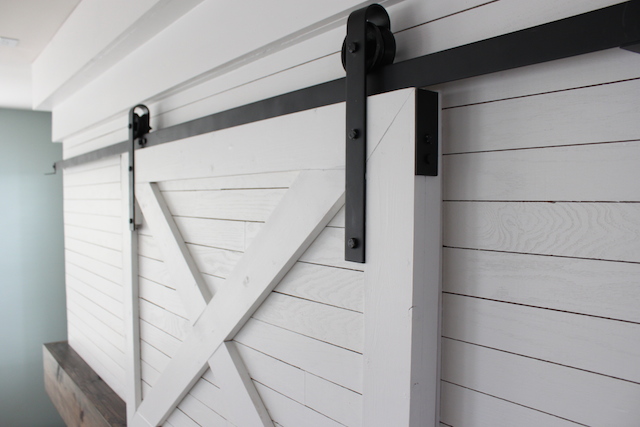
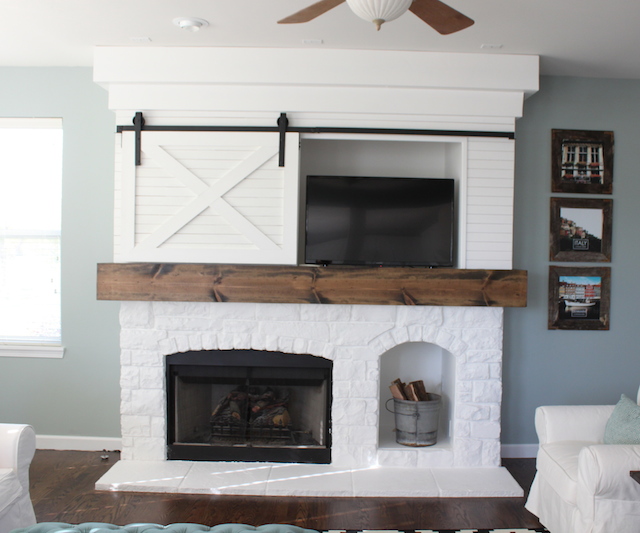
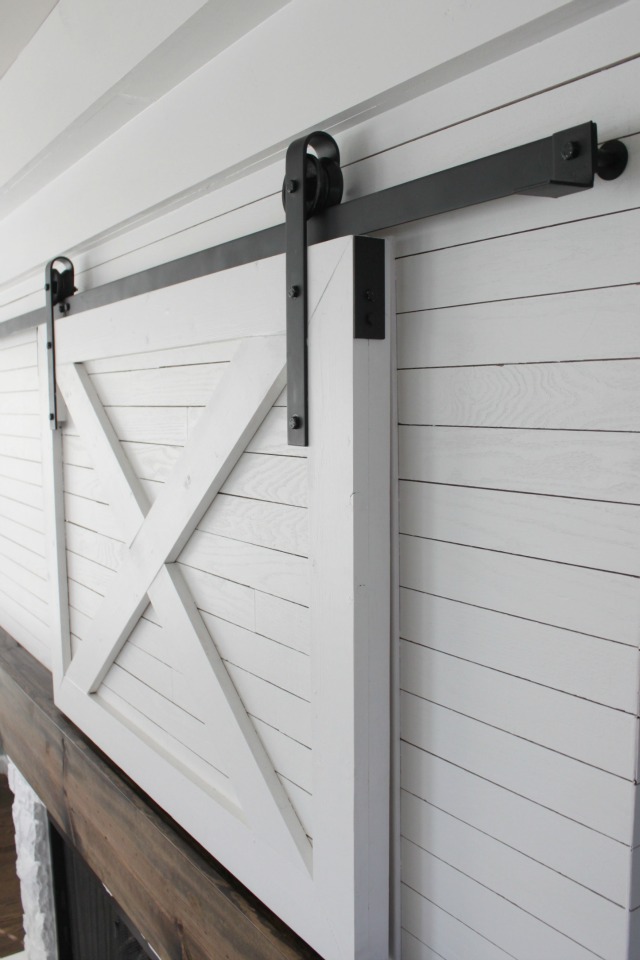
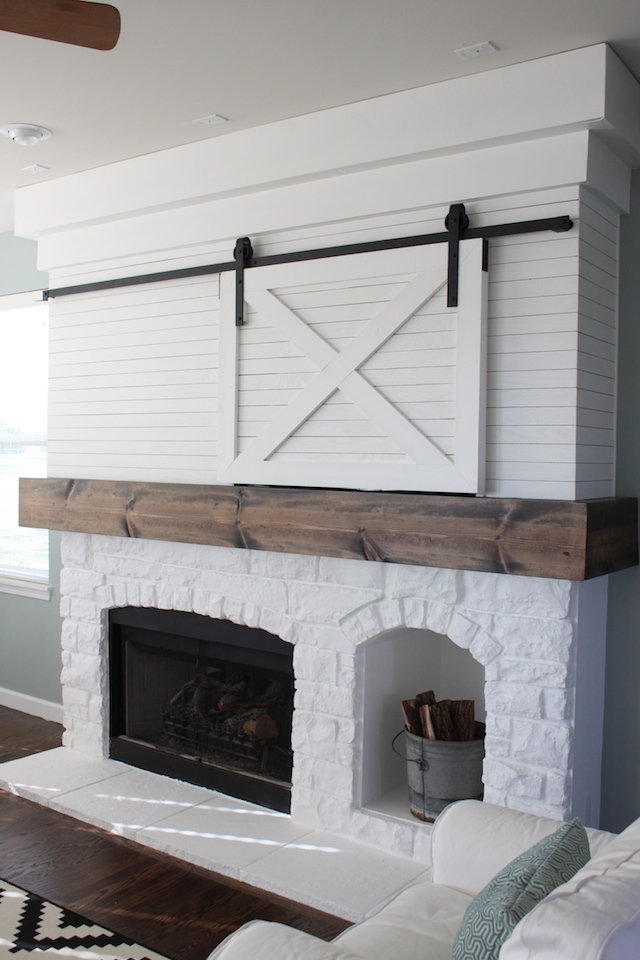 And the final addition was the barn door. My favorite part. I got the barn door hardware from Innovative Metalcraft. They have so many different types of barn door hardware and accessories. Barn doors are so popular these days and so useful! I love how I can hide the TV when we’re not watching it. The people at Innovative Metalcraft were so kind to send me this track system and were so accommodating. I requested it in matte black to match the fireplace below. I love the sleek and simple design of the track I chose. I got the 8ft track. Adding the barn door is such an easy way to add character and functionality to your home. The barn door hardware track system can be used in many places throughout your house. Check out some of their other great products here.
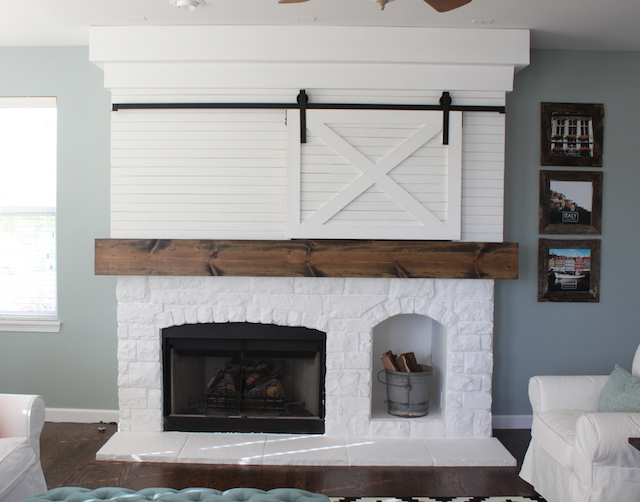 To make the barn door, I used a piece of 1/4 inch plywood on the back and then built the door on top of it. I used common board and some more hardwood floor planks. I attached it all with the Gorilla Glue construction adhesive and nails. There are so many designs for the barn doors, I had thought of a lot of different options, but ended up doing the ‘x’ in the middle to add more character. Some of those angles were not easy my friends. But I managed 🙂 I then screwed on some pieces of wood right on the planks for the hardware to screw into. The door was pretty heavy, so I wanted the hardware to attach to more than just the outside trim. Then just follow the directions given to you with your barn door hardware kit and you’re all set. There was a lot of measuring to make sure the door was the right size to fit on the track and a lot of measuring when placing the track wheels. The first time I put them on I was about a half inch off so the barn door hit the mantel, so I had to adjust them.
 Phew it’s done and I love it! I do plan to add a picture frame or something to the fireplace but it will have to be really thin to fit behind the door when it’s open, so we’ll see what I end up doing there…
