
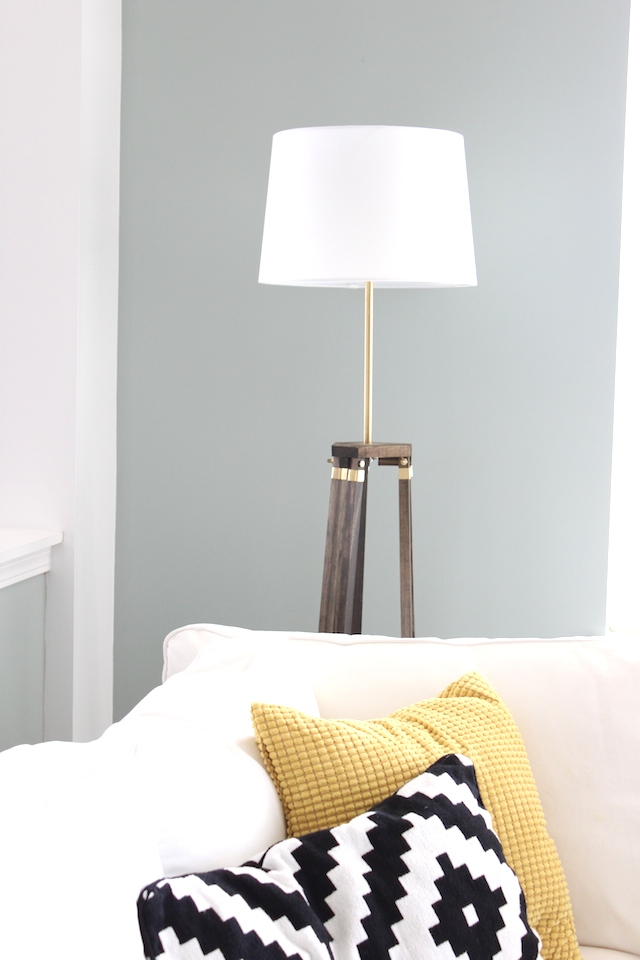
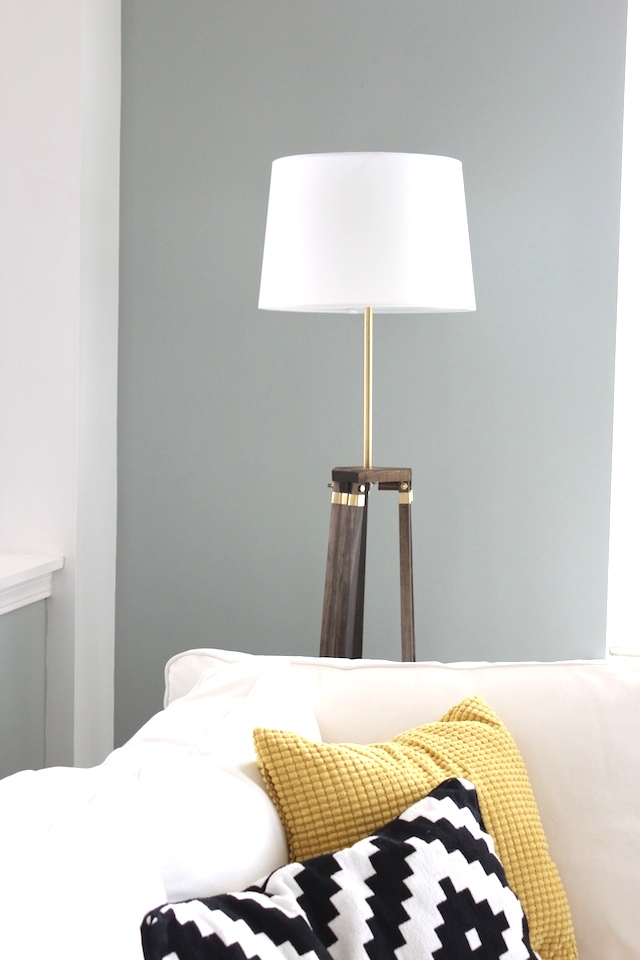
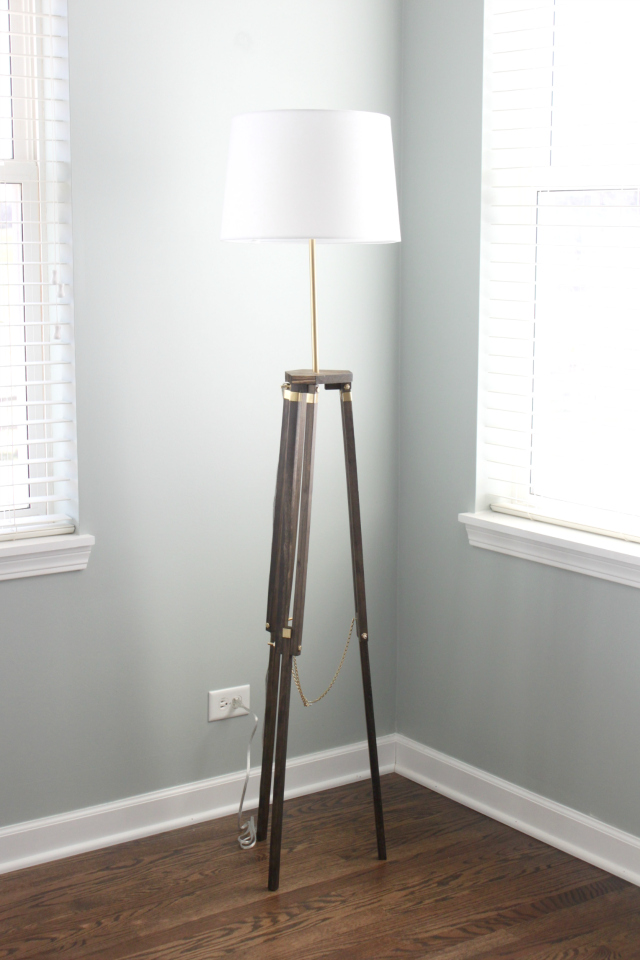
I love tripod lamps. I have seen a lot of vintage tripods used as floor lamps and was in need of two floor lamps in our family room. Here are a few I found online that you can buy (here, here and here). I decided to take the DIY route because I knew I could do it for about $50 per lamp. The lamp shade was the most expensive part. I always worry with little kids that floor lamps will get knocked over… so these may end up in my husbands office long term-but for now I love seeing them in my family room. They add the perfect amount of light and are such a unique addition to the room.
D I Y T R I P O D F L O O R L A M P
I made two lamps, but for one lamp here is a basic list of what you would need:
-Lamp shade (mine are from Target)
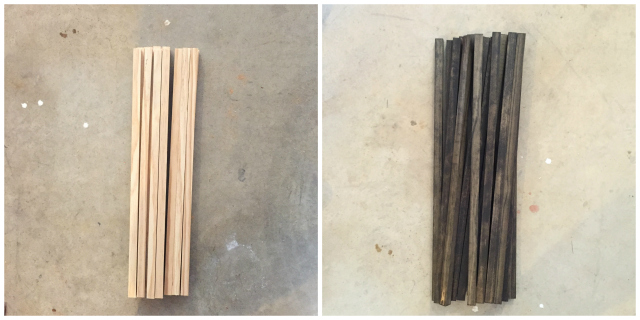
-1 x 1 square dowels (about 25 ft)
-6 nuts and bolts mine were 3 1/2 inches long
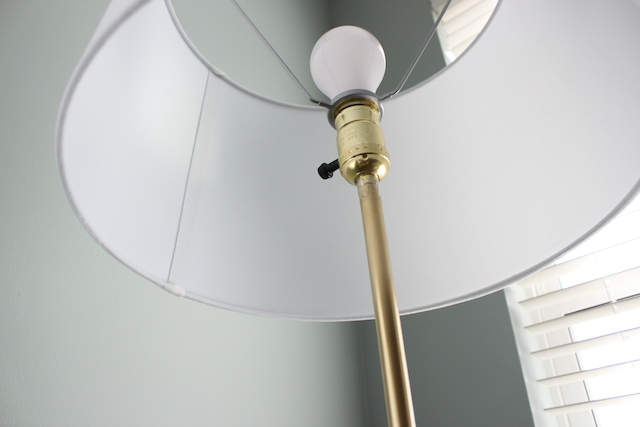
-Lighting kit (cord, turn knob with socket)
-Metal round tube (mine was about 1 1/2 feet long)
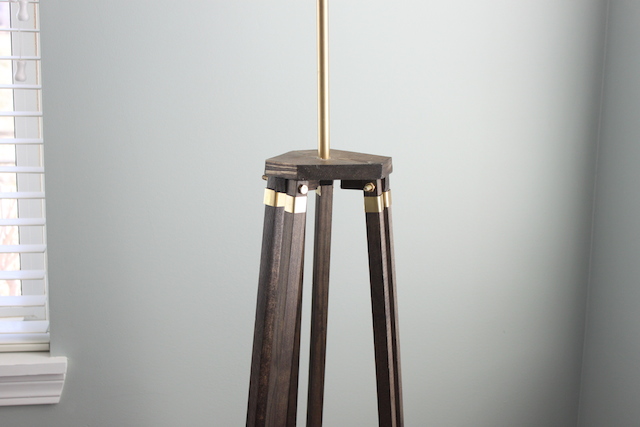
-Scrap wood for top center piece of tripod legs
-Wood stain (I used Jacobean color)
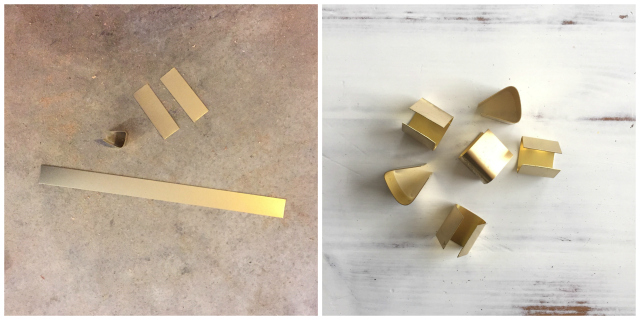
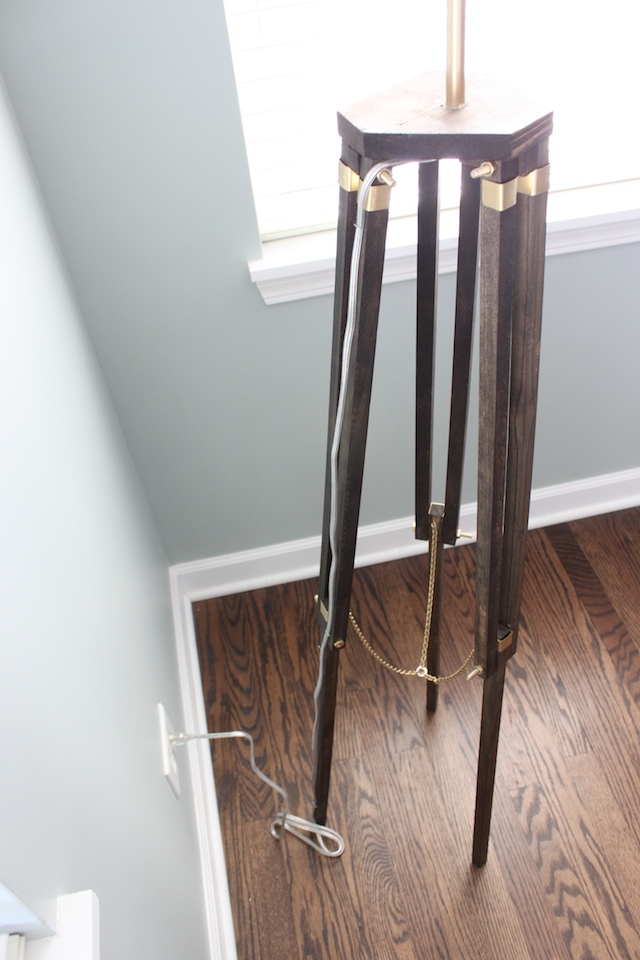
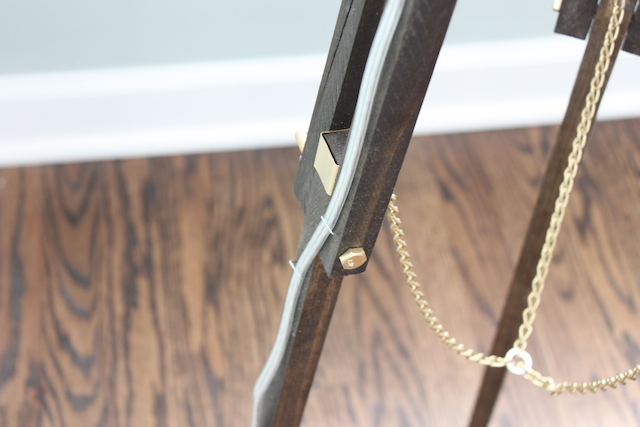
-Metal accessories like strips of flat metal, a metal chain and eye hooks
-Gold spray paint
-2 inch threaded rods (mine were found in the lighting kit section at Home Depot)
IMG_7423
IMG_7421
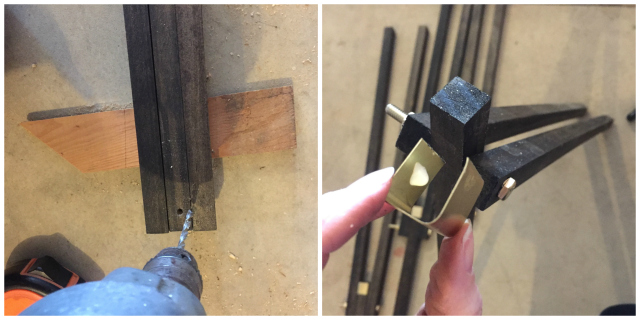
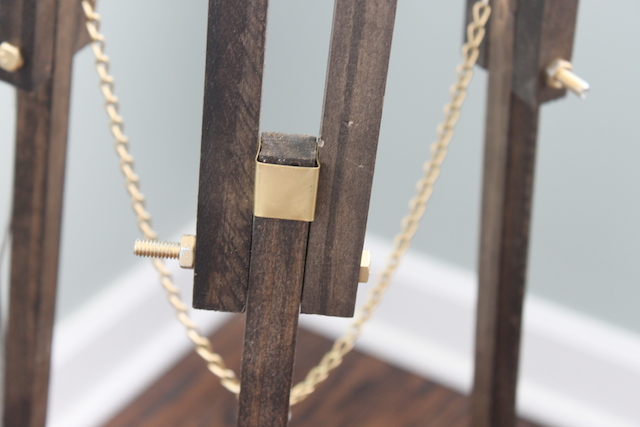
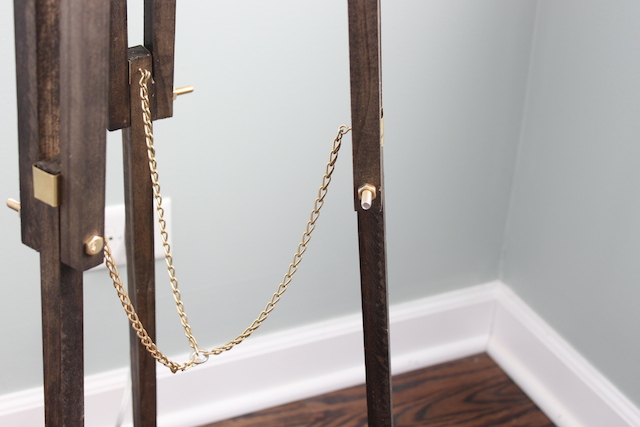
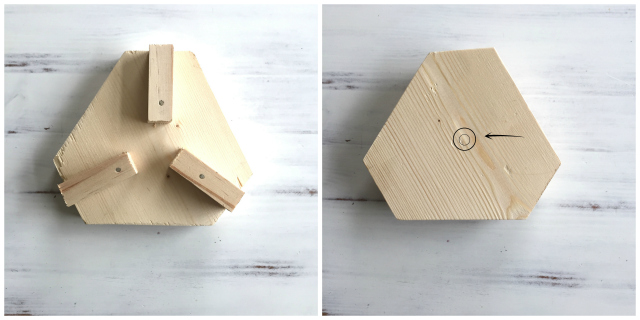
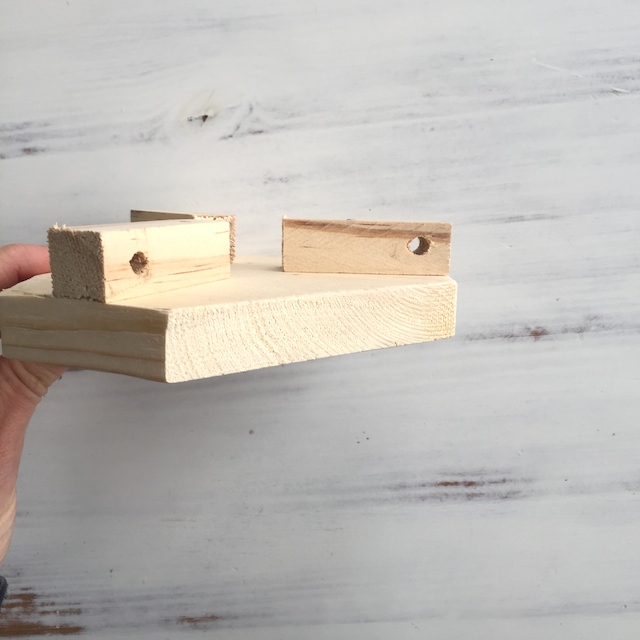
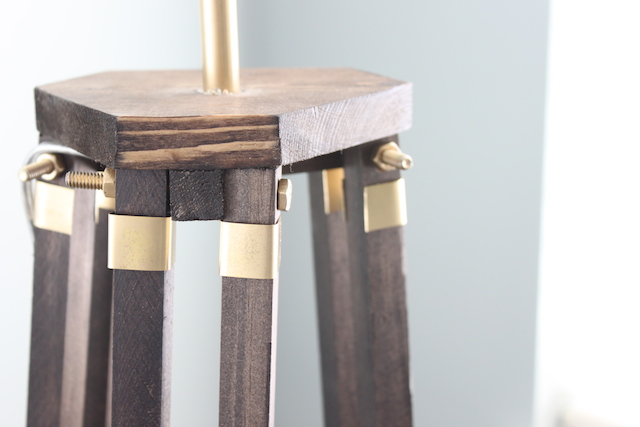
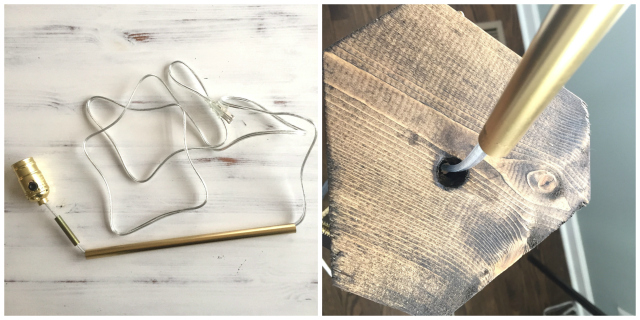
1. I got these 1 x 1 square dowels from the hardware store. They were about 10 ft long and I cut them down to about 2 1/2 feet-but this will determine how tall your lamp is, so this can be adjustable. Stain the wood after it’s cut.2. I also found some random metal pieces at the hardware store including these little metal strips. I spray painted those, the nuts and bolts, the metal chain, eye hooks and metal tube gold. I cut the metal strips so that they could snap on to the tripod legs (as seen in the picture below)3. To assemble the legs, drill holes in them and secure them with a nut and bolt. Then snap on the little metal accent pieces (I used a little dab of glue for some but I don’t think you need to do that, if you bend the metal they should just snap on)4. When you have all three legs built, screw in an eye hook to the inside center of the leg. Then attach your gold chain to it using pliers. I found a little washer in a tool kit and spray painted that gold and used that in the center of the the three chain pieces. 5. For the top center piece of the lamp, I came up with this design. Of course you could modify this, but it totally worked. I glued and nailed the little 2 1/2 inch pieces of the square dowel to the center piece. I drilled a hole in the center. Drill a narrow hole all the way through and then drill a second hole that is the same size as your metal tube part way through the wood. This will create a hole for the cord to go through but also allow your metal tube to sit right on top. 6. To finish off the center piece, drill holes in the ends so that a nut and bolt can attach the top of the tripod legs to it. Stain it. 7. Attach your light cord to your light socket, making sure to string it through all the right spots before securing the cord wires. I had to redo this a ton it seemed like 🙁 Luckily it was easy! You have to string the lamp cord through the wood top center piece hole, through the metal tube, through the threaded rod, in to the light socket. The picture below on the left is missing the piece of wood in there just FYI :)8. I put a little caulk glue on the hole where the metal tube meets the wood piece to keep it secure in there.
9. Put on your lampshade. 10. Snap on the rest of your little metal pieces if you haven’t already.
11. Using a staple gun, staple the lamp cord to the back of the legs of the lamp.None of these steps were super hard, it was just a slow process I felt like. Because it had a lot of components. But I love how they turned out!