
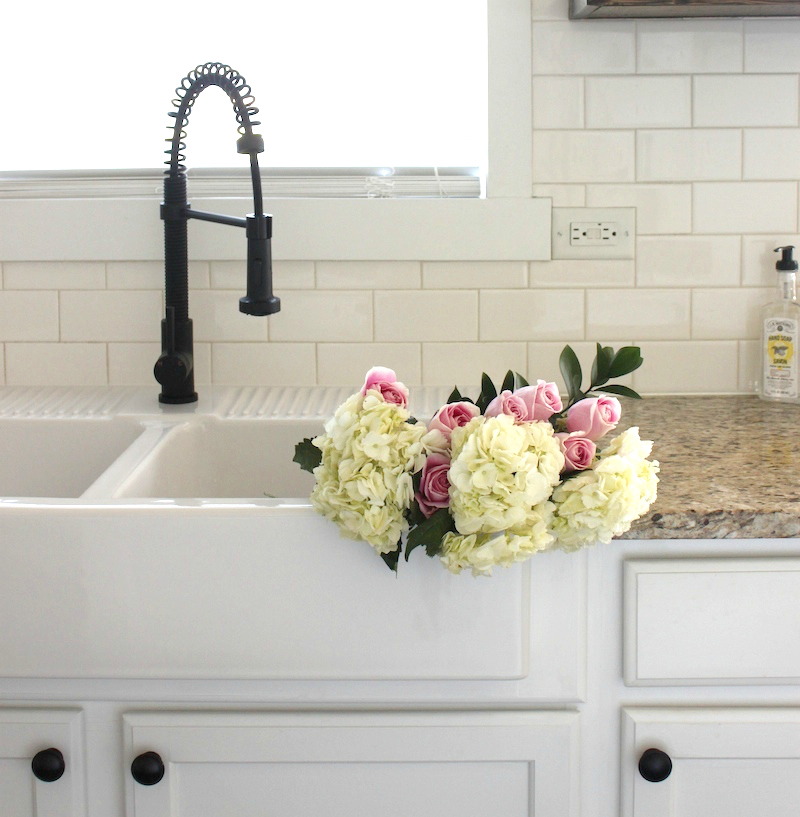
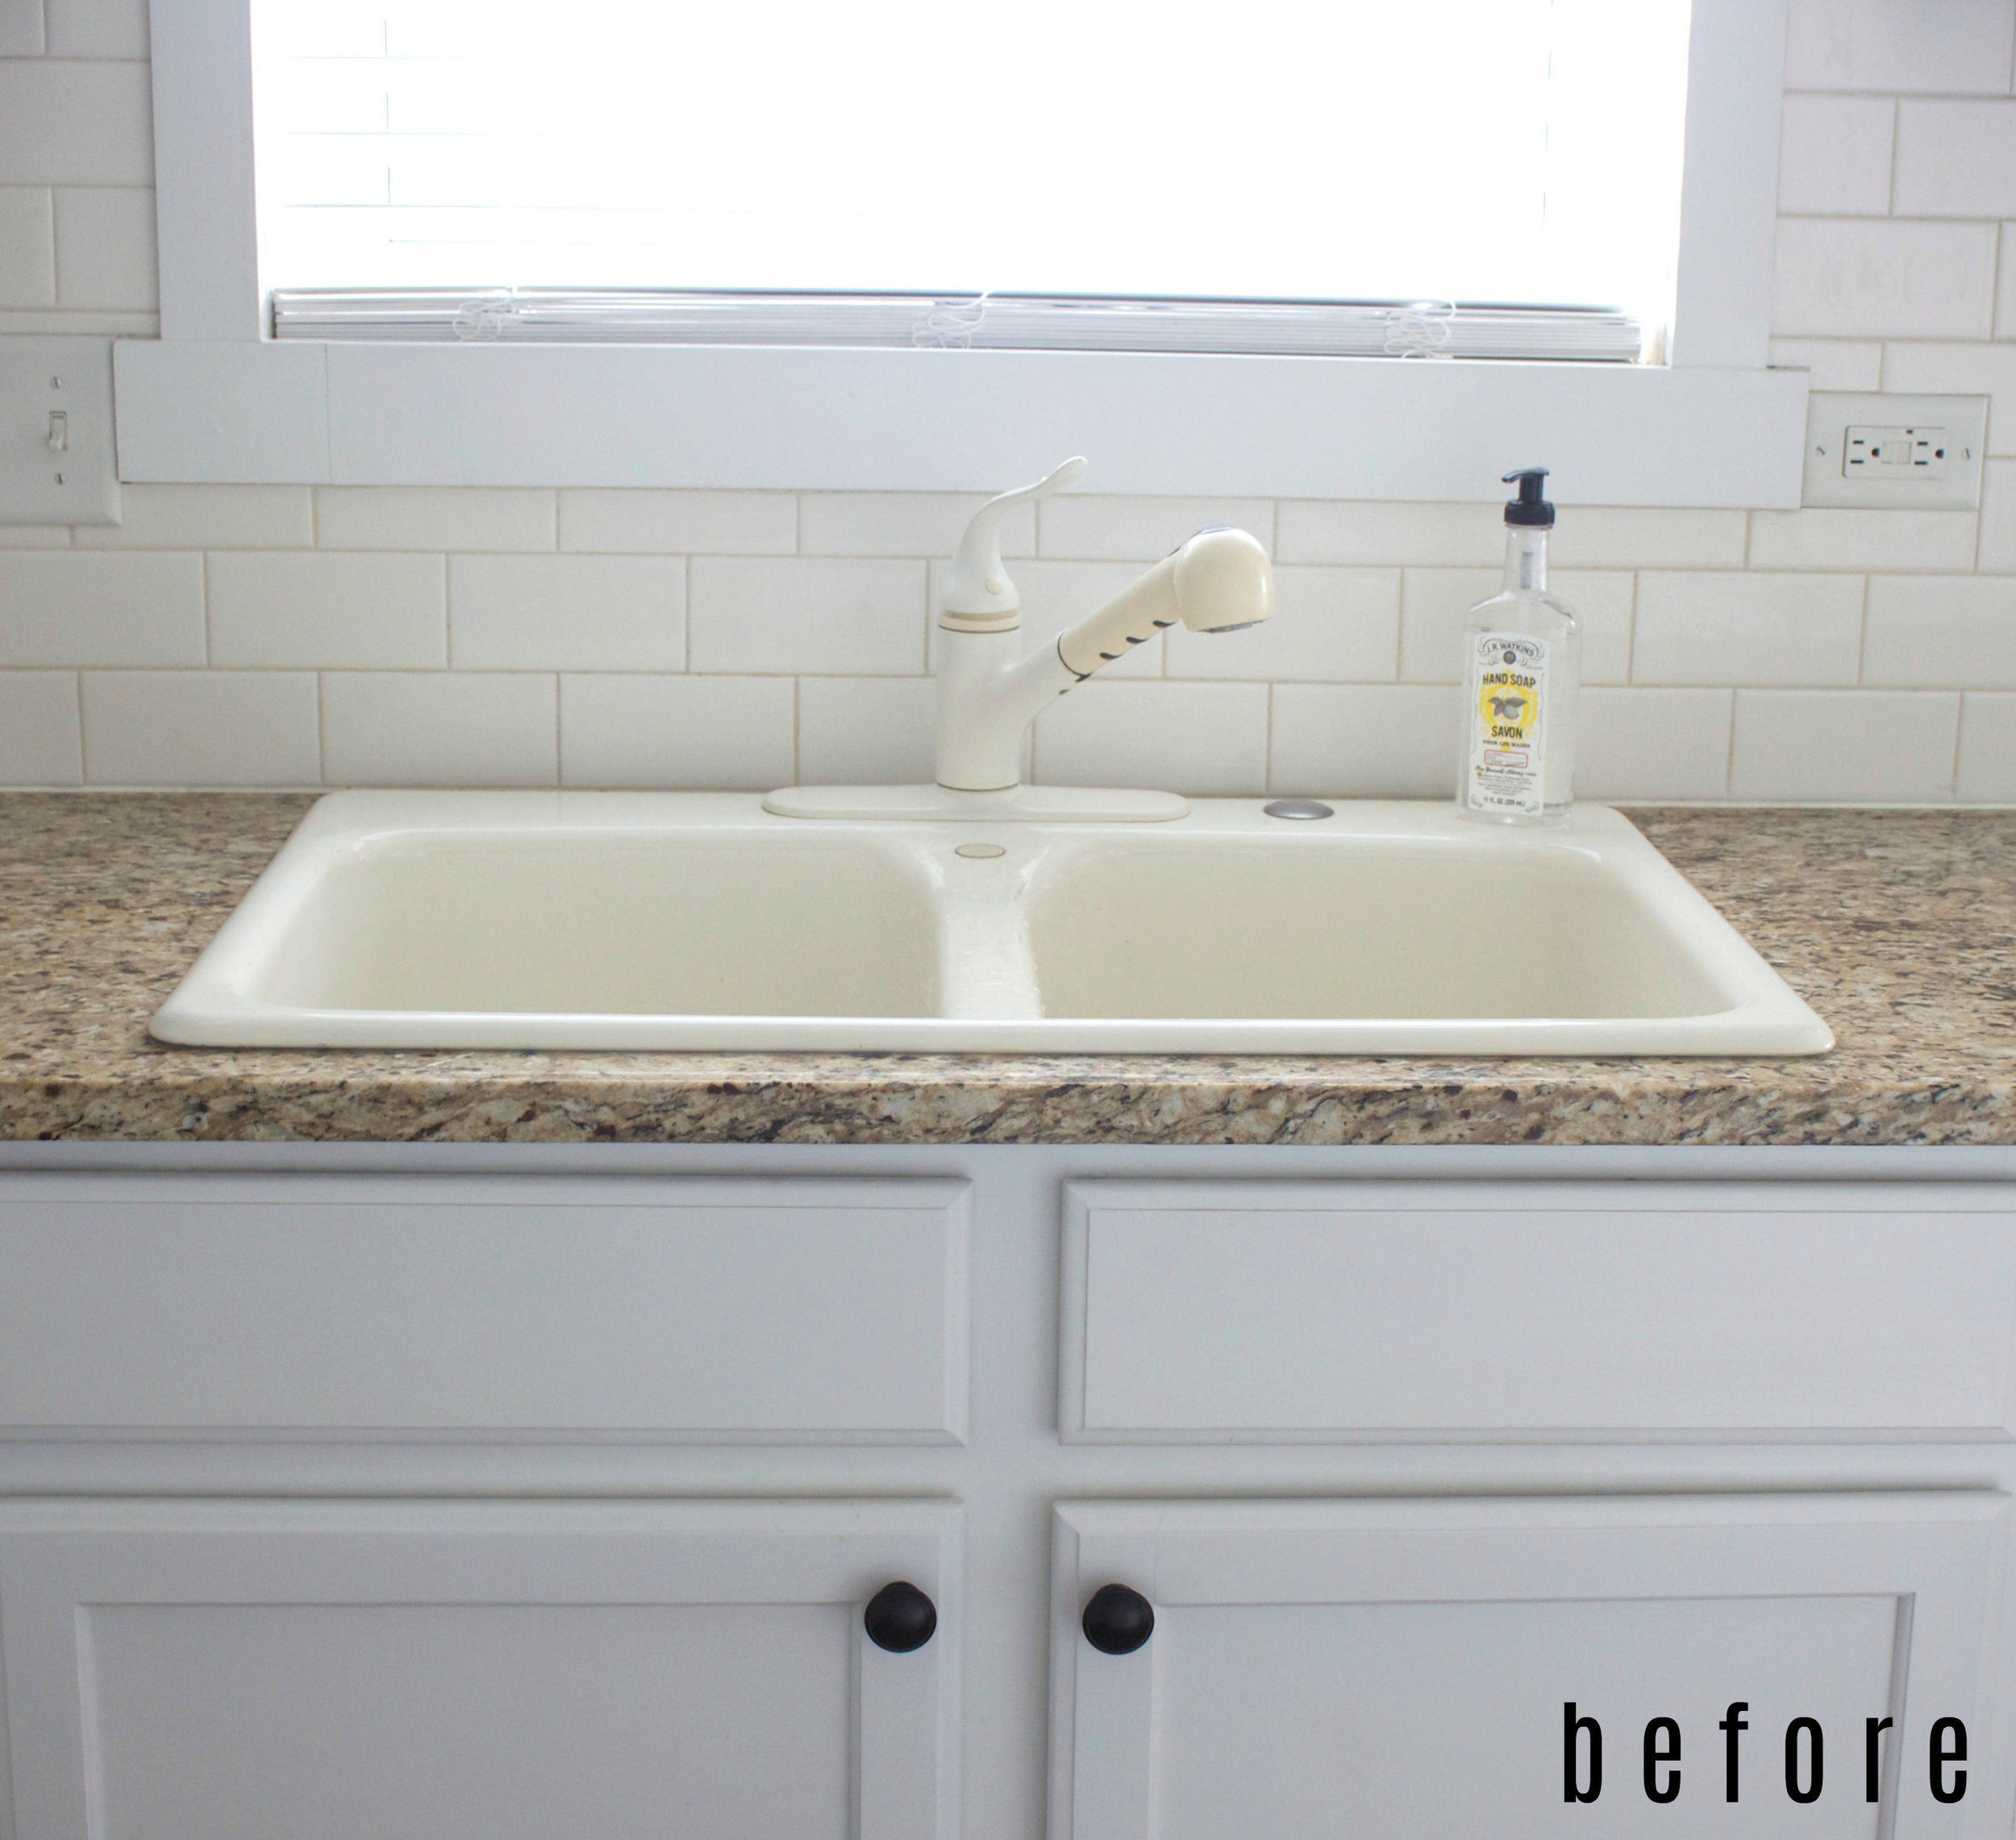
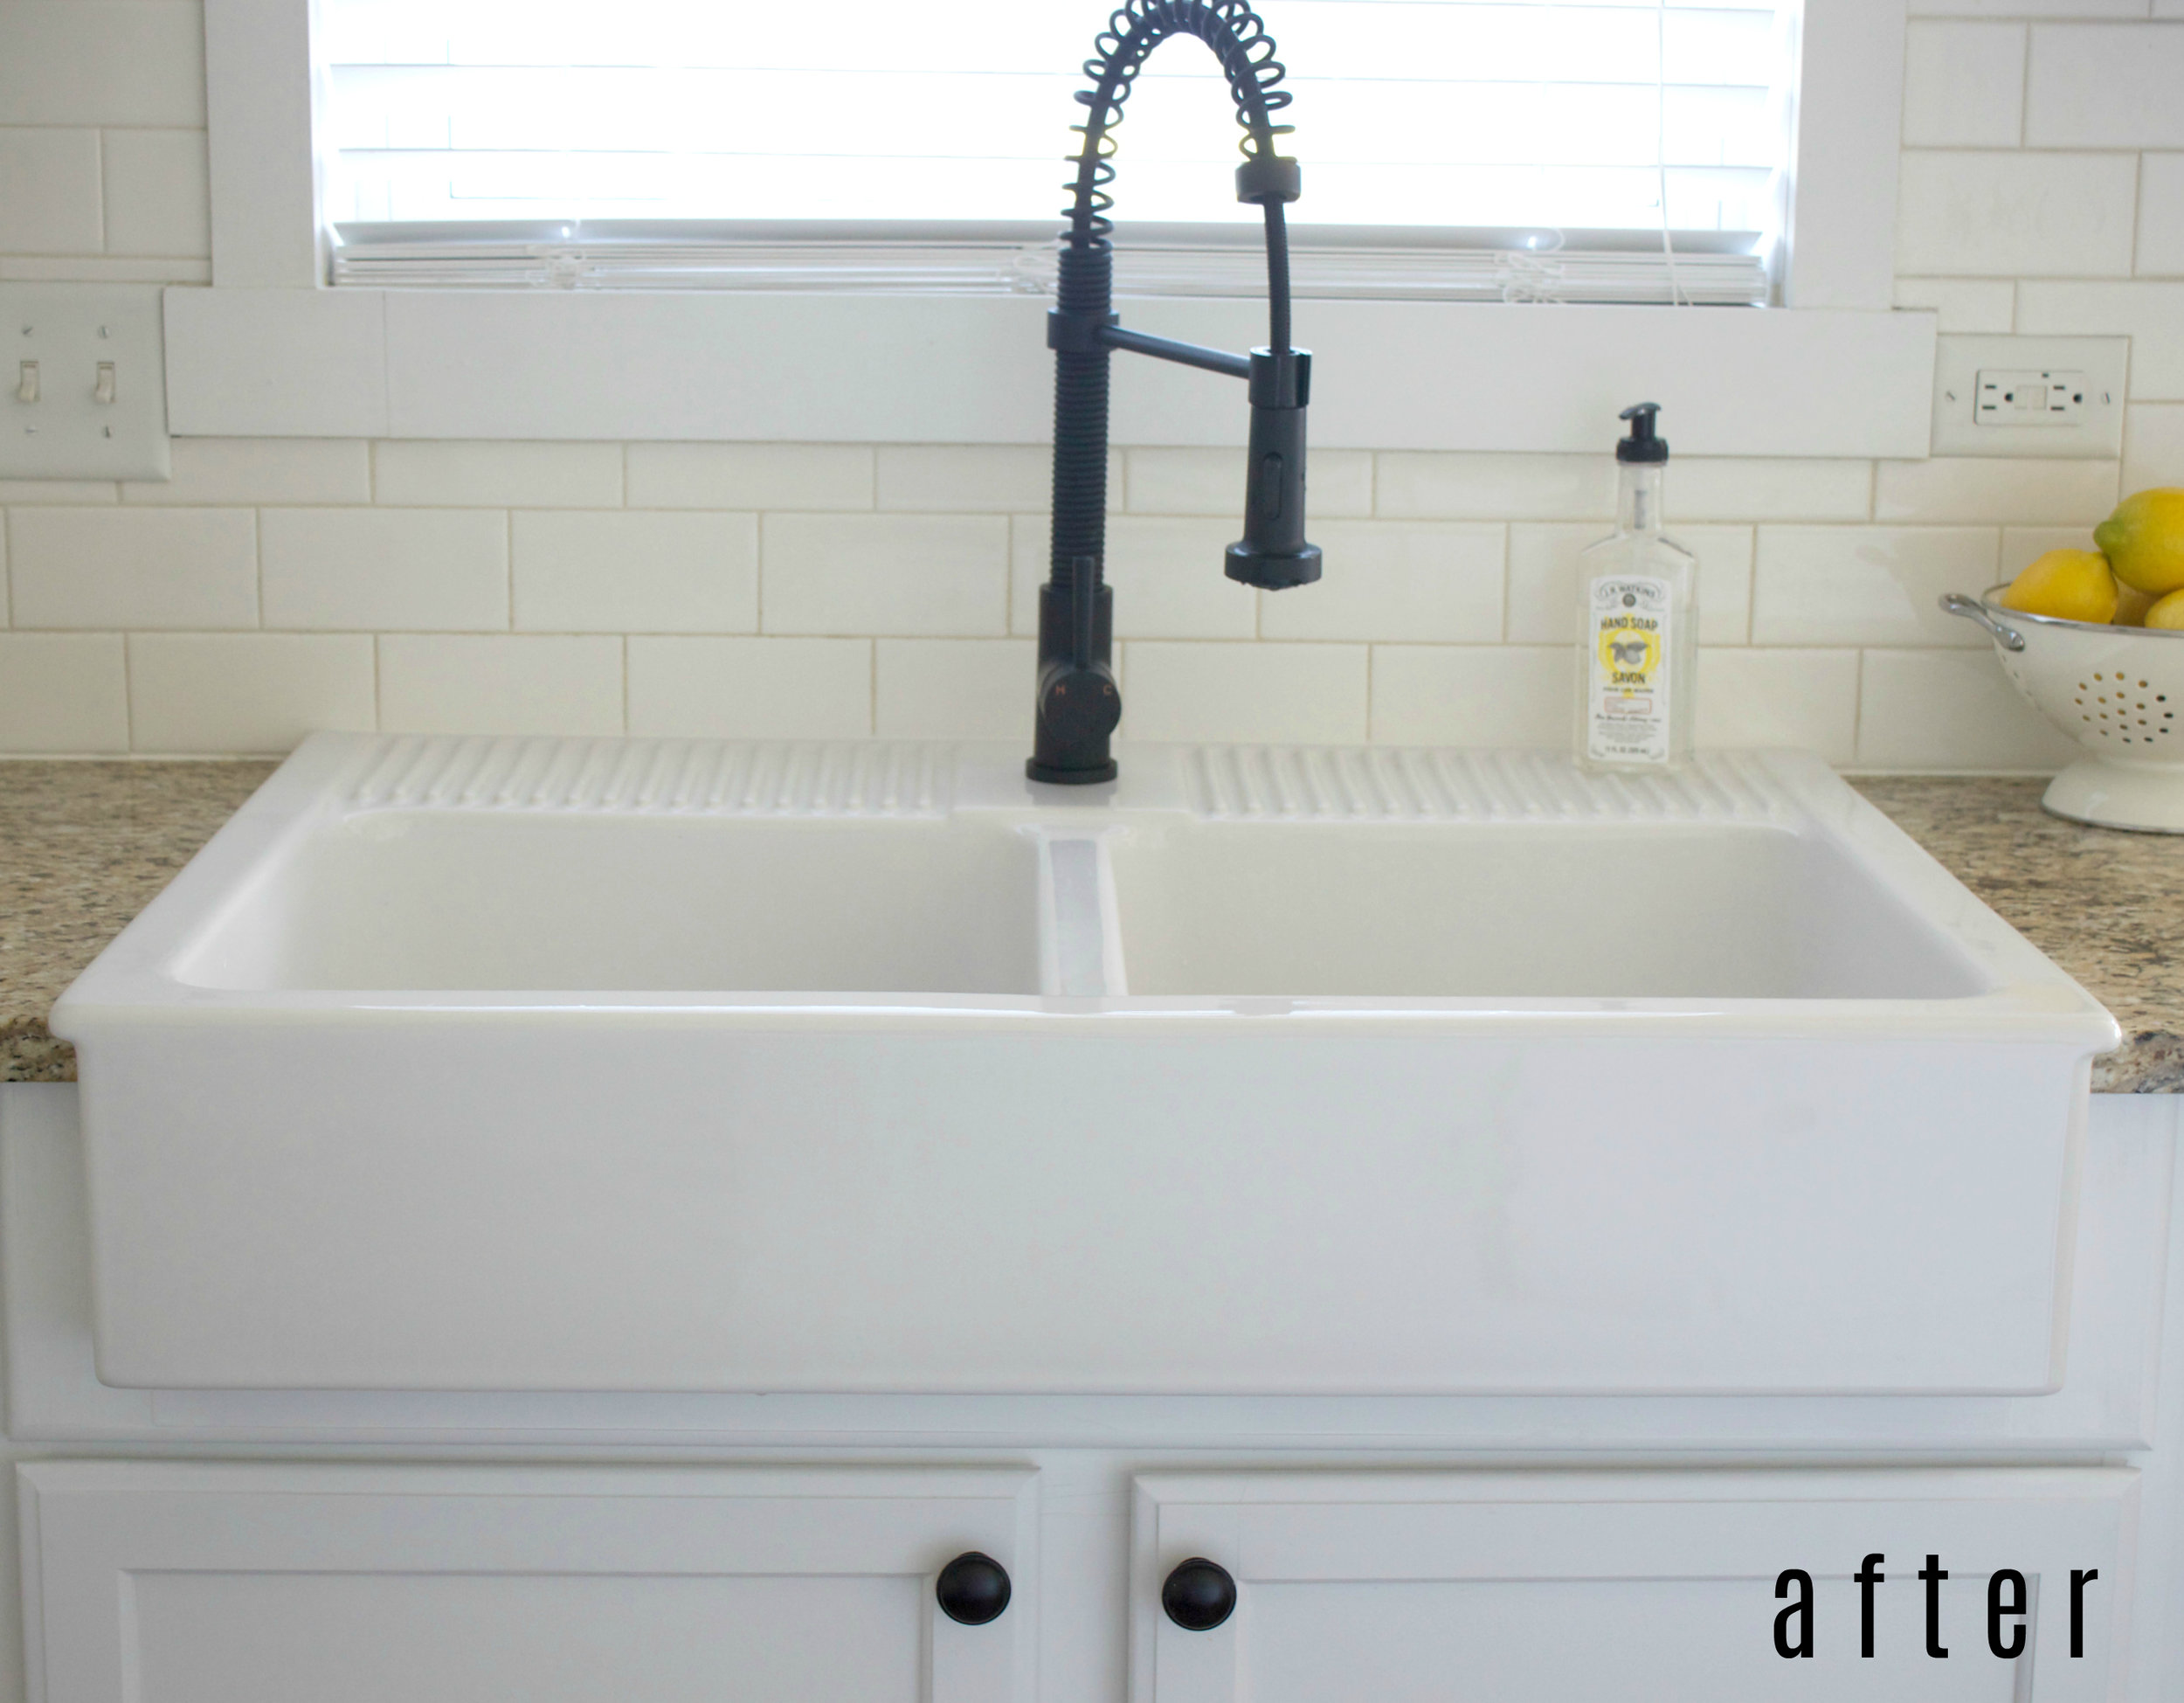
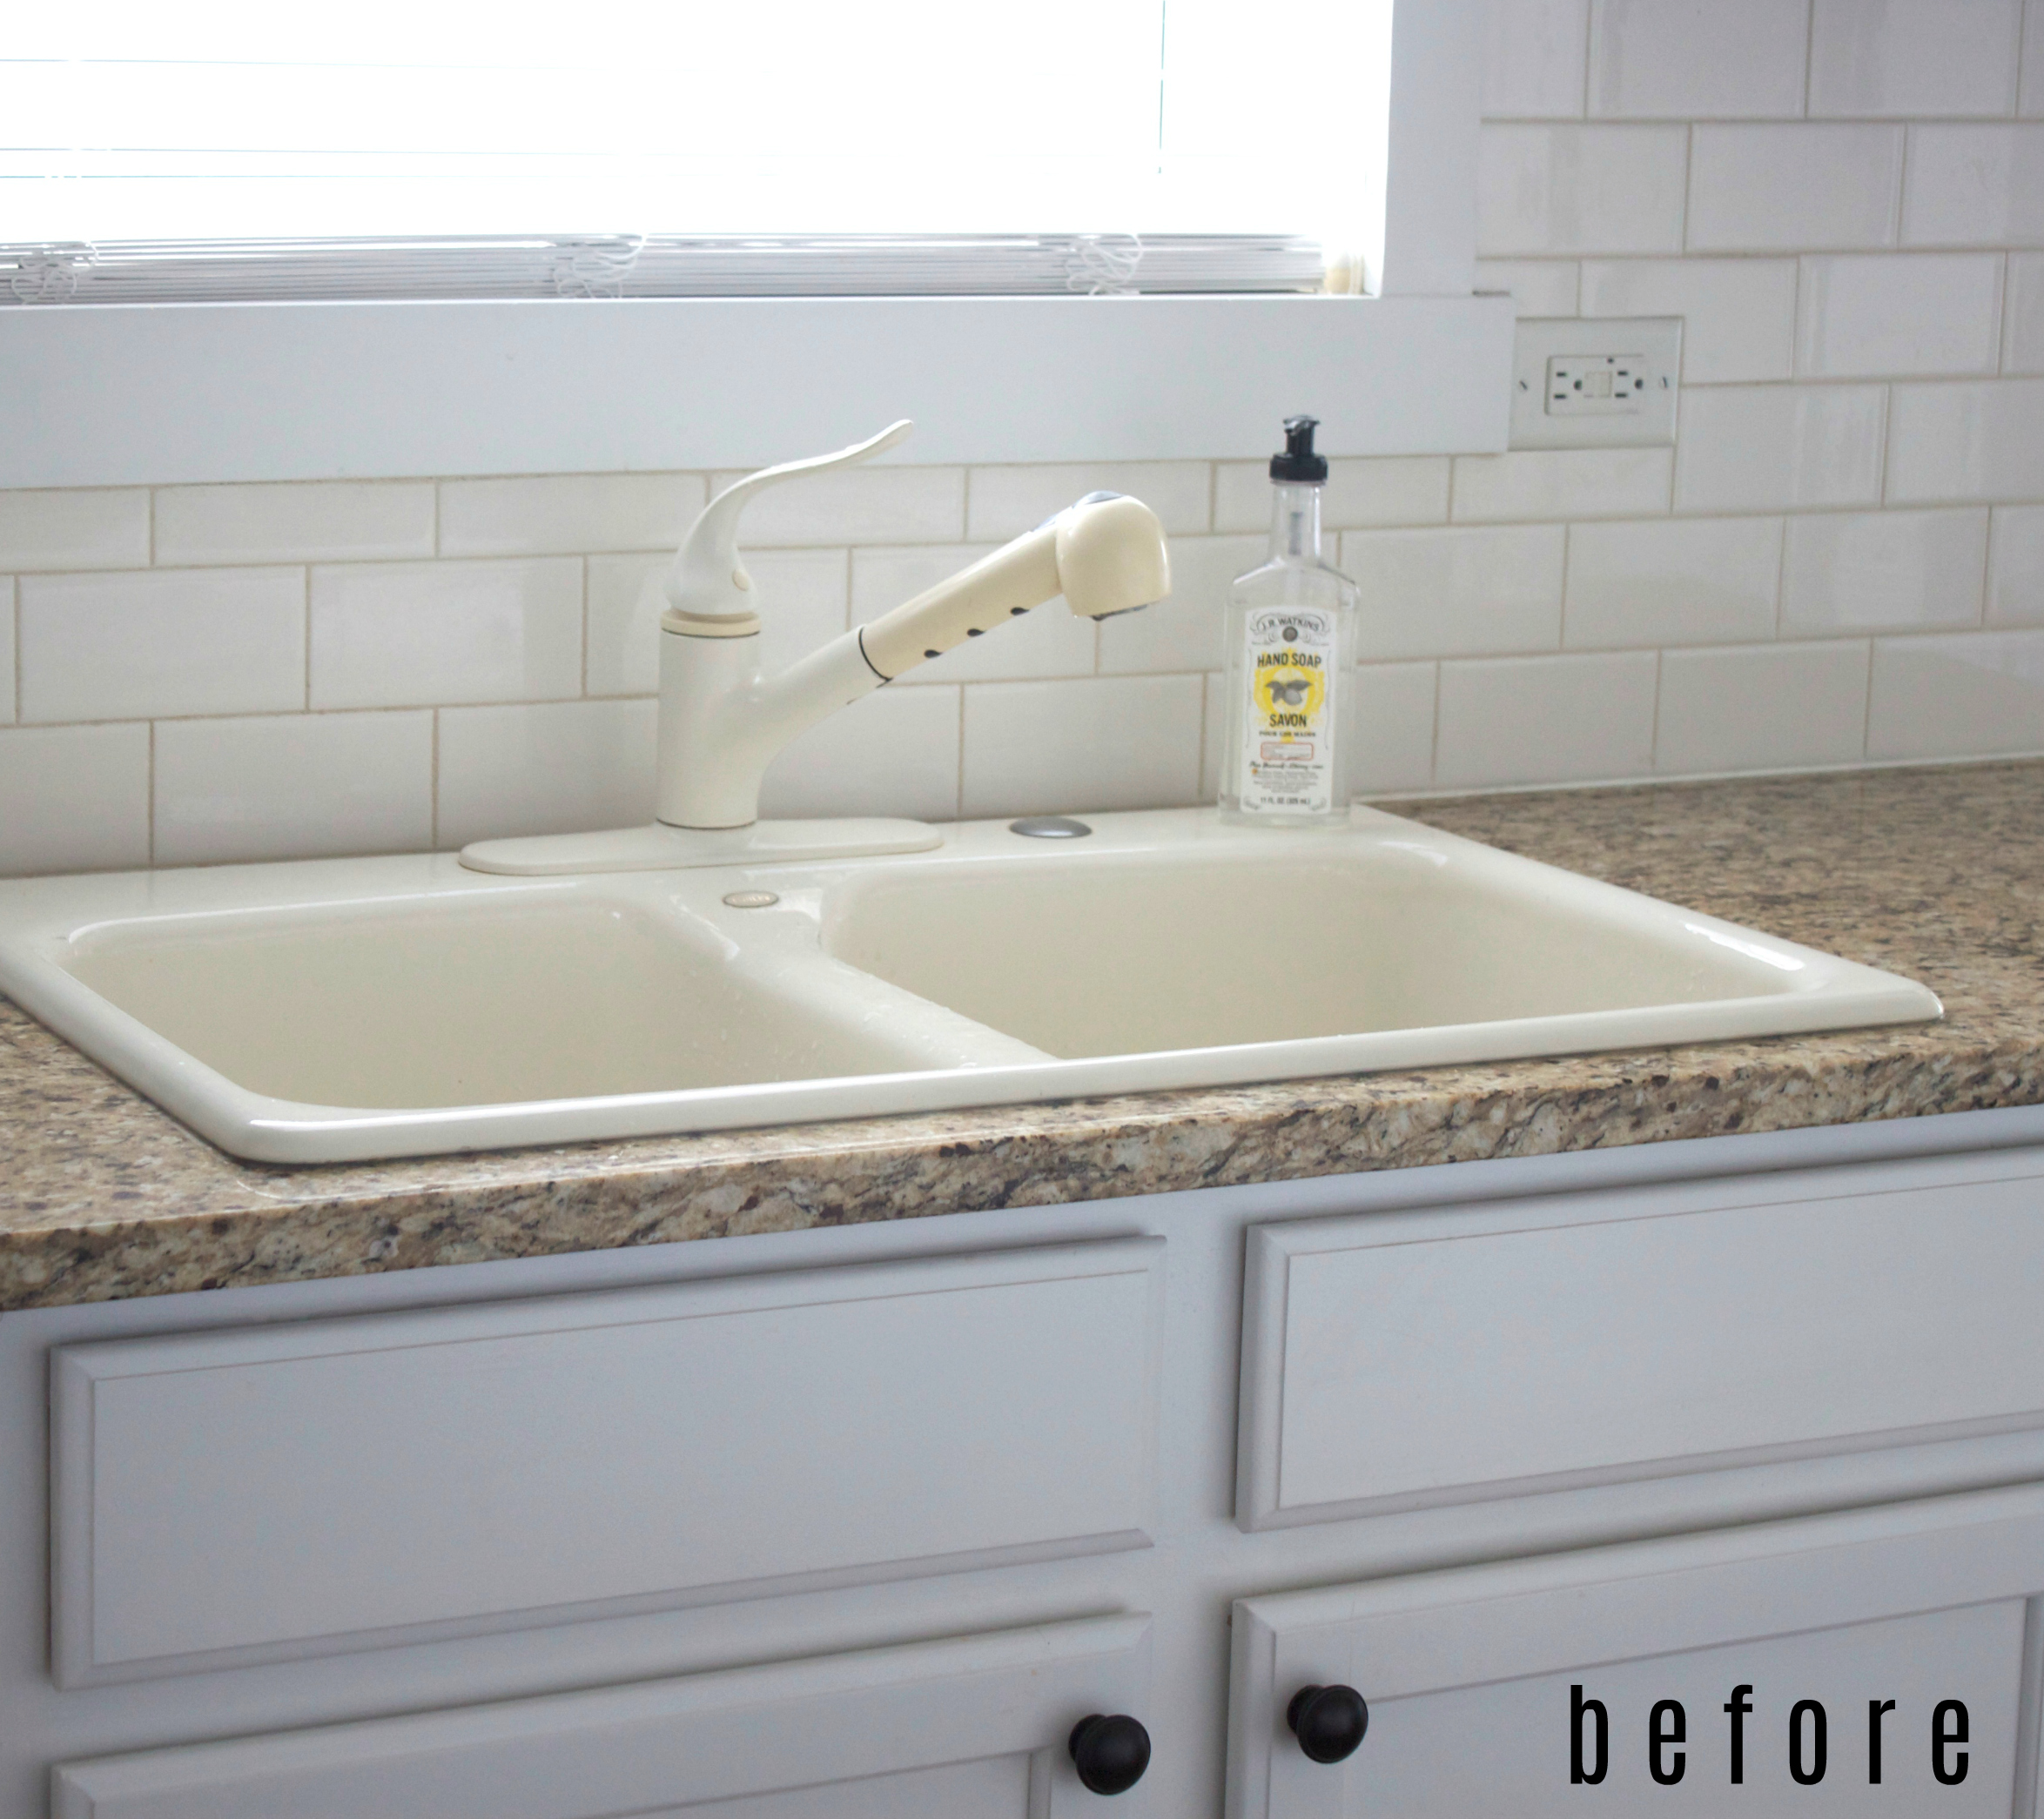
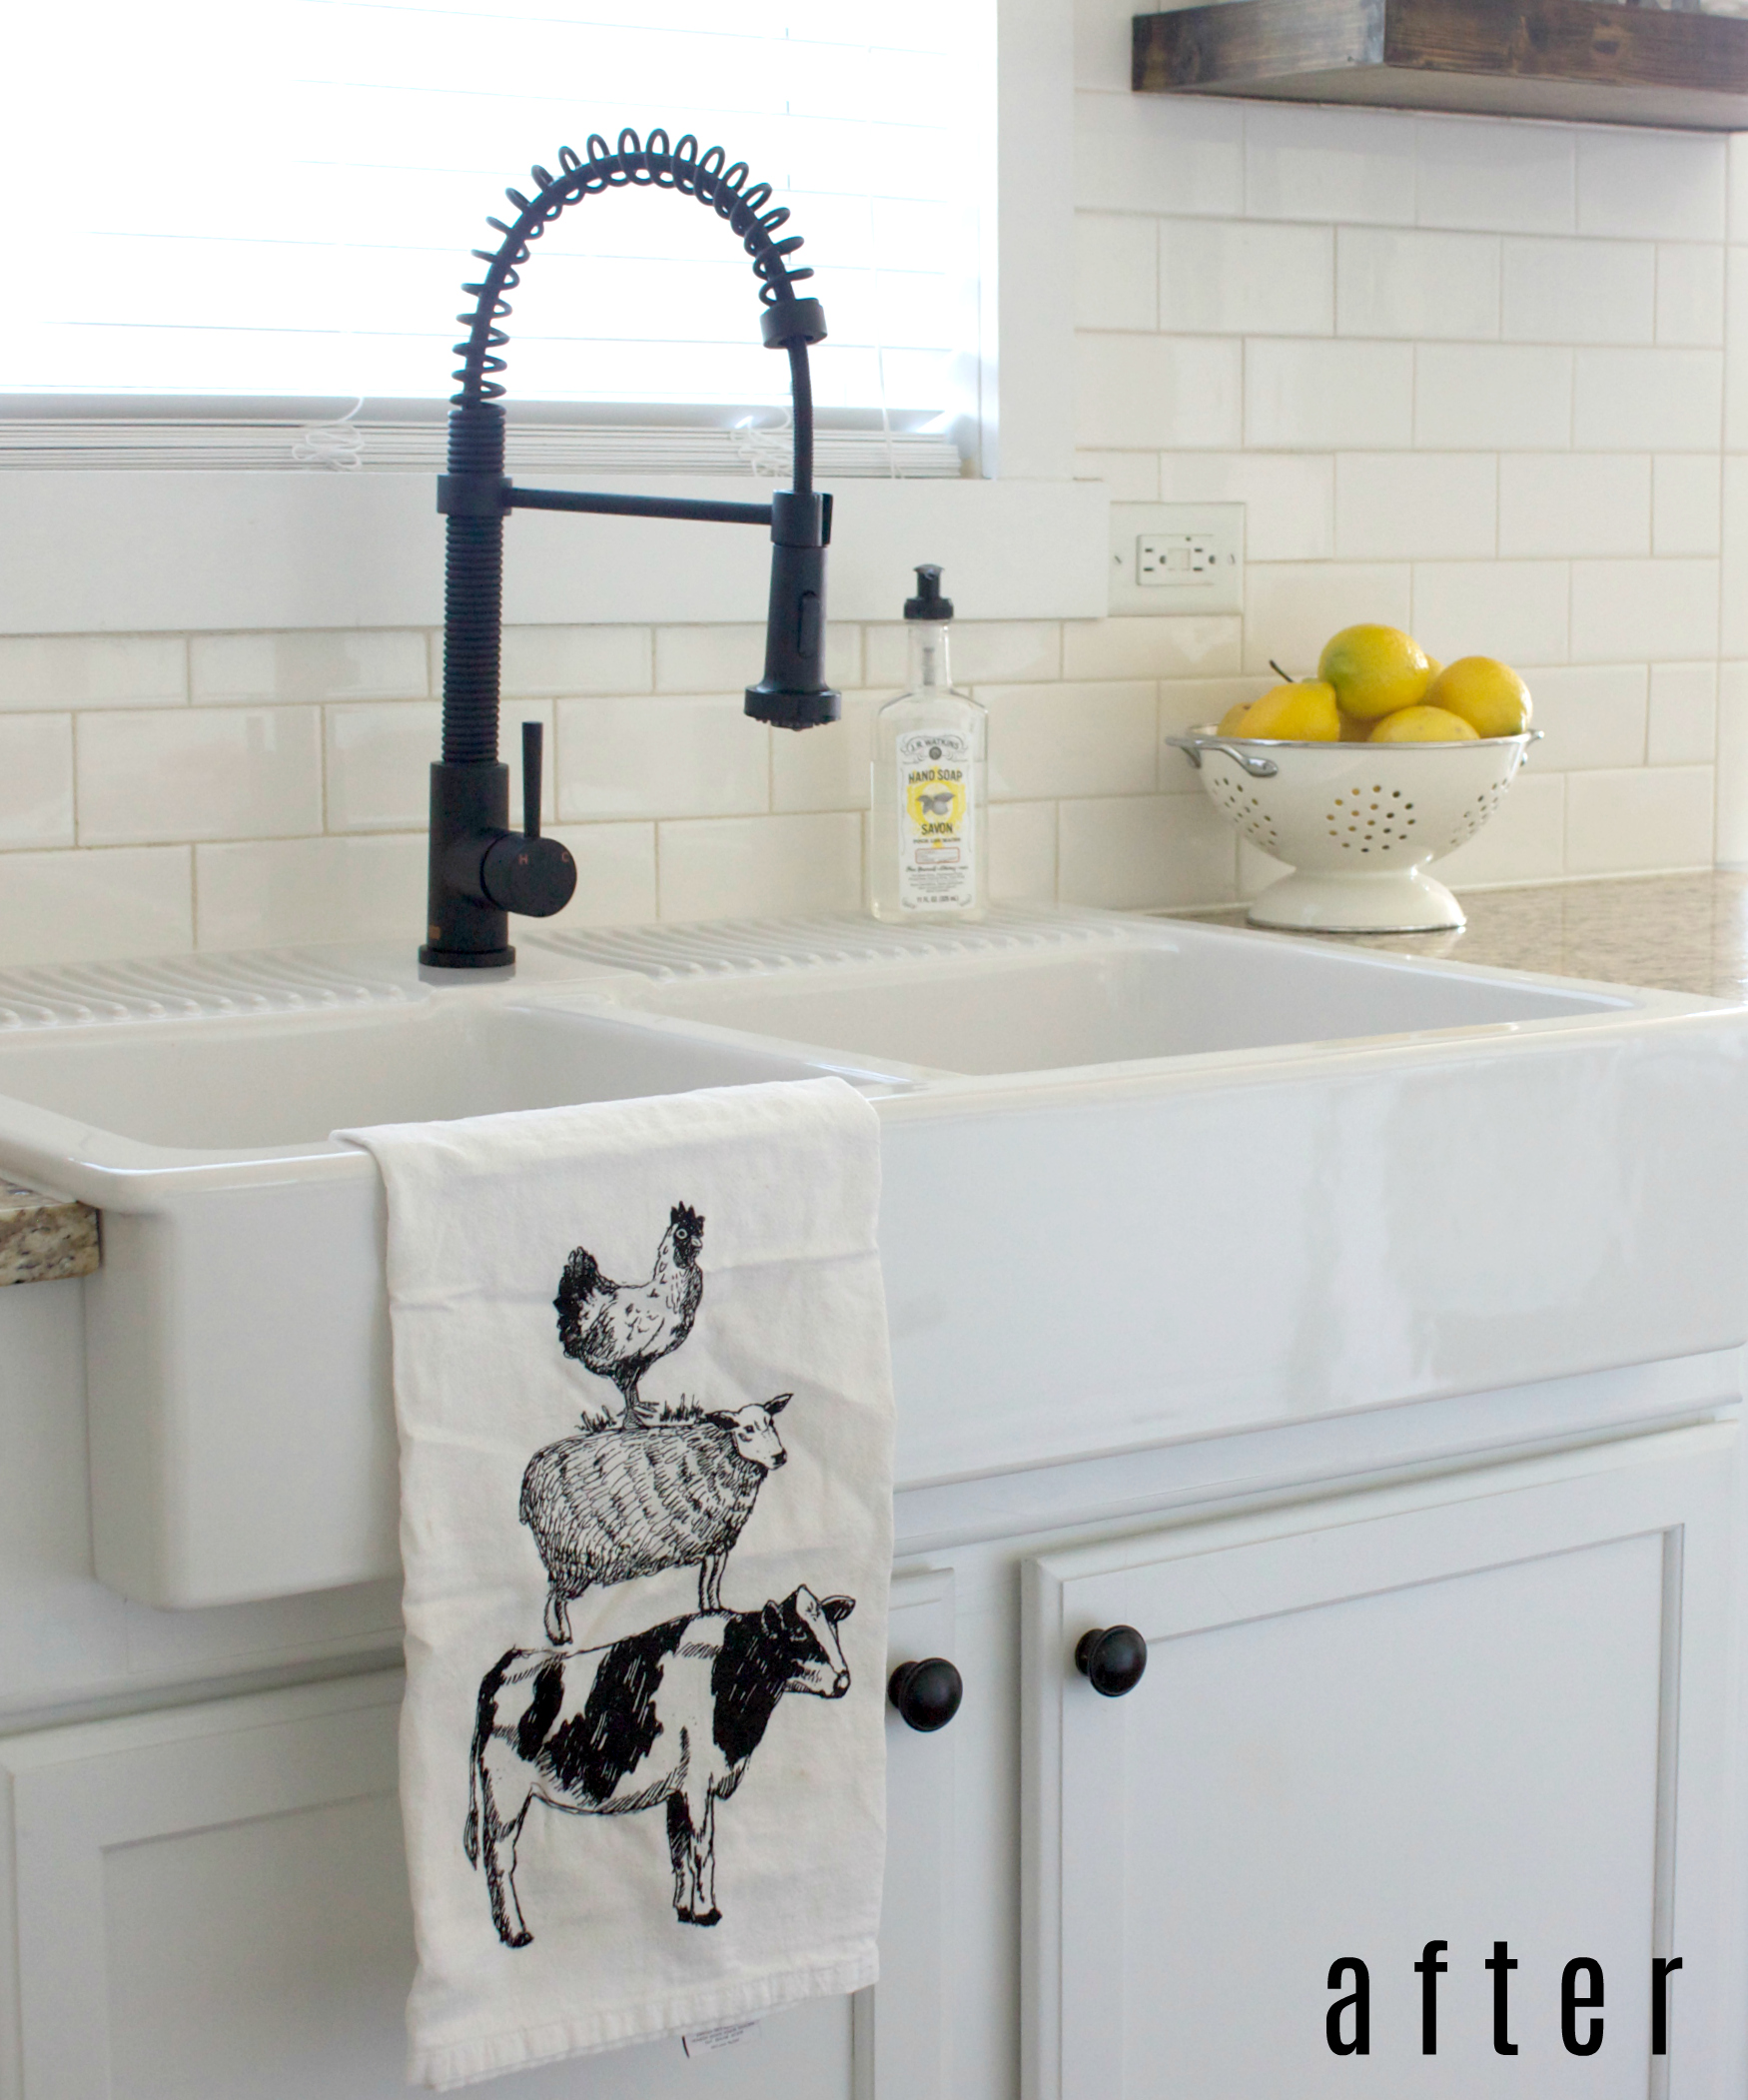
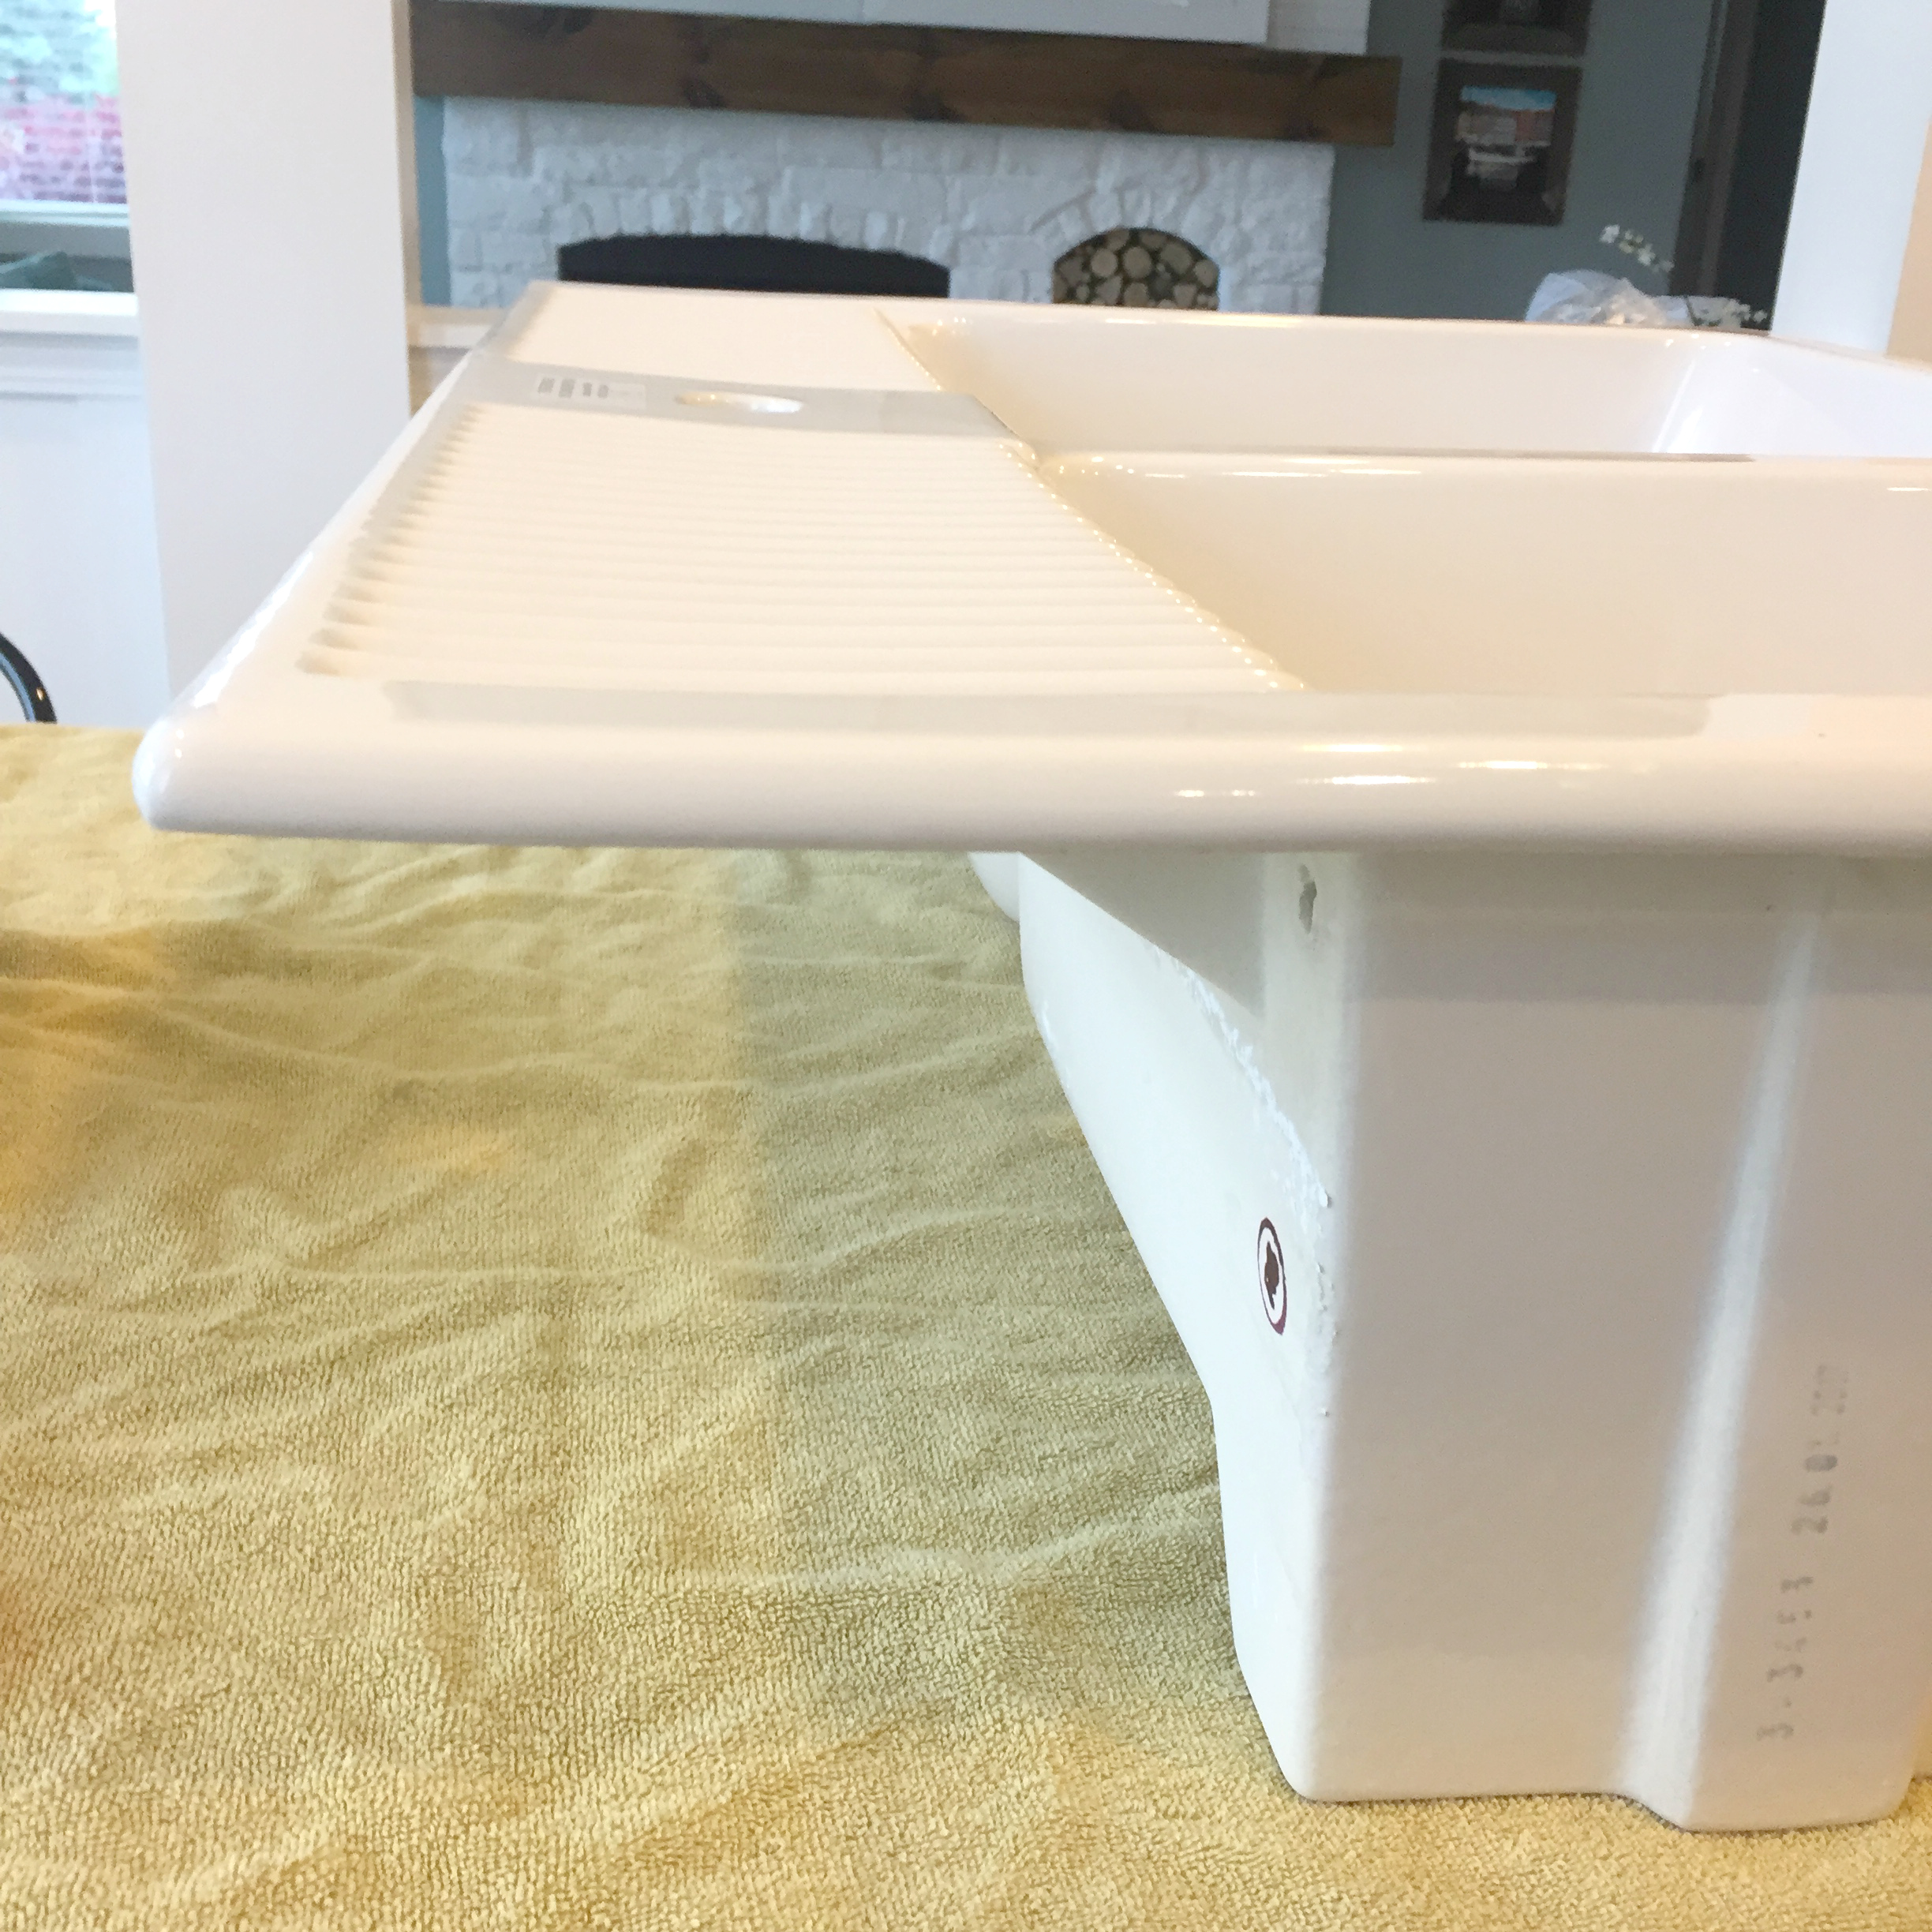
For Mother’s Day, my husband bought me this farmhouse sink and faucet. Okay.. well, he may have gotten the idea from me 😉 I have been looking for a farmhouse sink that will fit with my existing granite countertops. A lot of farmhouse sinks are under mount and this would have been tough to retrofit the granite to. I looked everywhere it seemed, and finally decided on the IKEA Domsjo sink. One, because it was an above mount sink which meant we could cut the granite ourselves and if it wasn’t perfect that was okay. And two, because it was only $300 and you just can’t beat that. I first tried calling around a few granite stores and handymen to see if they would cut granite and they either wouldn’t do it at all or it was really expensive. My husband has cut tile before so we figured that cutting granite wouldn’t be too tough… so we decided to take this project on all ourselves. And I have to say, I’m pretty impressed that it actually turned out great!
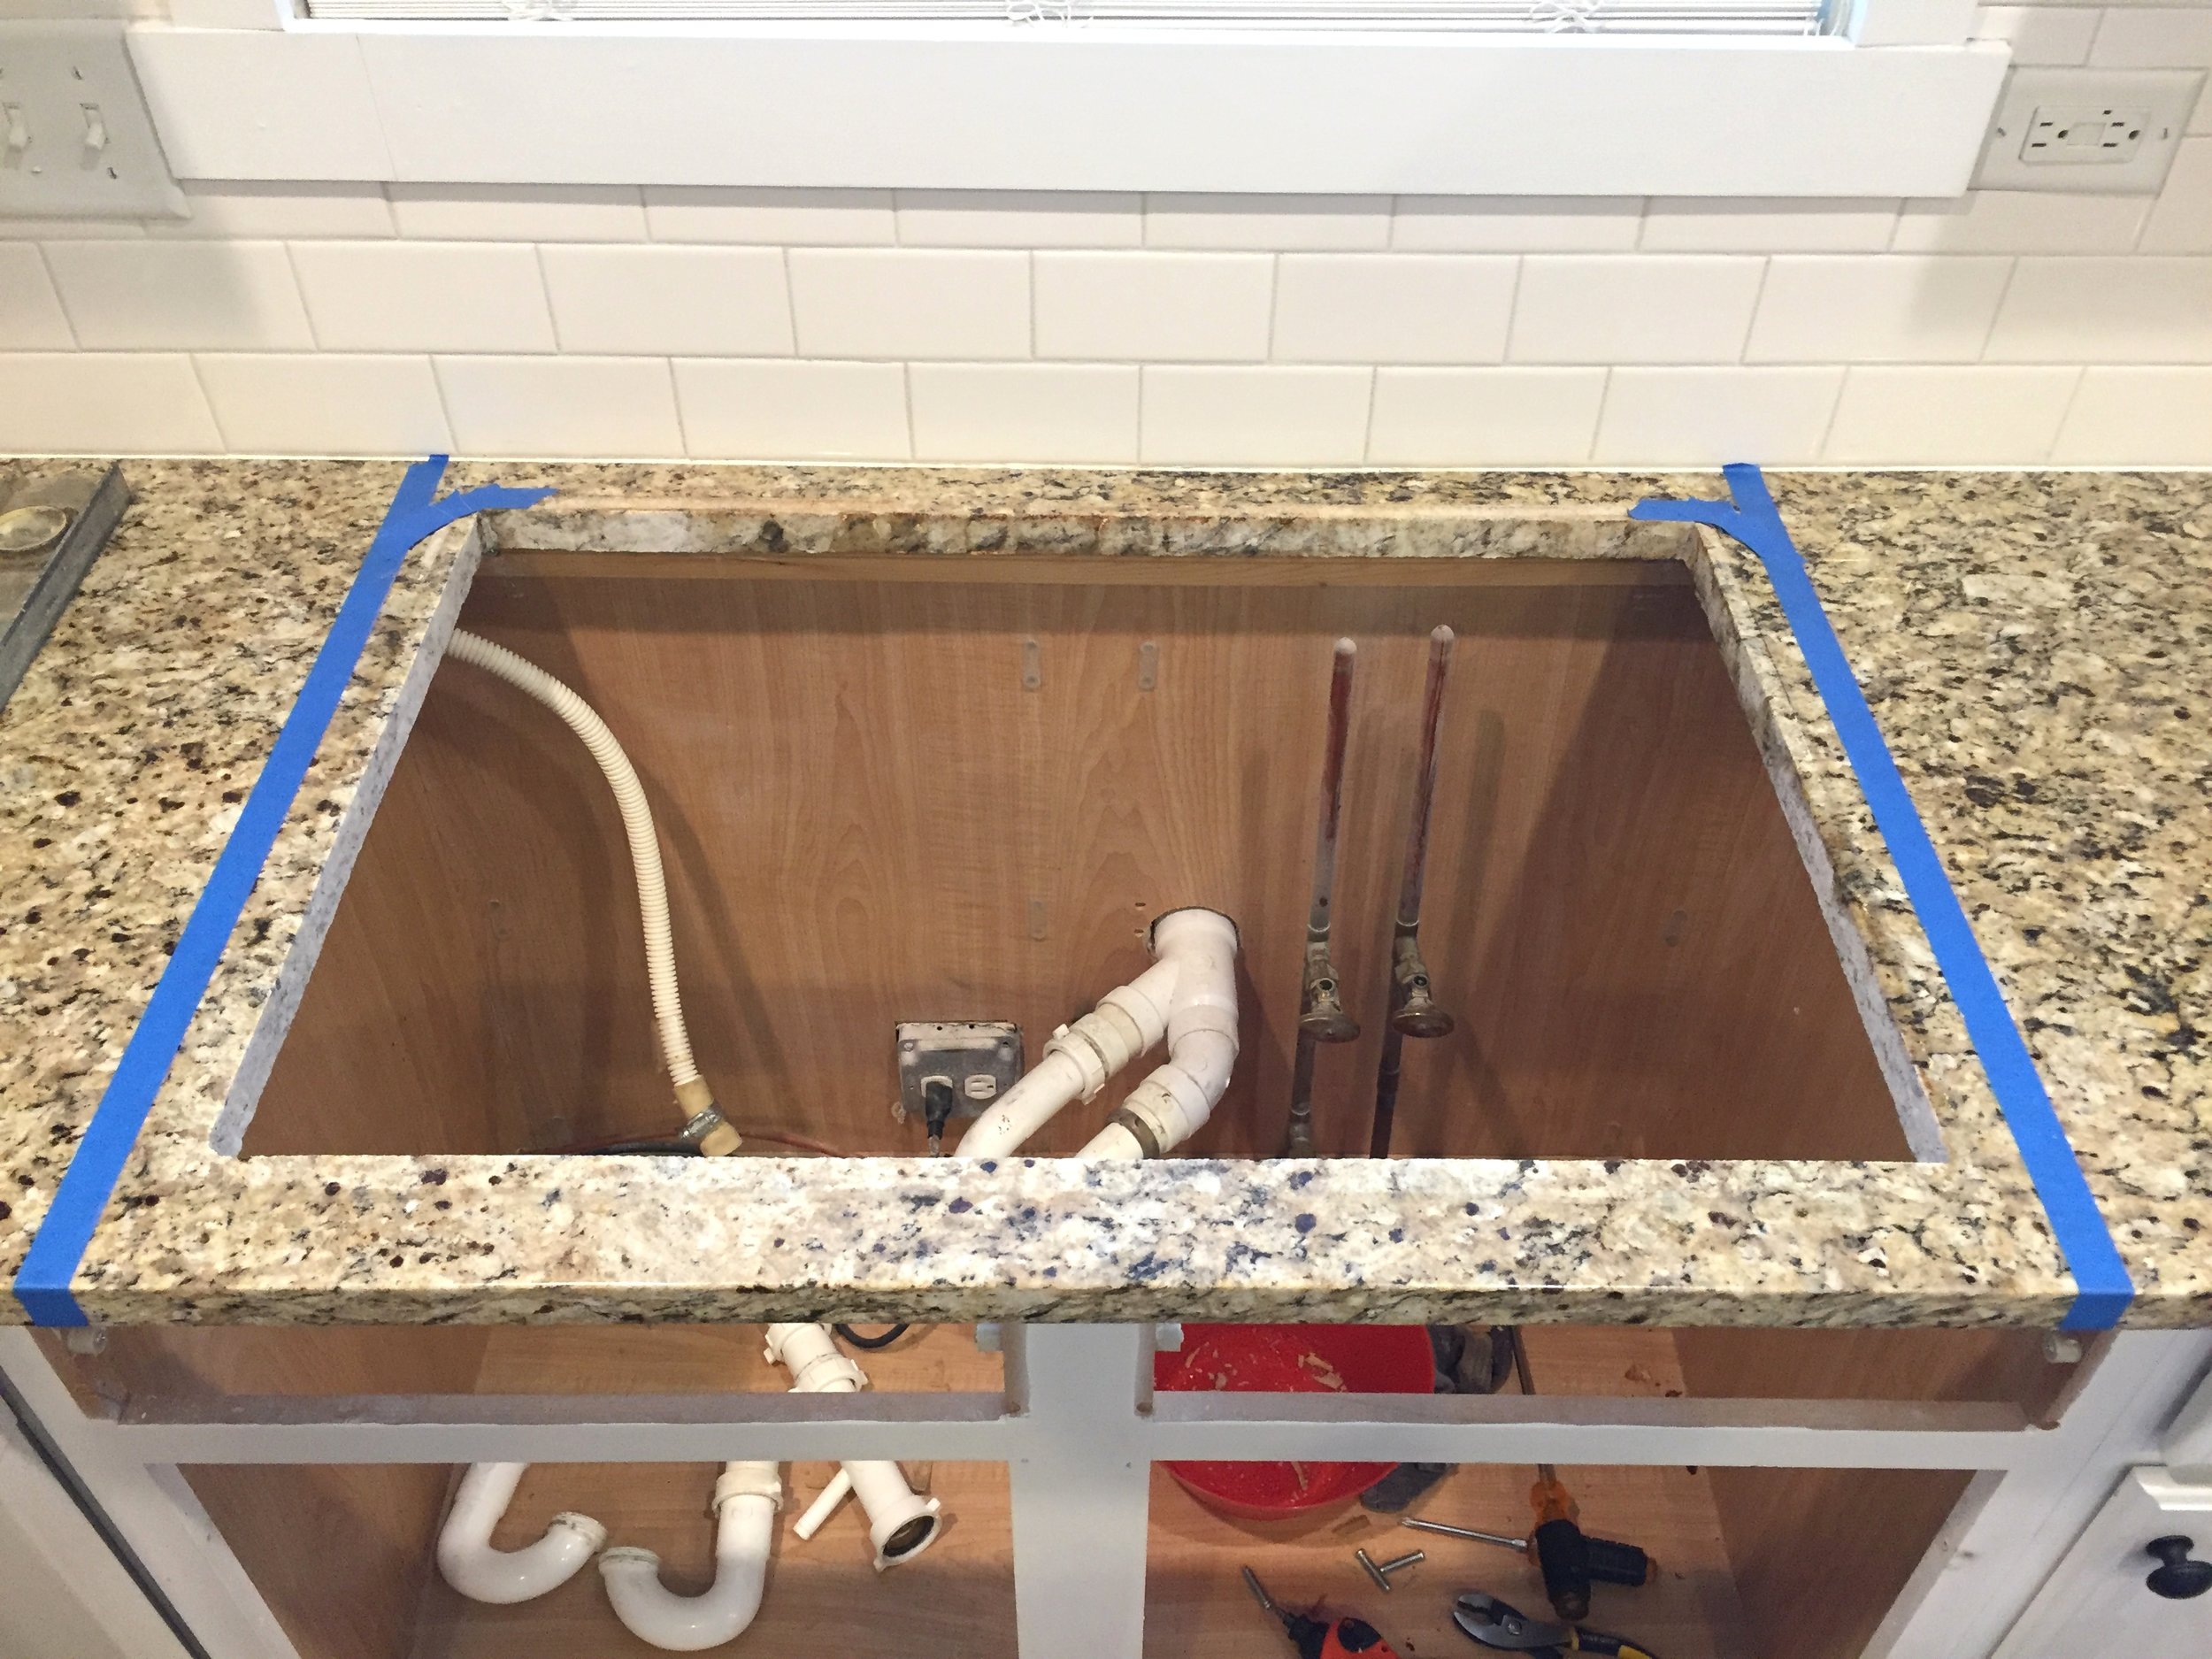
The first thing we did was remove the existing sink and cabinet doors. My husband knows a thing or two about plumbing or else we wouldn’t have done this ourselves. There is obviously some plumbing work that goes in to removing a sink and faucet and then replacing it.
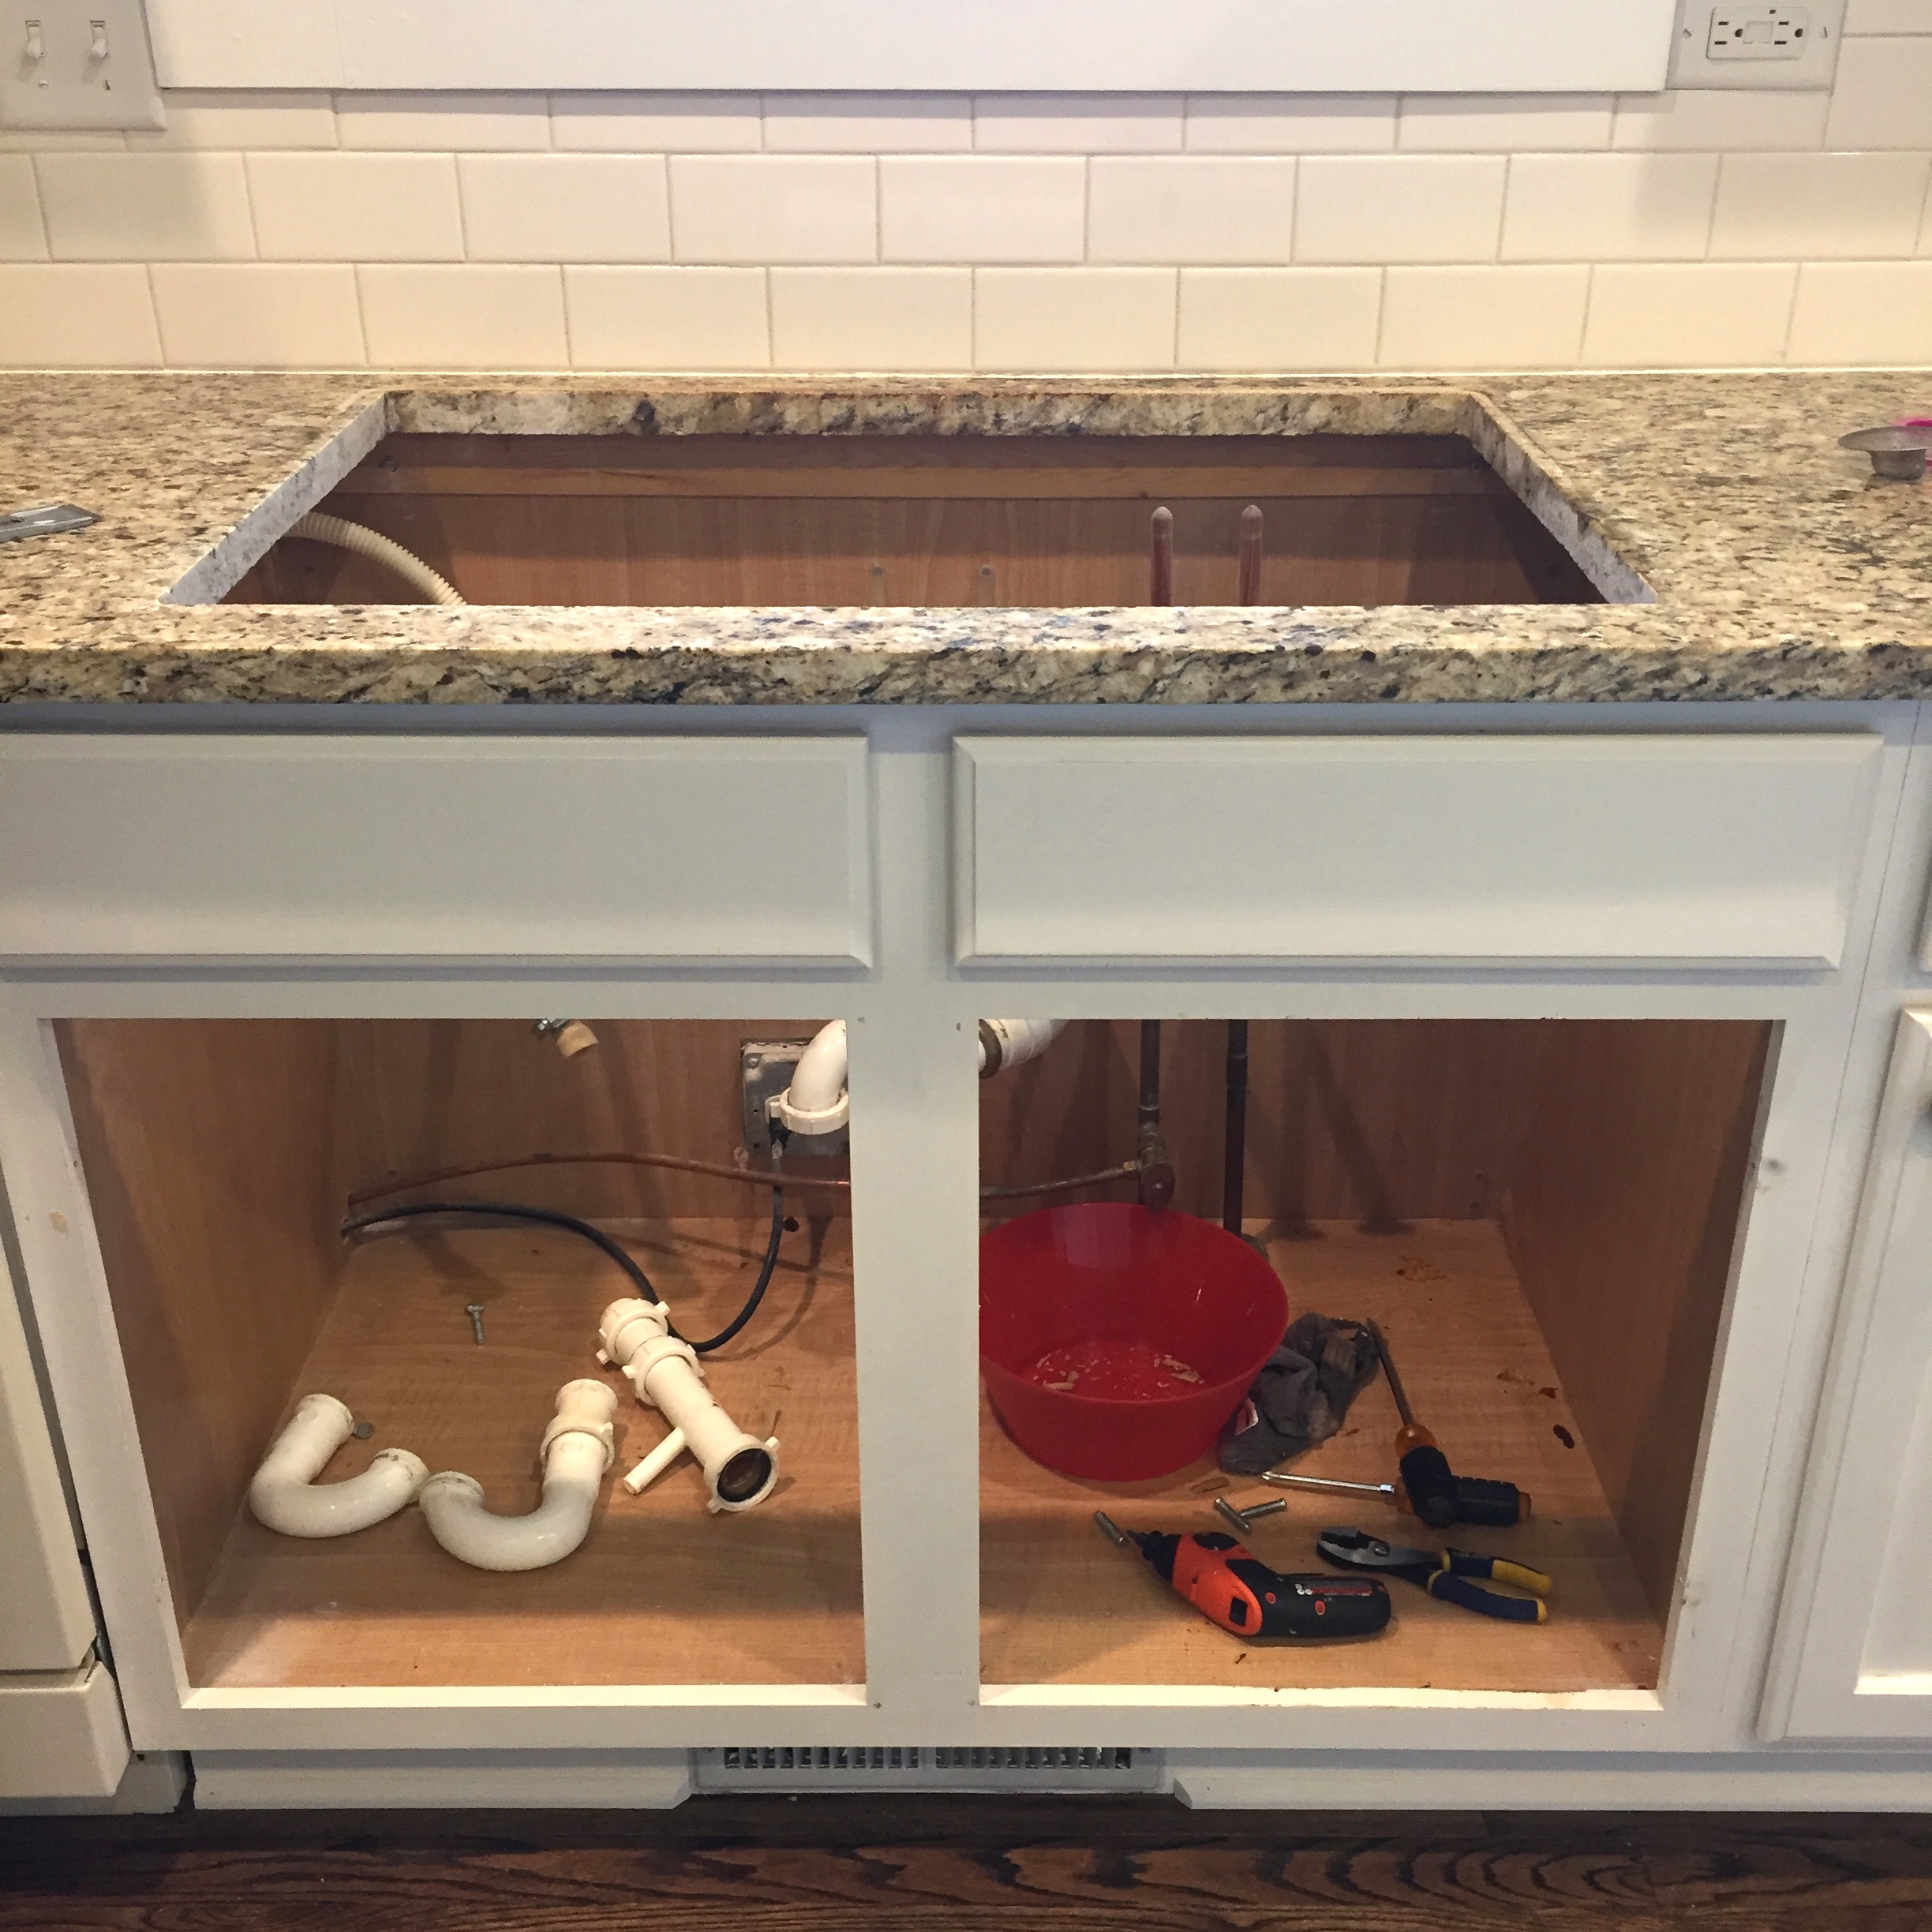
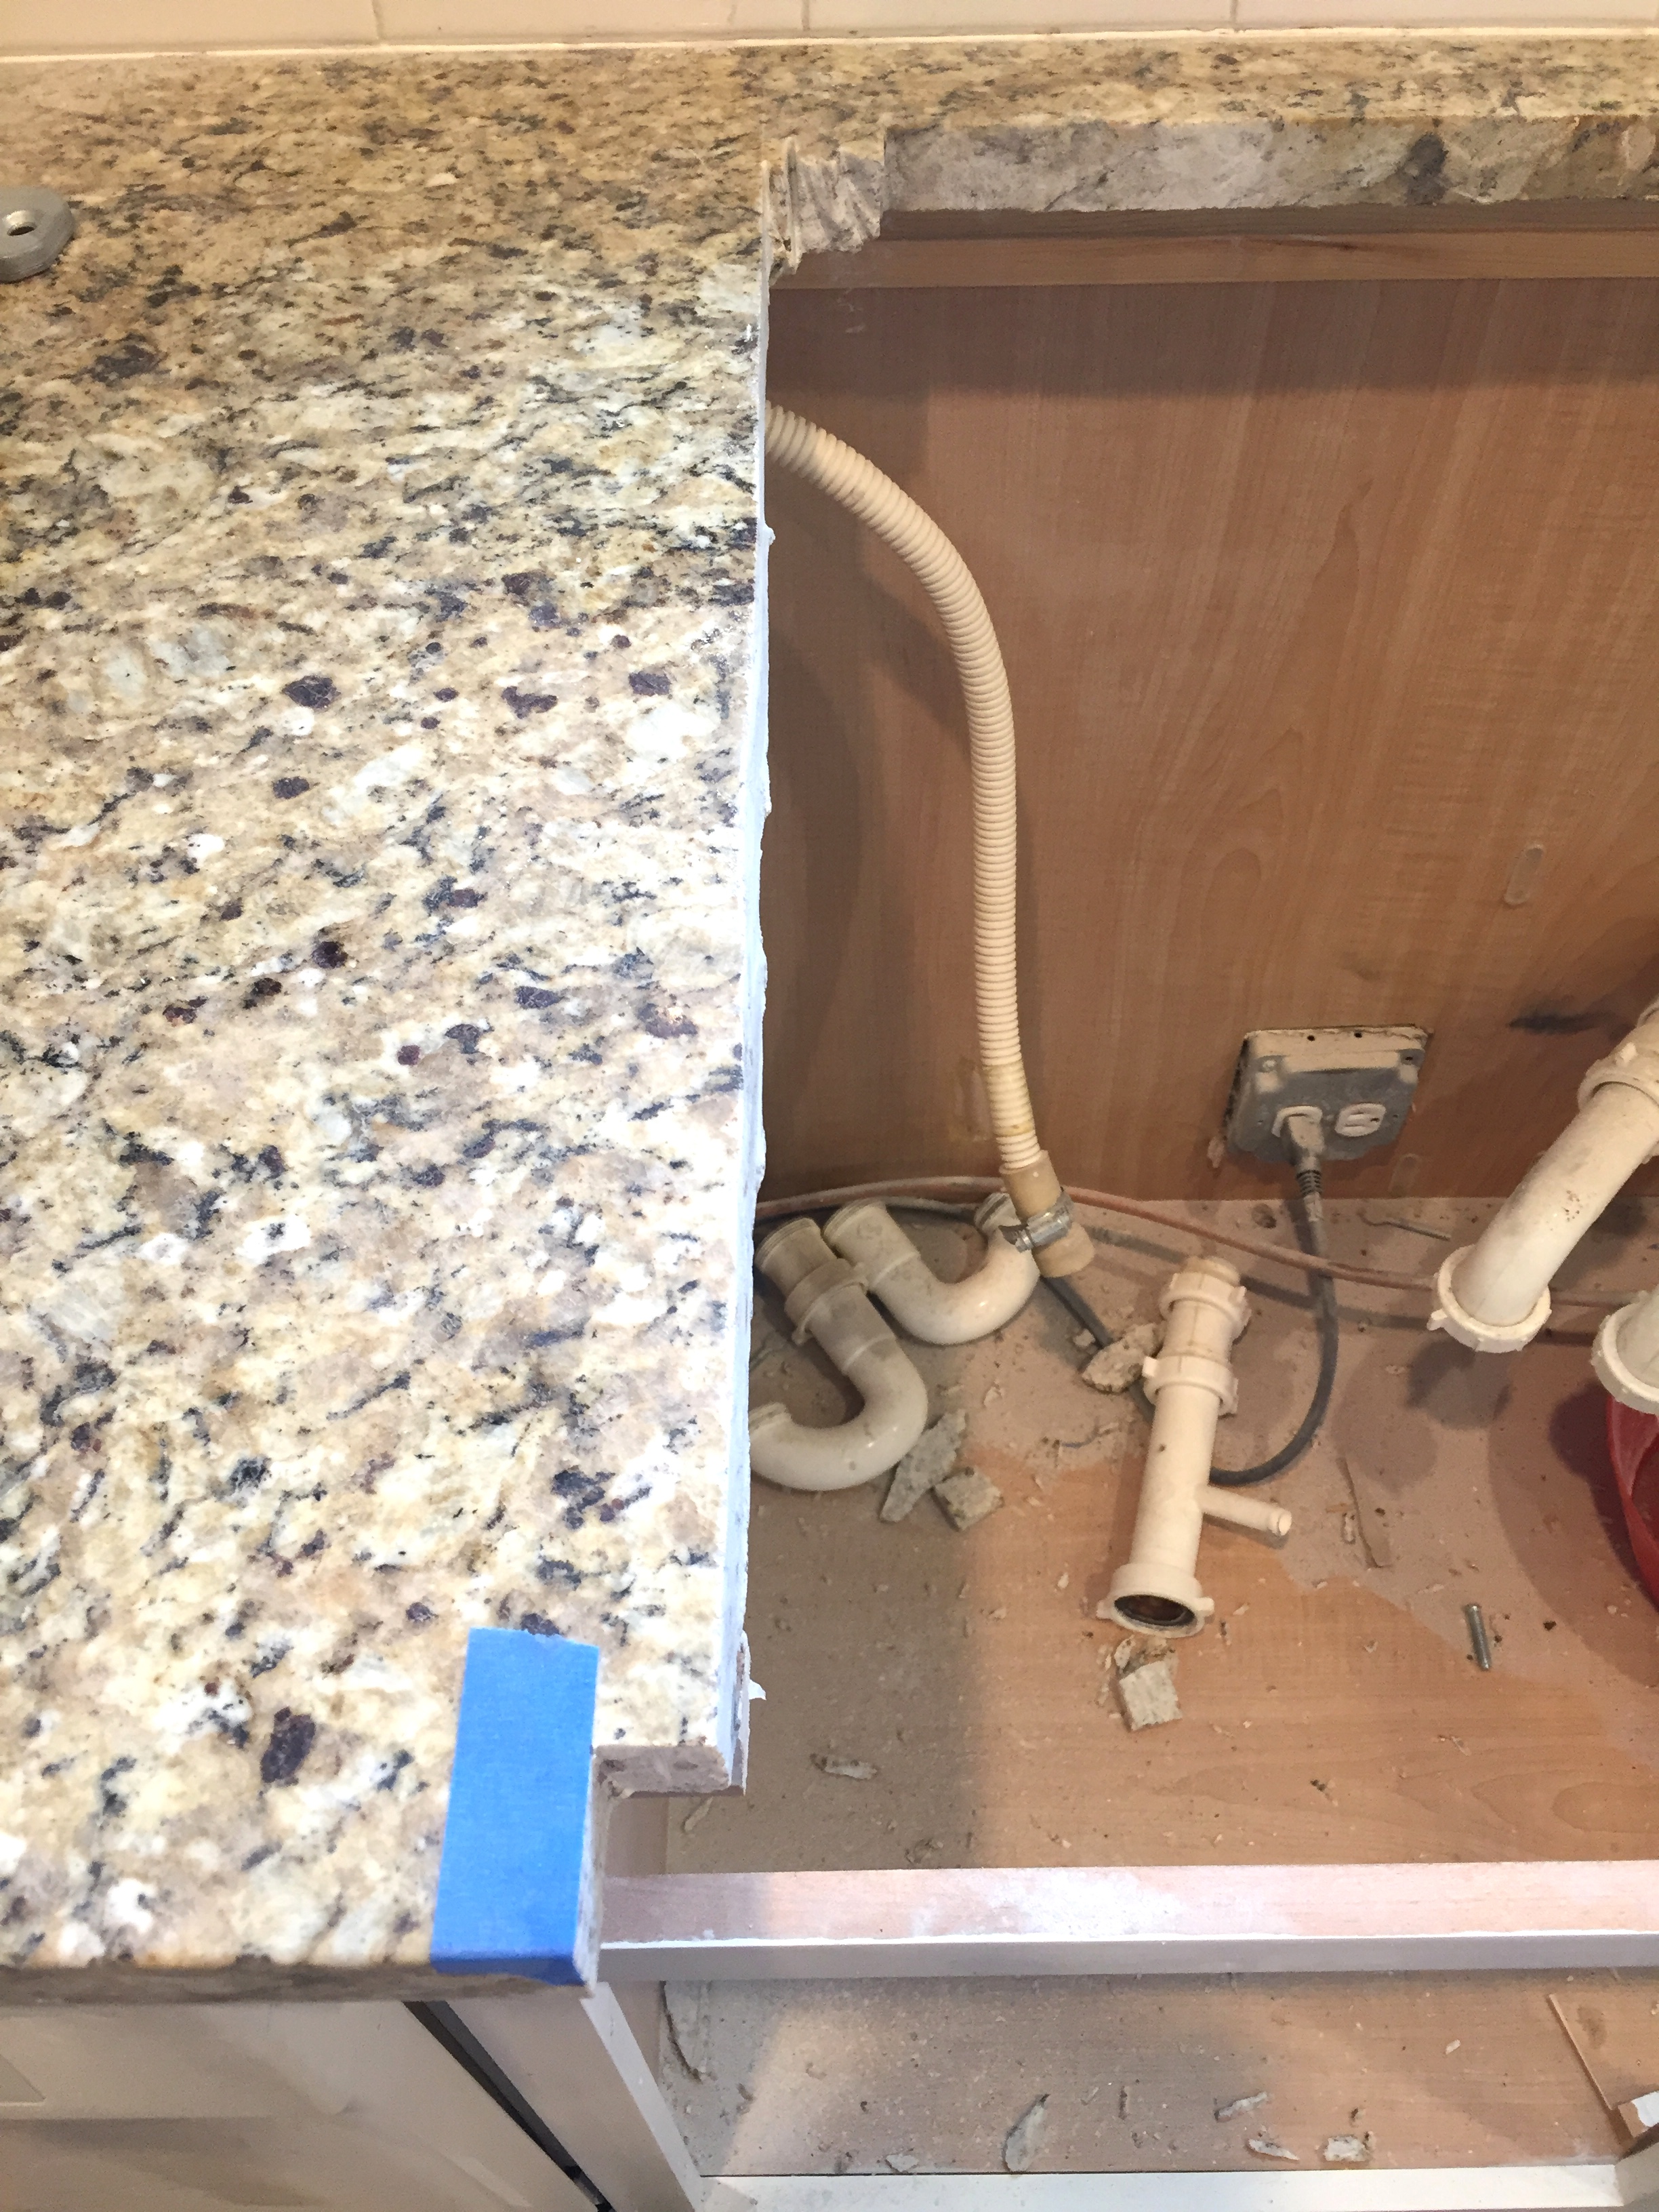
We measured the size of a cut we would need to do. There is over an inch of overhang on the sink so it was okay if the cut wasn’t perfect-which is nice for d-i-y’ers.
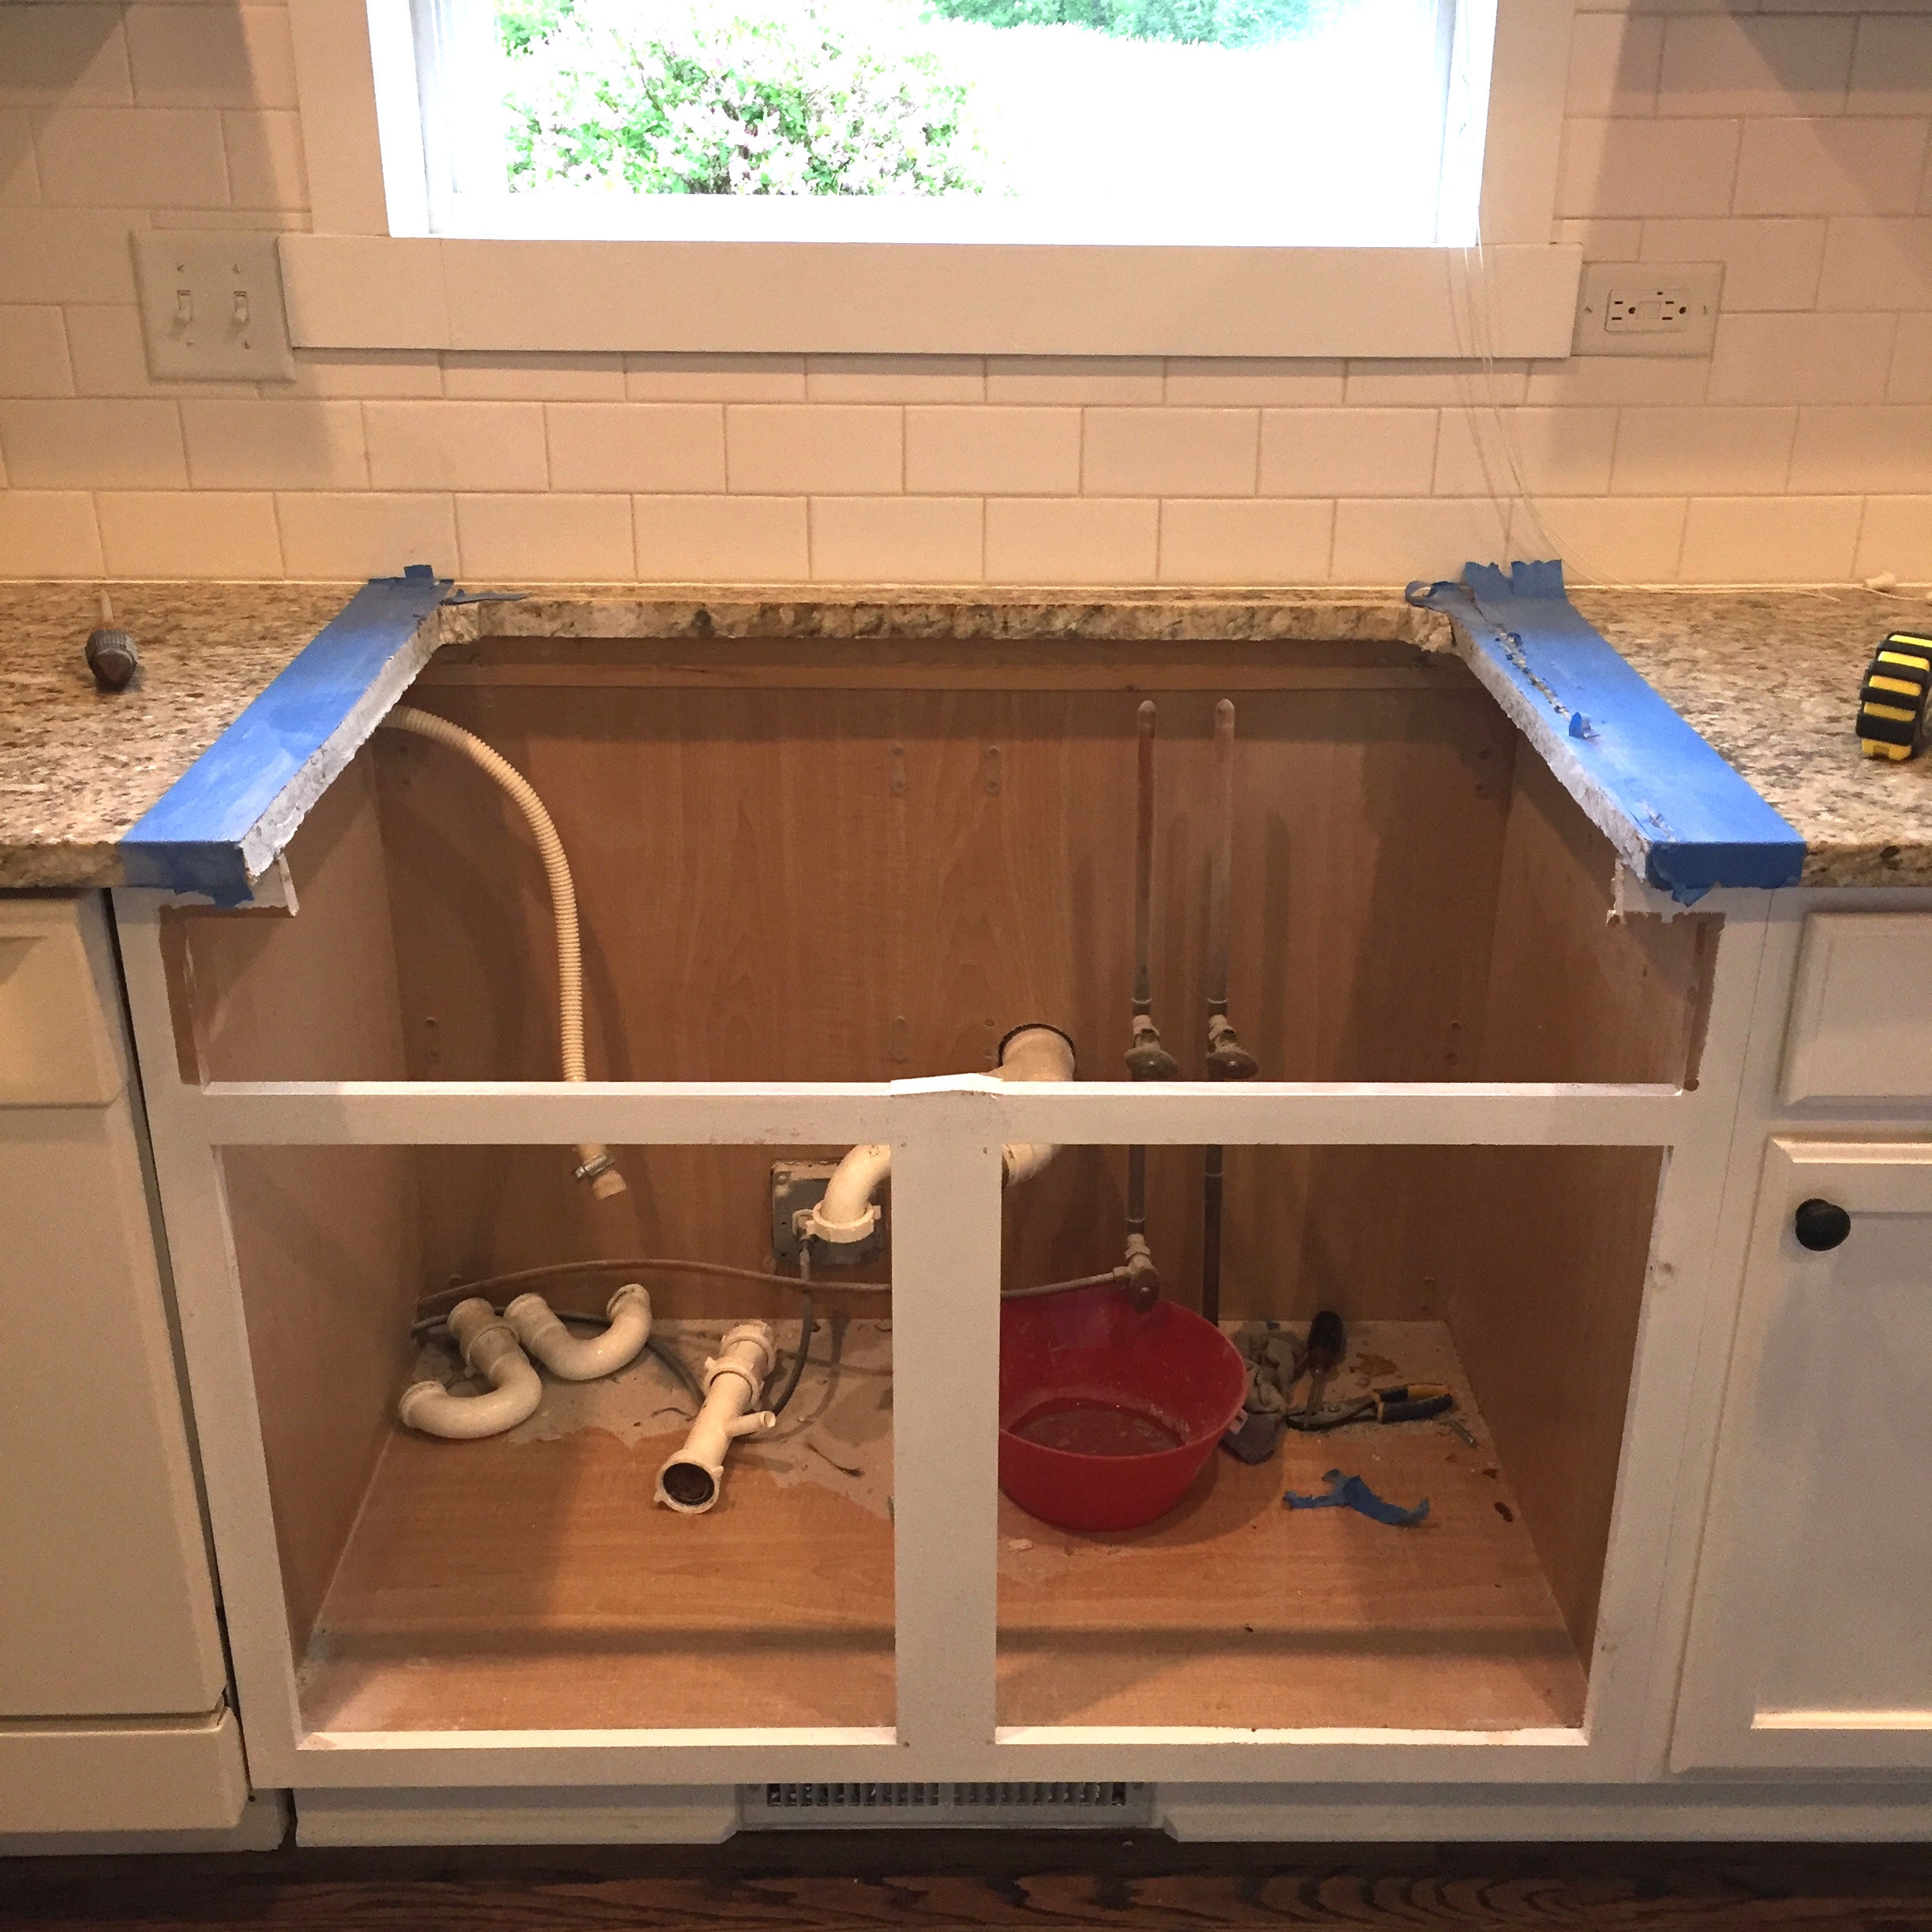
We didn’t have to cut off the back piece because as you will see in the picture of the sink below, there is plenty of room underneath the back of the sink for it to rest on the existing countertop. Which is great because it adds more support for the sink to be held up on three sides. Our granite countertops were very securely supported in the back so we didn’t feel like we needed to add any extra support back there for the sink.
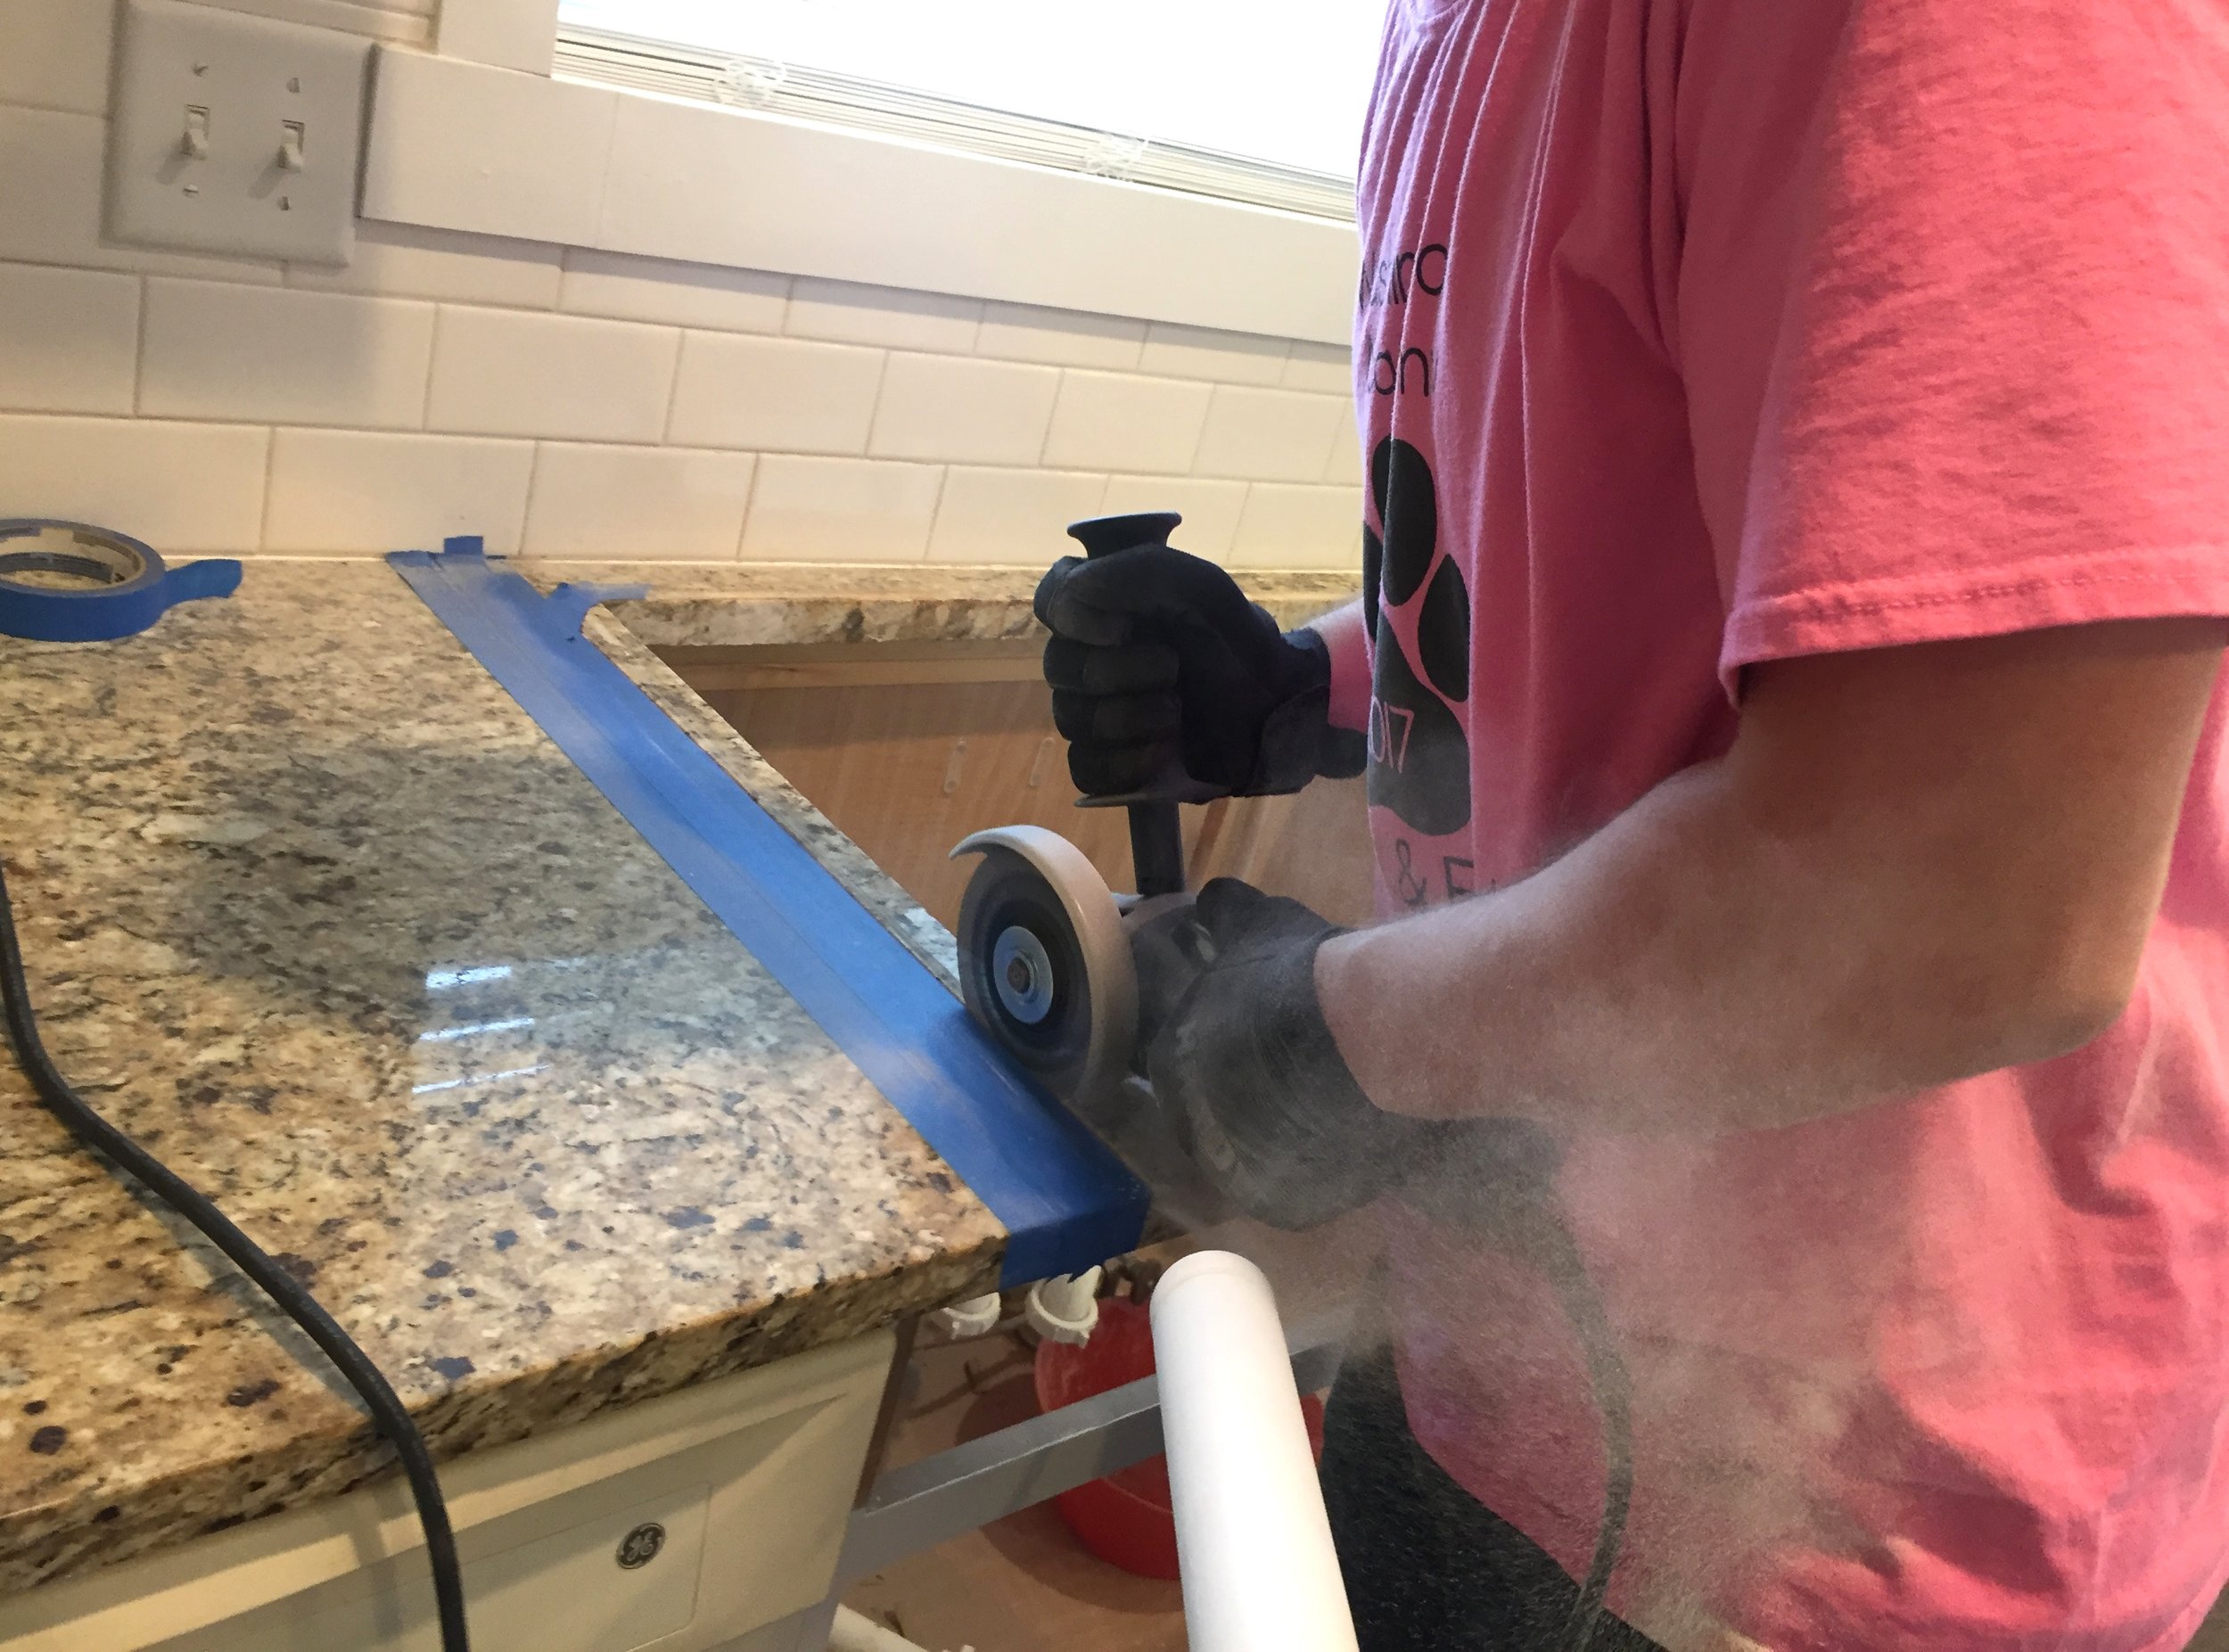
My husband used a handheld diamond blade saw. It can be used wet or dry and we decided since we have hardwood floors in our kitchen we would use it dry so as not to make such a sticky wet mess. I just held the vacuum right behind the saw. It worked pretty well. Make sure to wear glasses, we had tiny pieces of granite flying. And there was still dust on our dining room table I noticed but the dust really wasn’t that bad. Don’t get me wrong it was messy in the kitchen but nothing that couldn’t be vacuumed or swept up. My husband did have to give the saw a break so that it wouldn’t burn out the motor. But it cut through the granite just fine.
And no cracks in the granite yay!
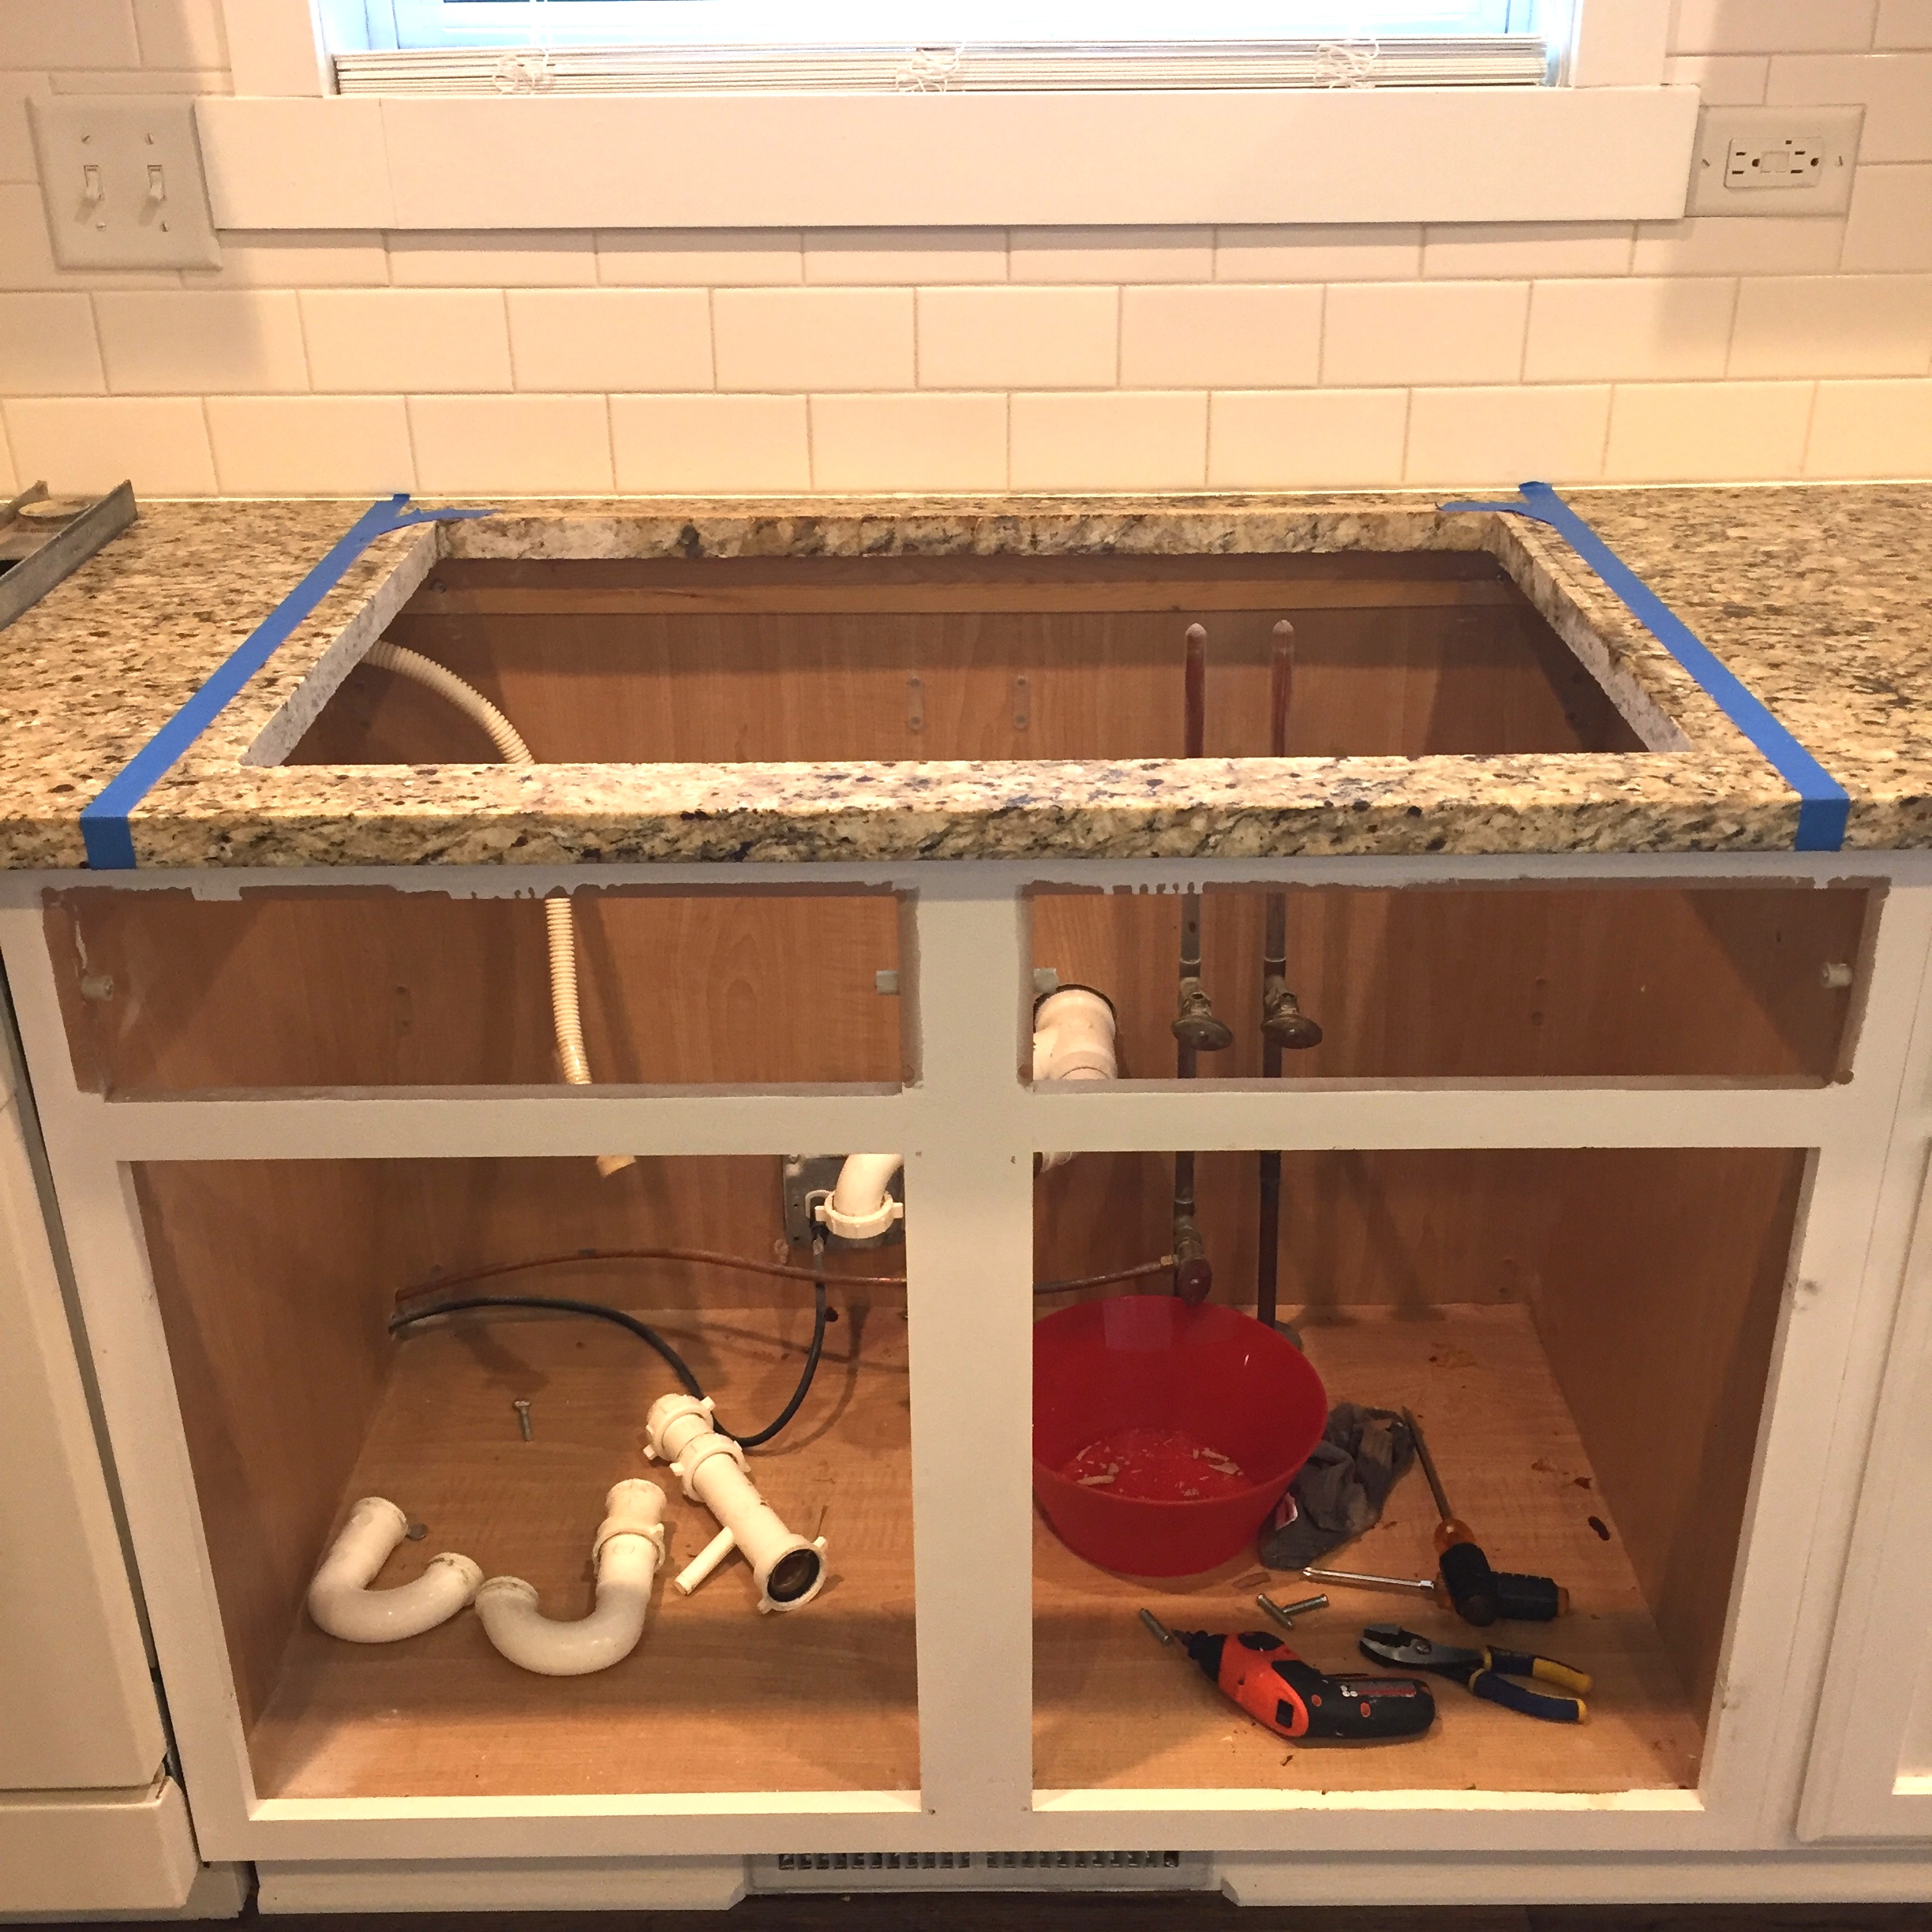
We had to cut out a little notch in the front for the front of the sink. You can see the edge line of the granite and back little corner isn’t perfect but you don’t see it at all so it’s fine 🙂
Make sure you measure correctly before cutting the granite I can’t reiterate that enough! We were constantly lifting the sink to test out the size, then cutting a little then testing it out. We wanted to make sure we were leaving as much of an edge for the sink to sit on as possible. Then once you place the sink, you will be left with some cabinet patching to do. You also may need to add in some under mount supports. The sink comes with a couple brackets you can attach to the insides of your cabinets. But each sink area is different and it’s possible that the counter strength is enough to hold the sink.
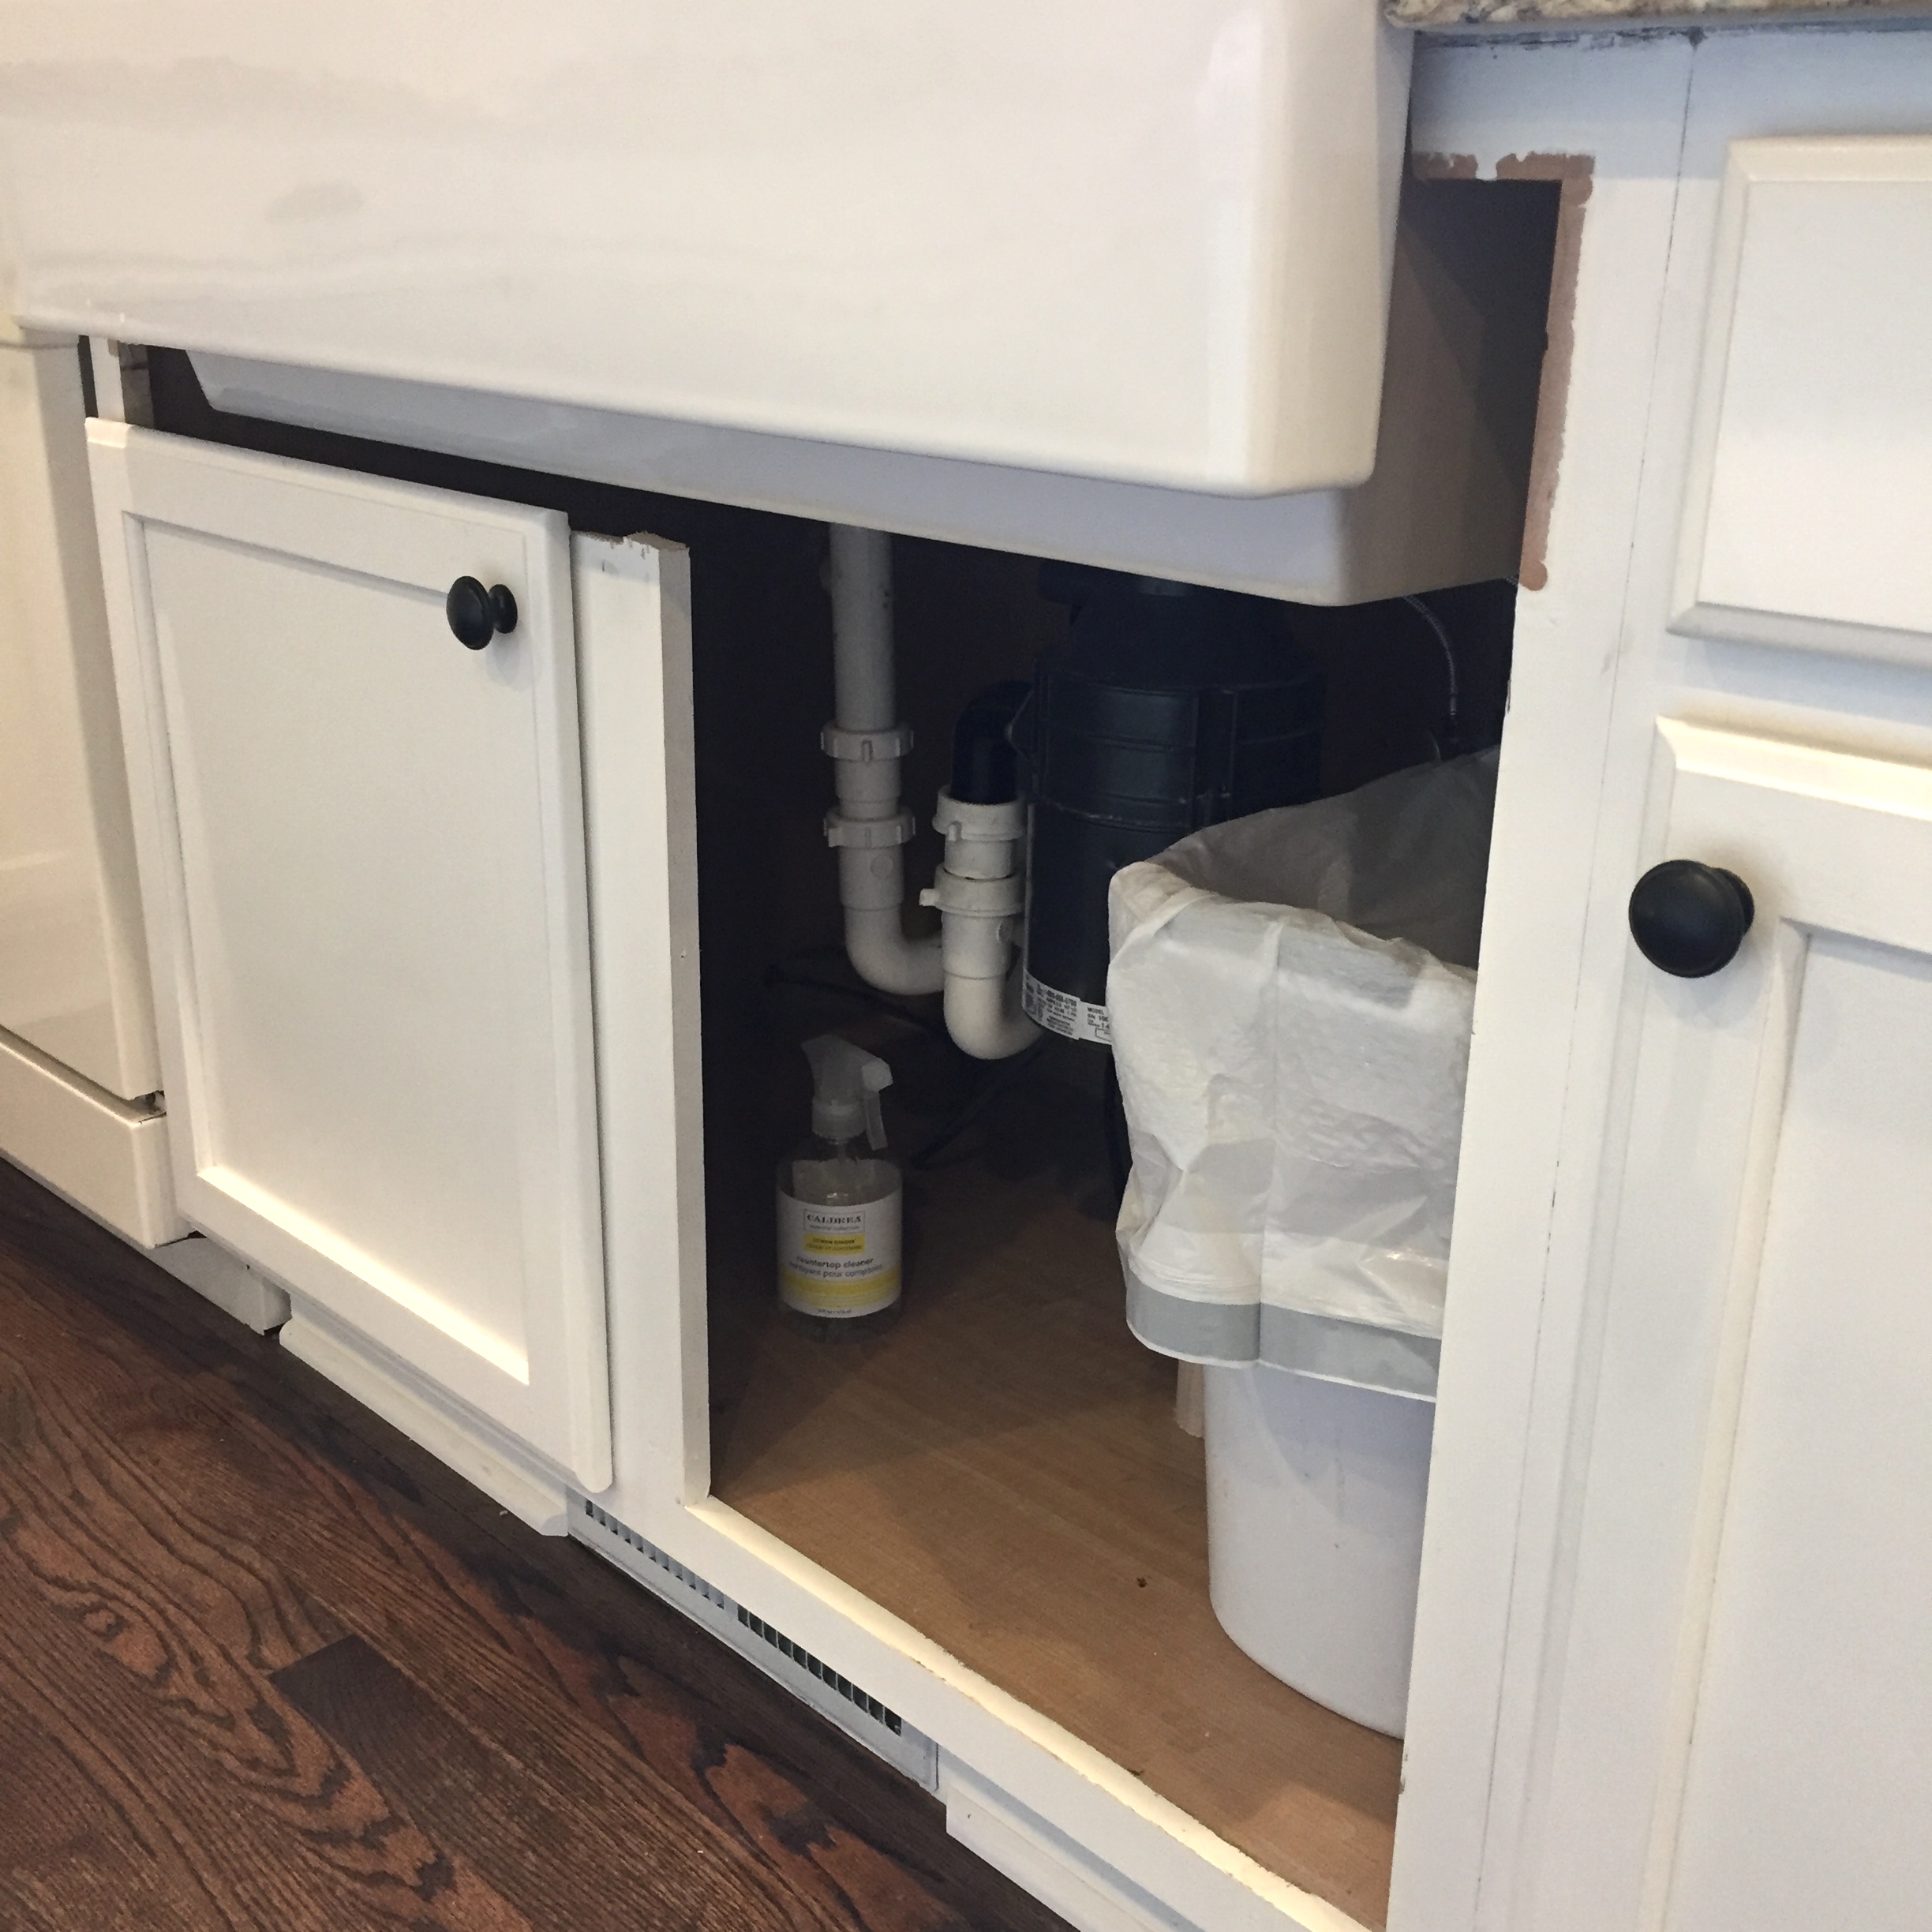
We slowly added pieces of wood around the sink until we got it to look how we wanted.
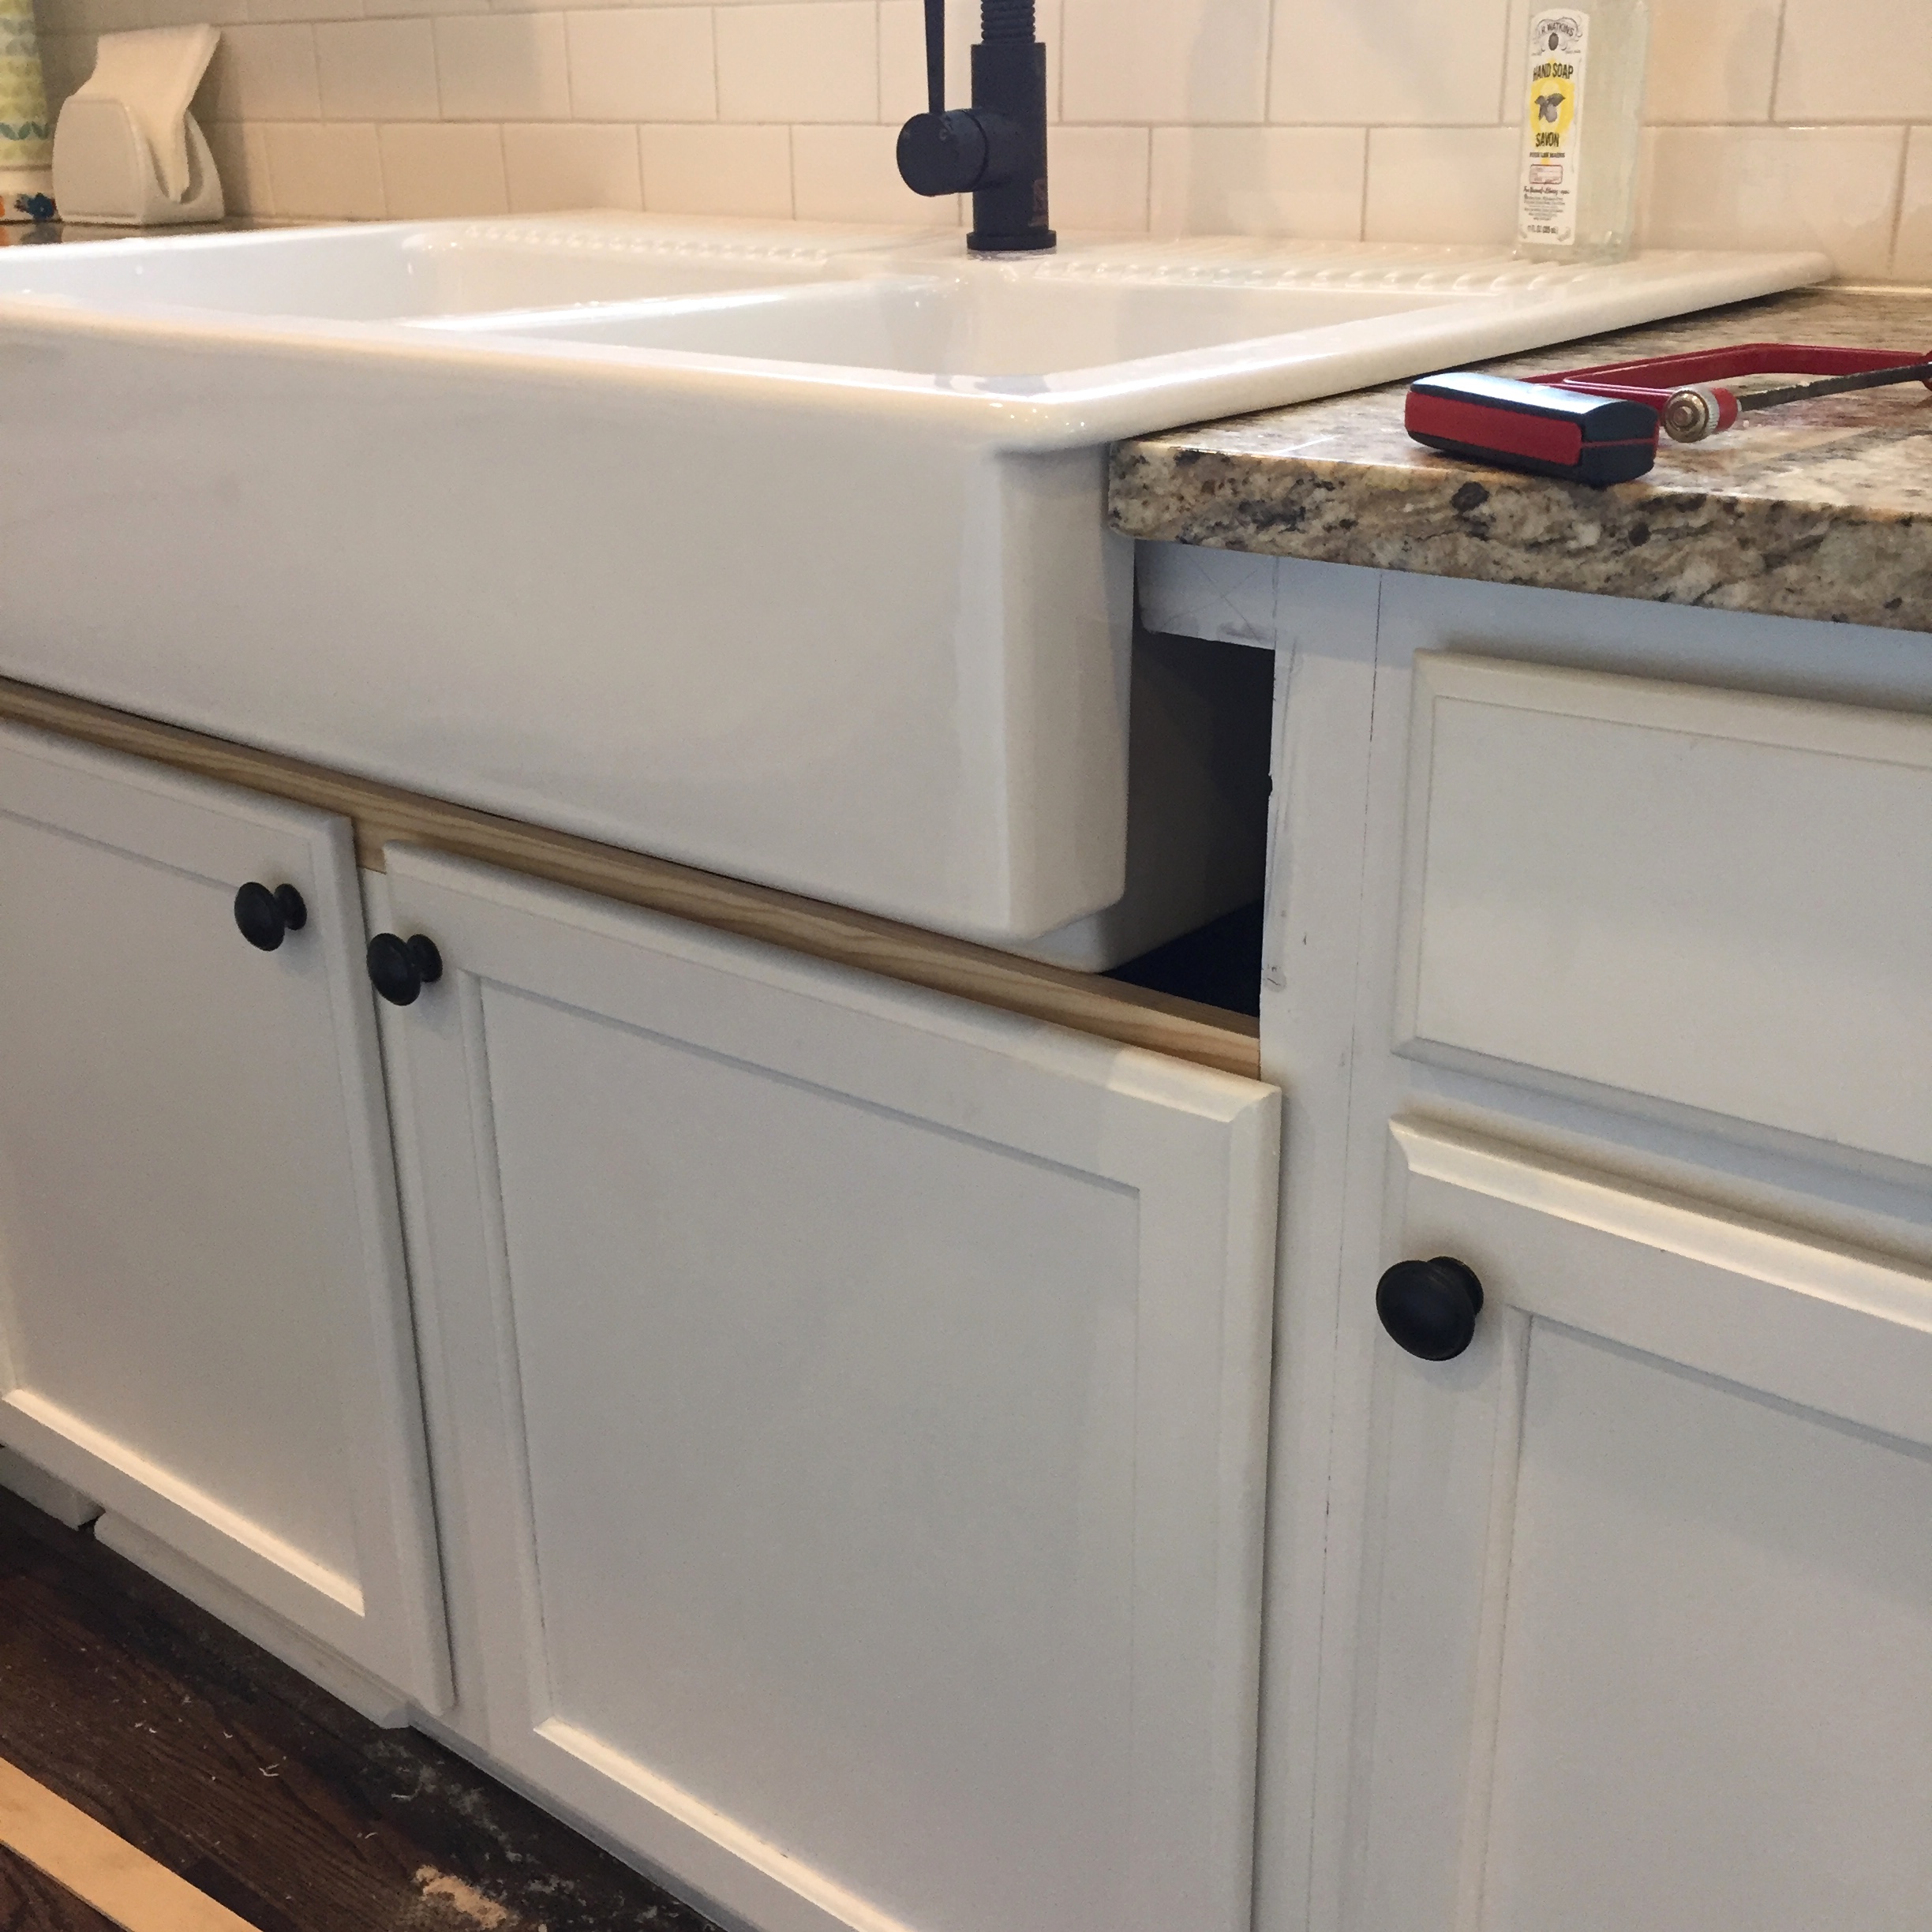
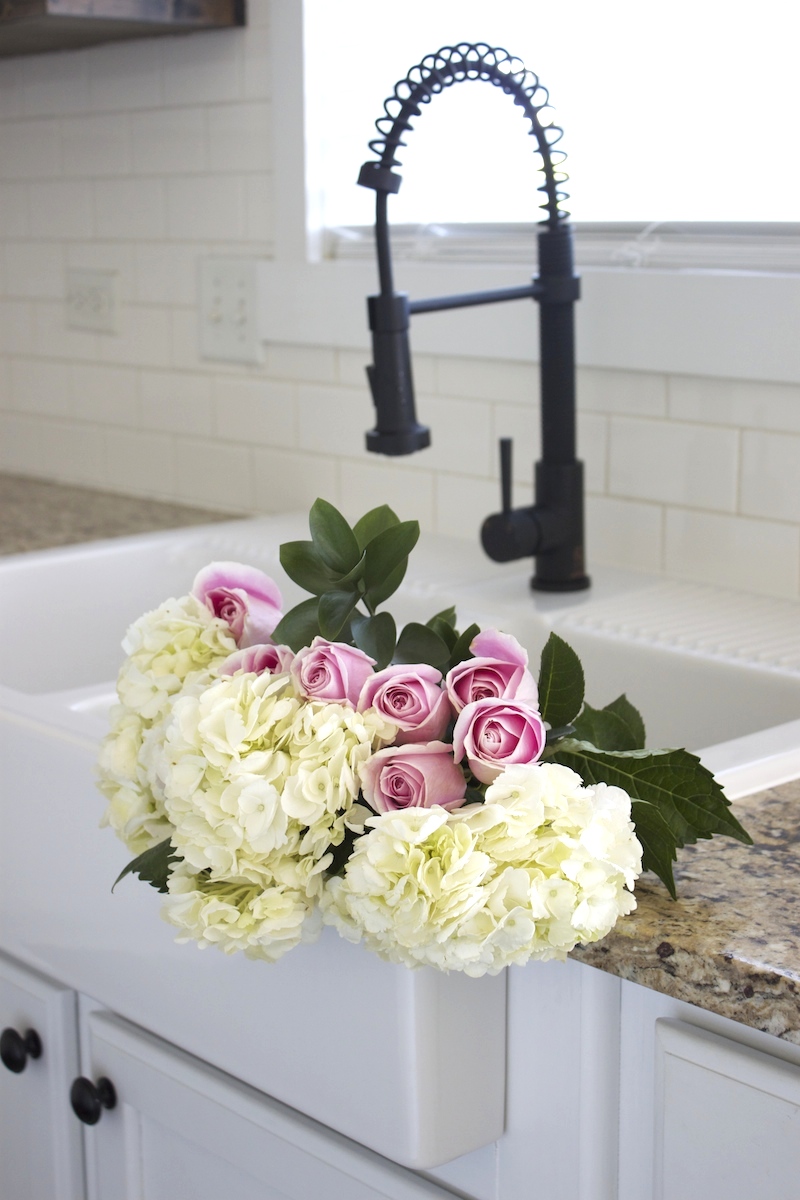
We installed THIS faucet. I wanted a black finish and also wanted a pull down sprayer. I think the faucet is cool but at first was a little nervous because it seems so low, so if I have a huge bowl or something it’s tough to fit it under the water. So I just use the sprayer. The sink is so much bigger than my last sink-and it hides the dishes so much better! 😉

