
Guys! I painted my tile floor! And I’m giving away $50 to Cutting Edge Stencils to one lucky reader over on my IG so go here to enter.
I am in the middle of making over my master bathroom and doing so on a budget. We have a few other projects we hope to finish in the next few months including new carpet in our whole upstairs, getting an ideal air purifier I read about yesterday and gutting our mudroom. Since those projects require more cash… I decided I would try to makeover our master bathroom cutting costs wherever possible. I’ll have a full makeover posted in the next few weeks when it’s totally completed, already it looks like a totally difference space. I can’t wait to show you the before and afters!
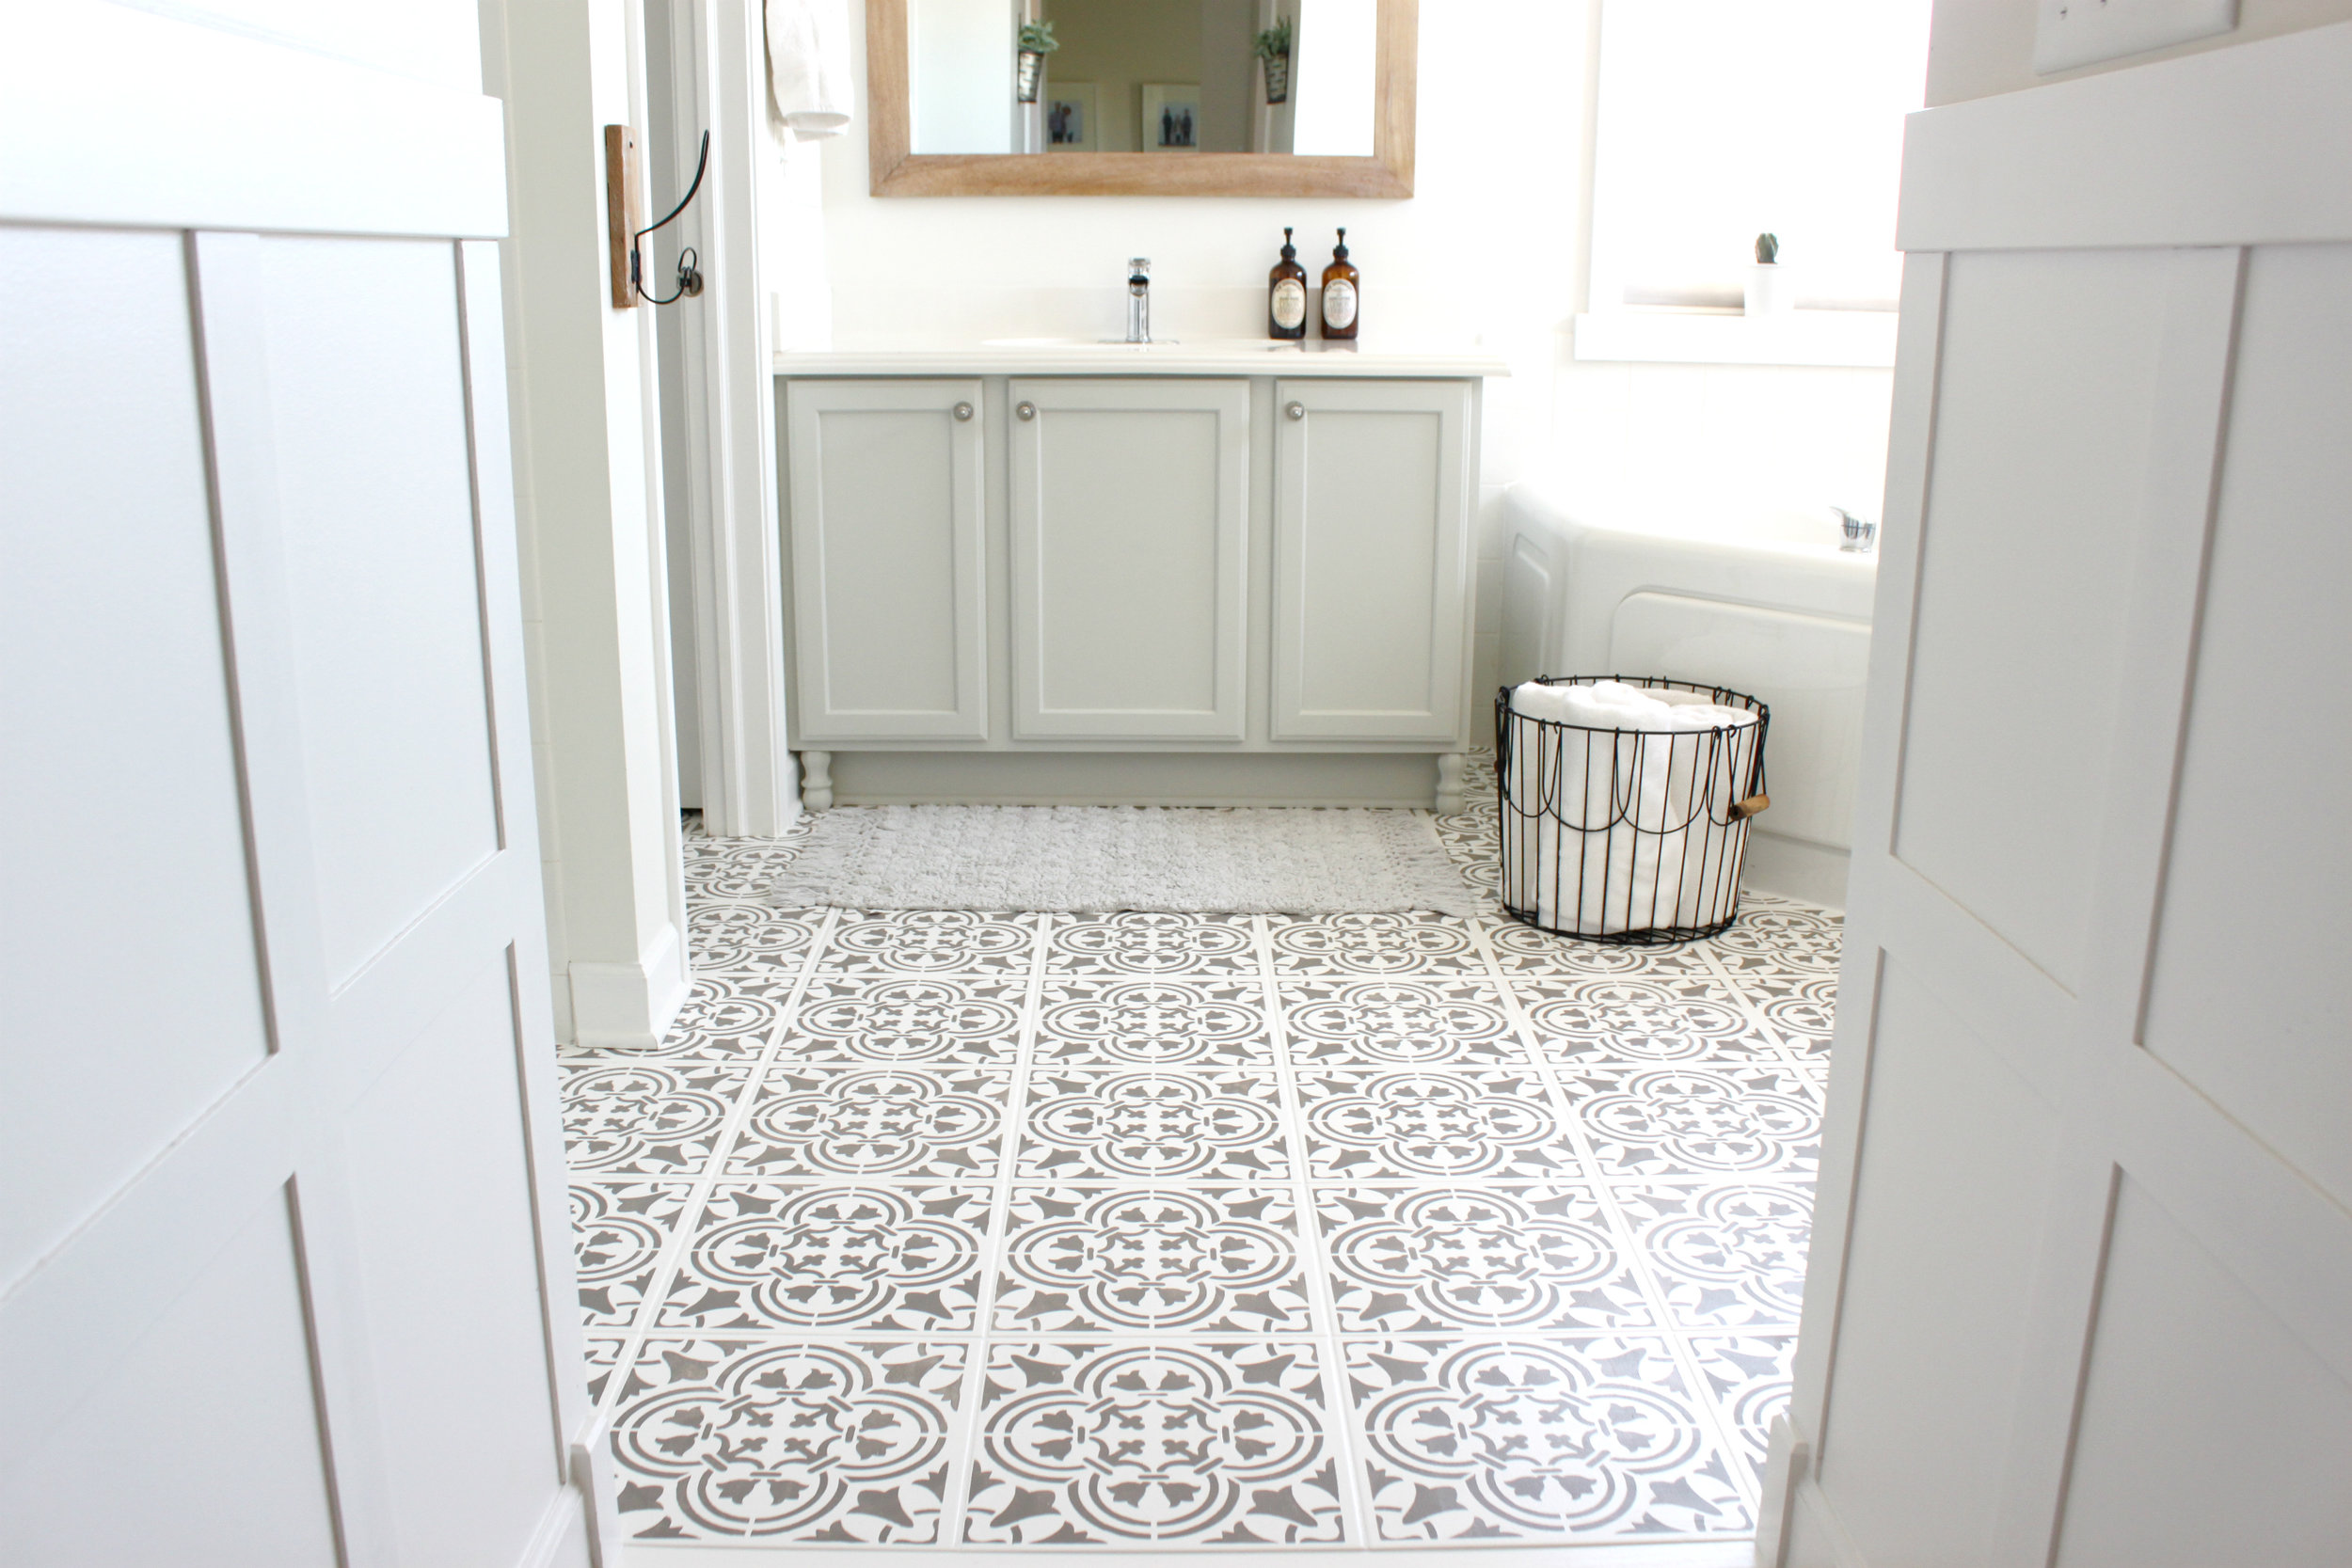
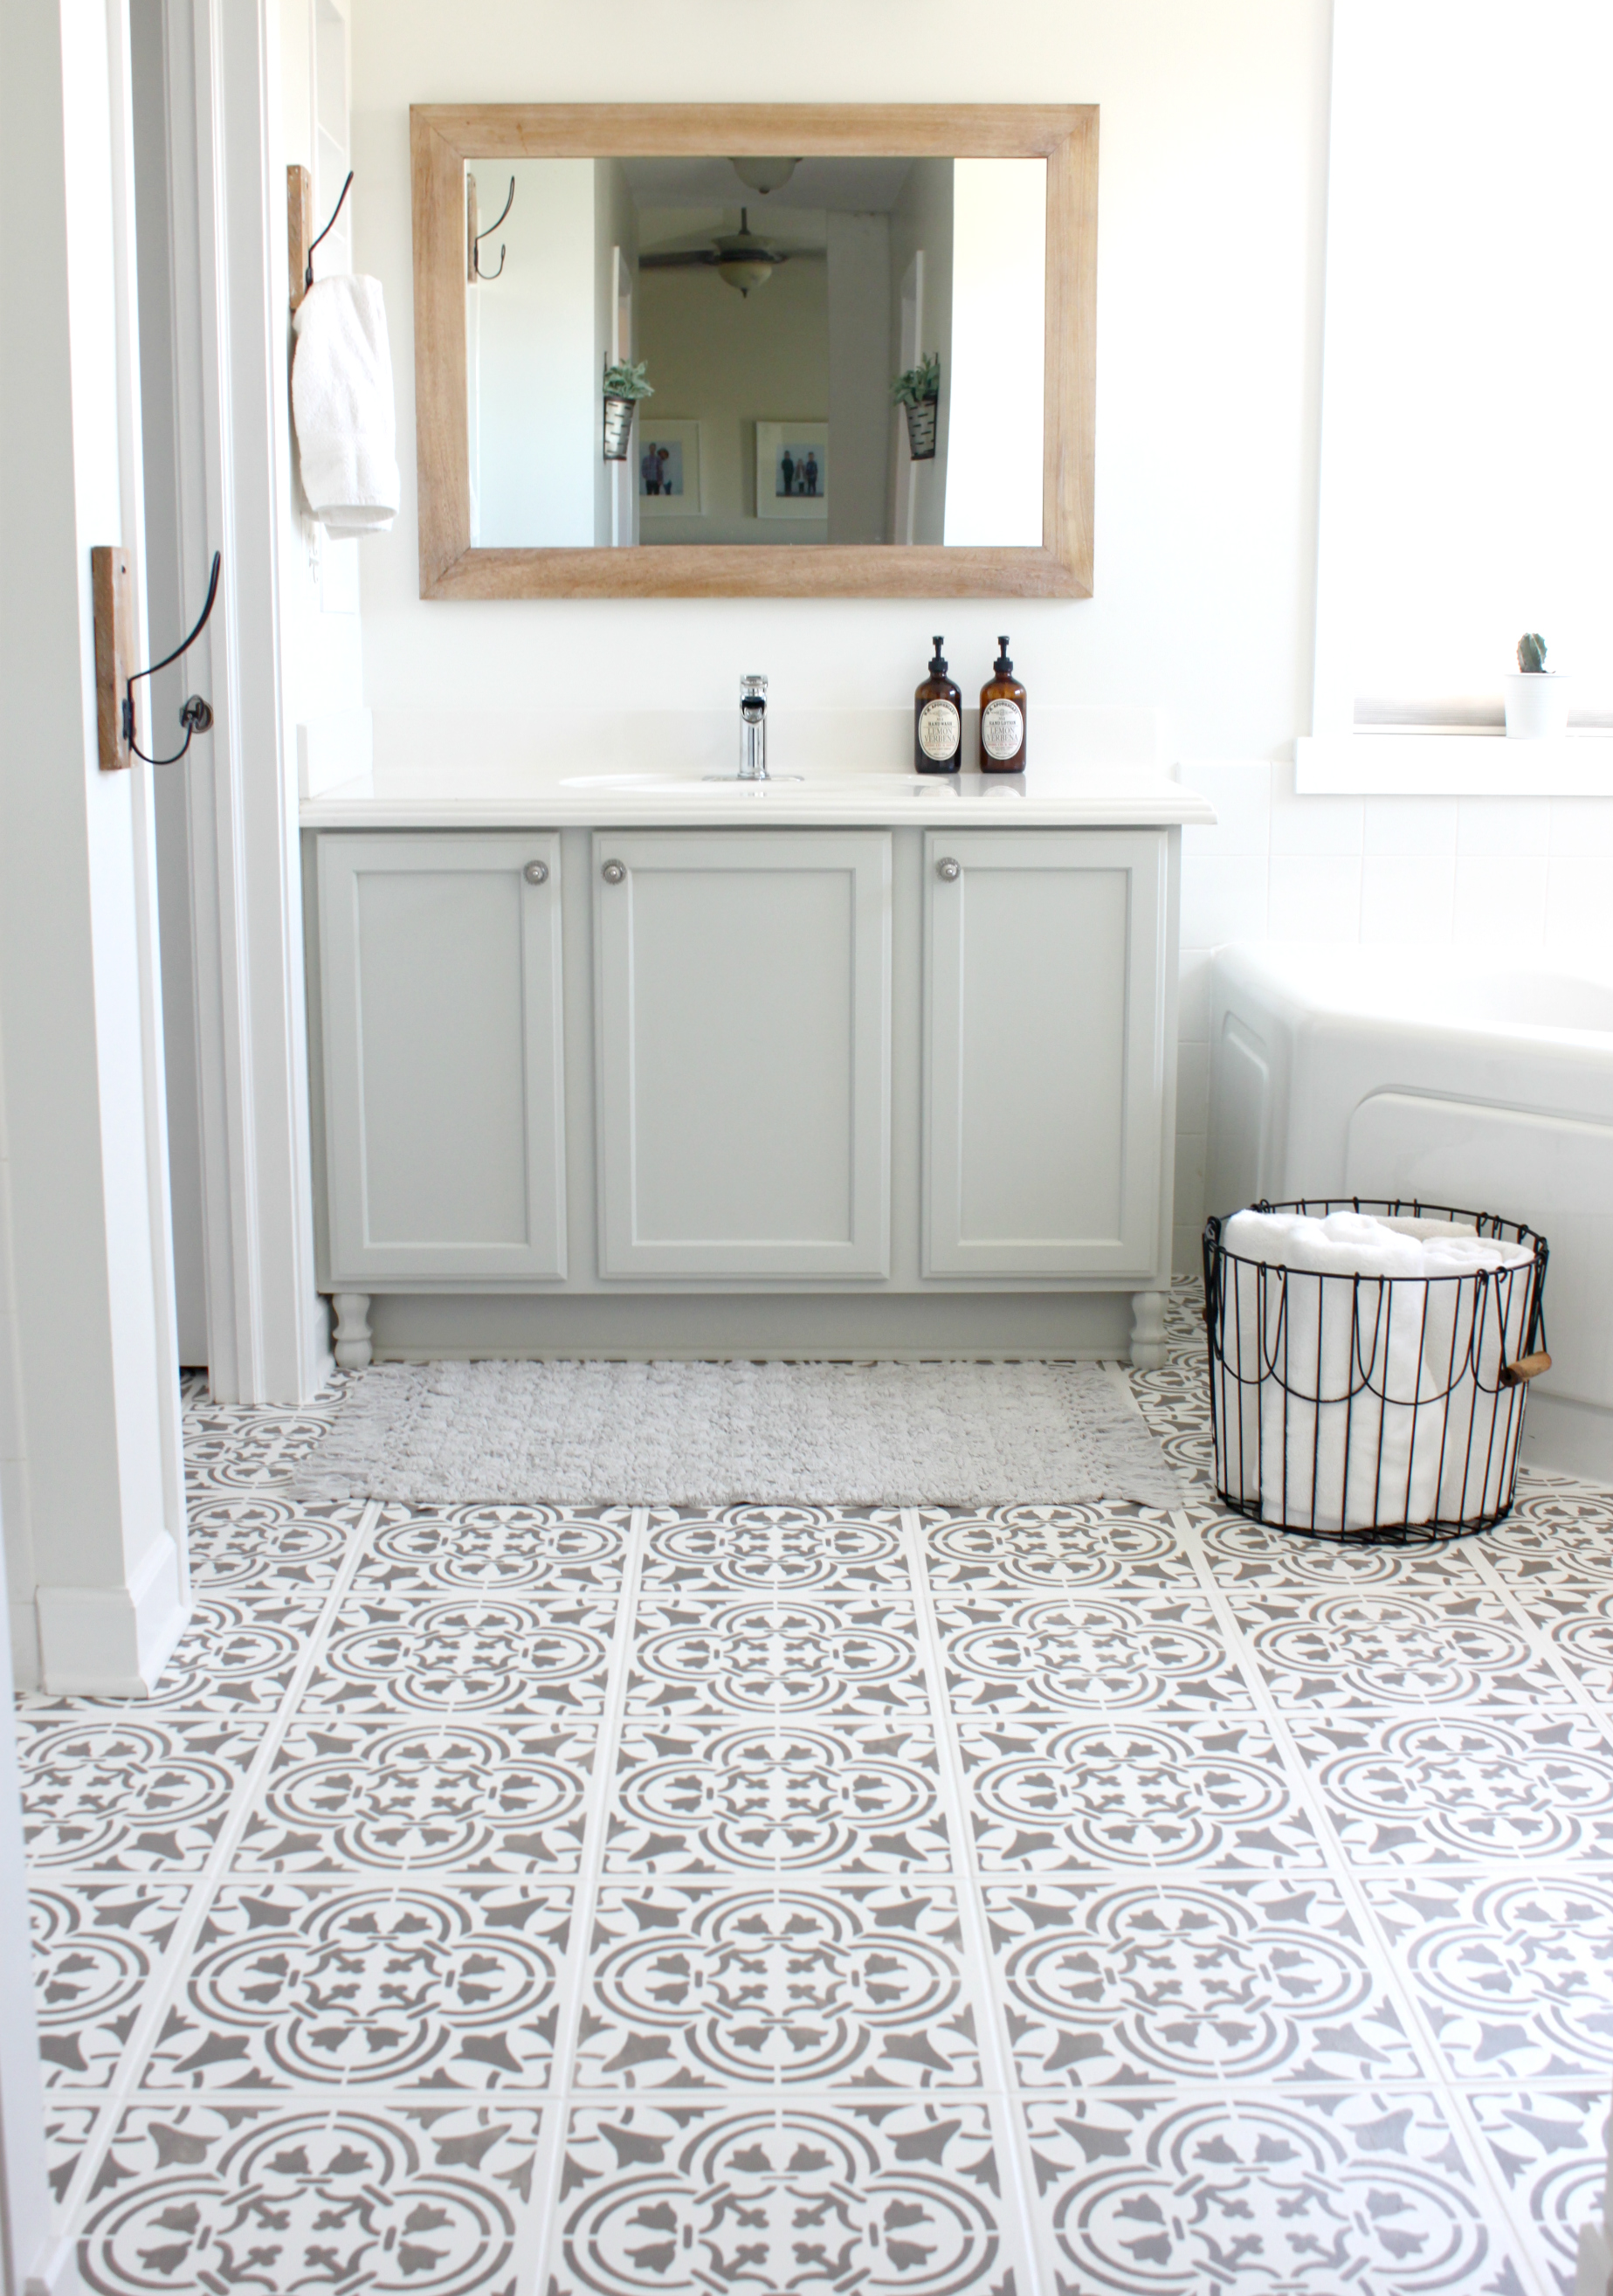
But for now I want to show you how I painted my tile floor. I have seen other people do it online so I had full confidence that I could do it too. Right now I have 12 x 12 tiles in there and really didn’t want to have to rip them up. It would have easily cost over $1,000 to have it ripped up and new tile installed. So instead I painted it and spent about $100. I decided to paint it white because I wanted it lighter, as opposed to painting the floor grey and the stencil white. I used THIS stencil from Cutting Edge Stencils. I thought it was a beautiful pattern. I chose size large and that was perfect for my 12 x 12 tiles. There was a little extra space around each stencil and I thought I could paint the grout lines grey but in the end decided to just leave the extra white space in between the tiles.
H O W T O P A I N T Y O U R T I L E D F L O O R
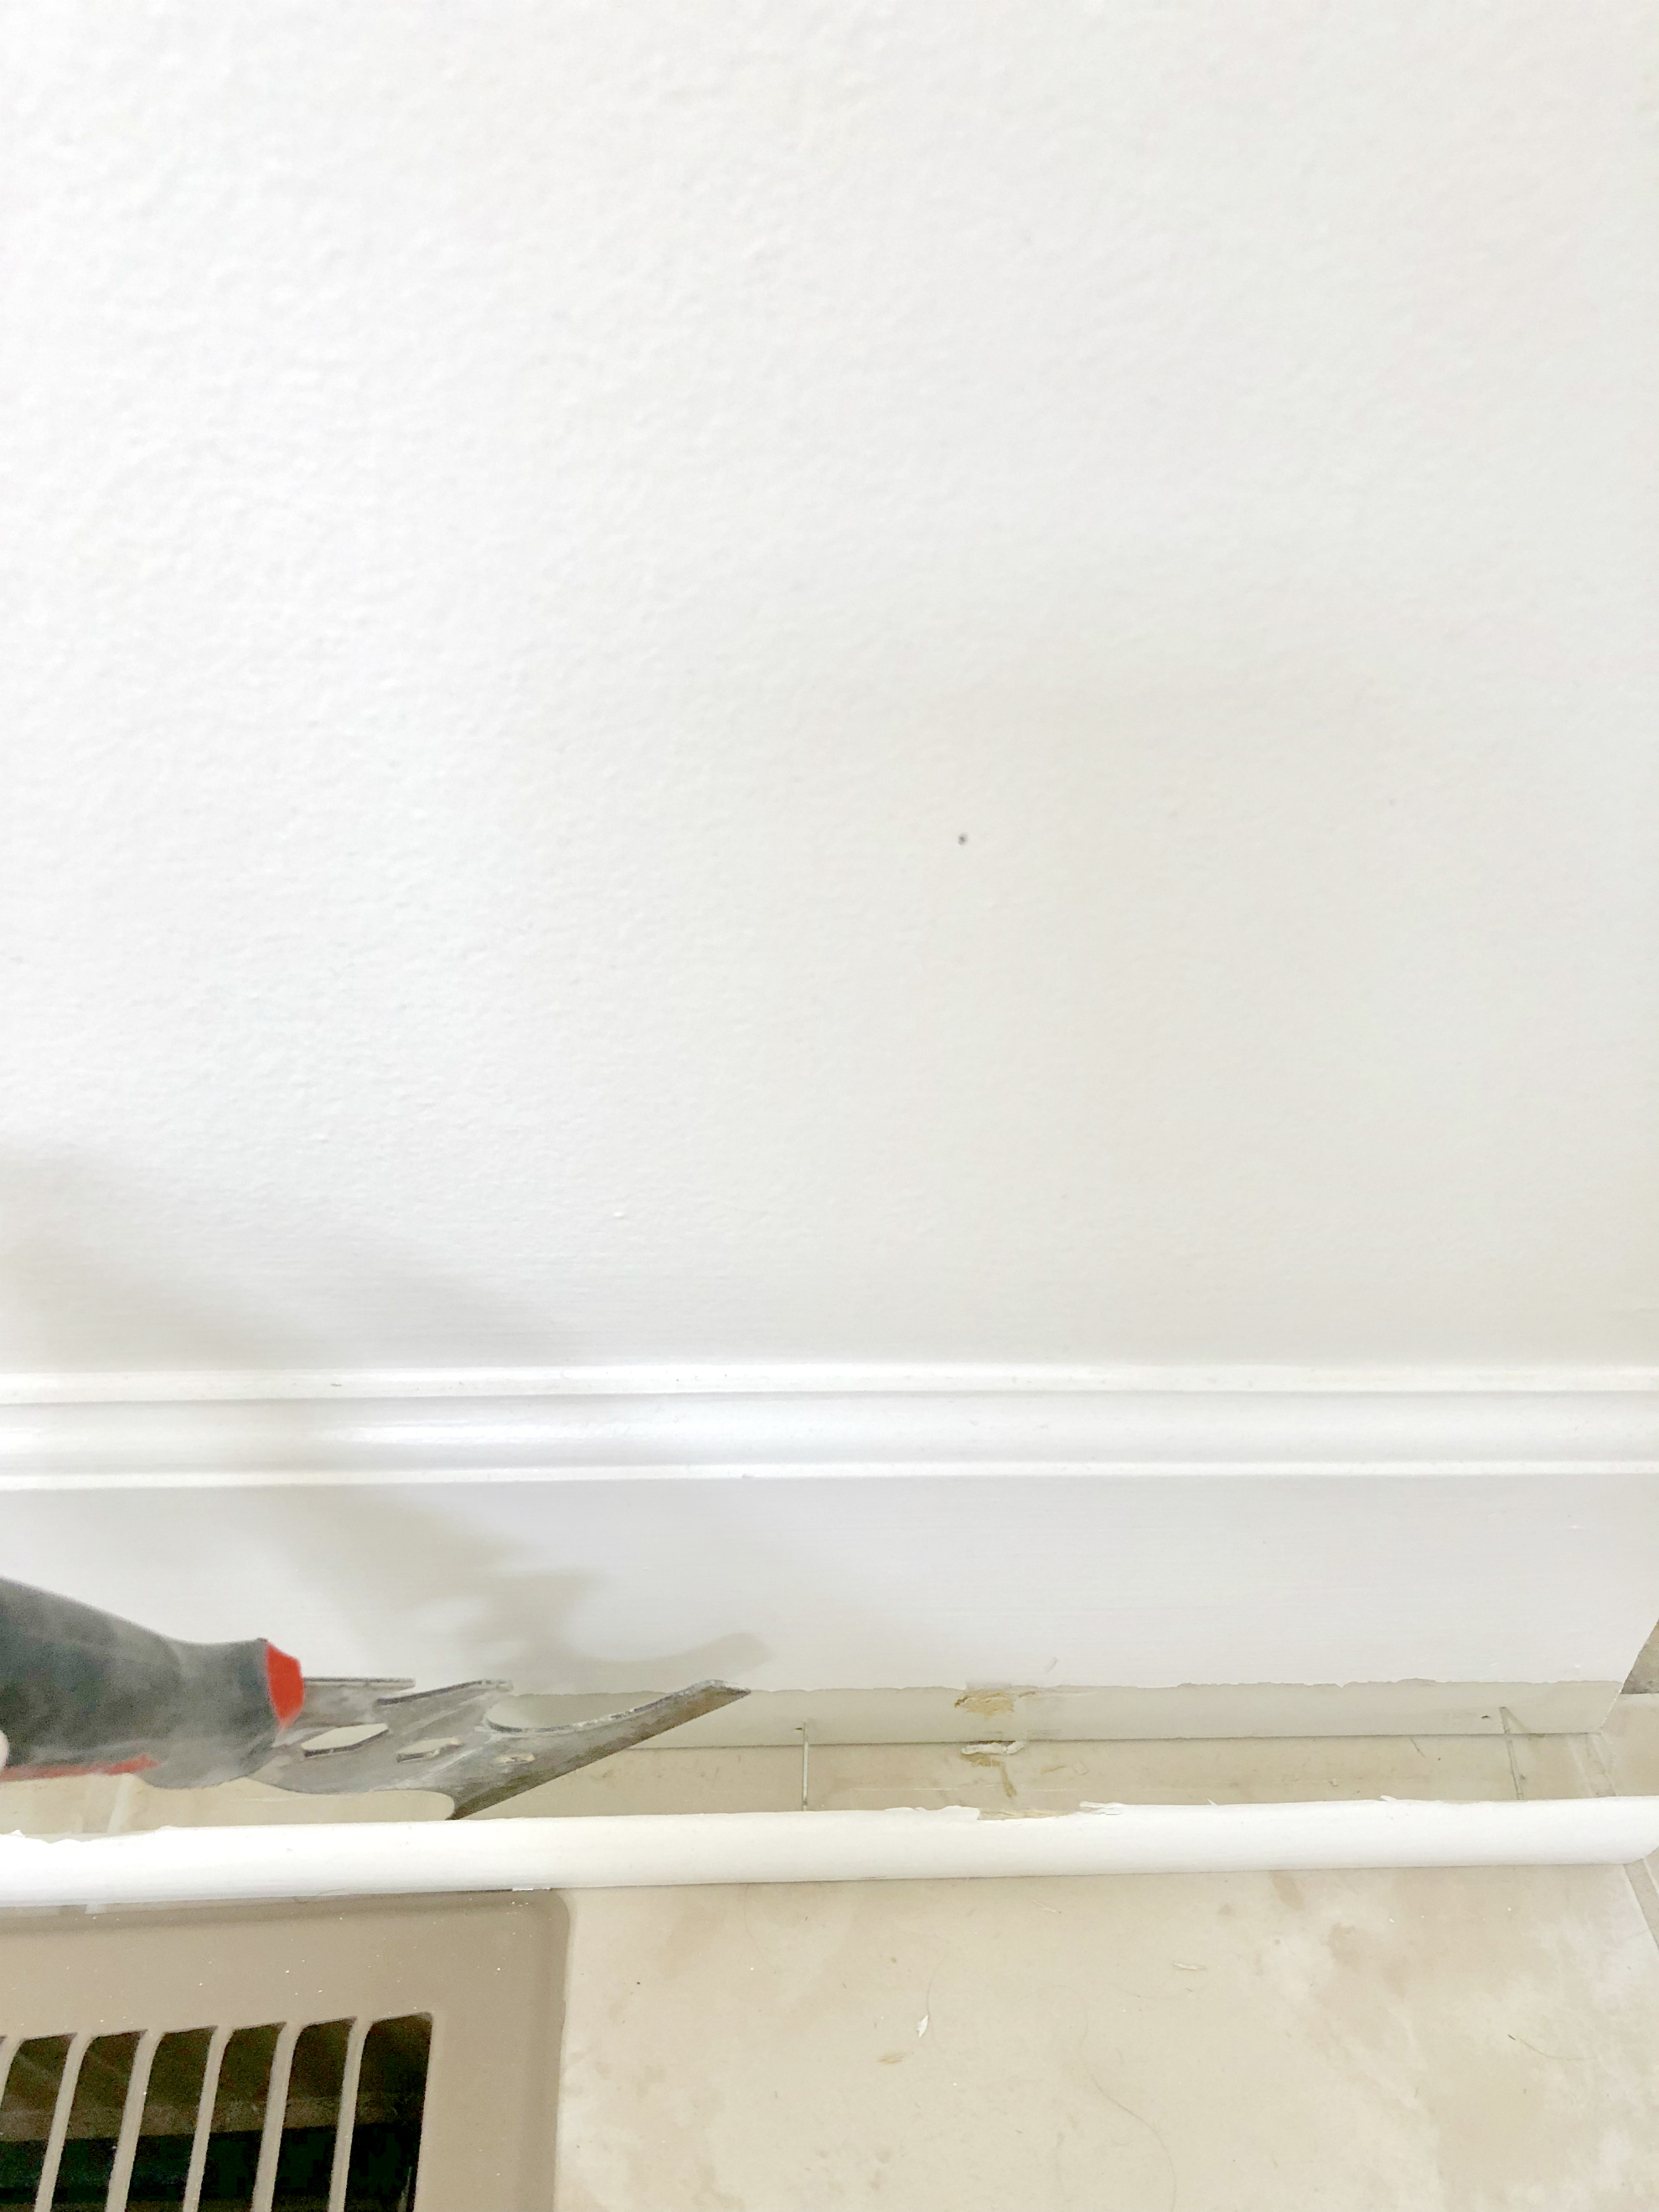
1. Pull off your quarter round and floor vents.
2. Thoroughly clean your floor.

3. Paint your floor with primer (I used a quart of Behr primer and had it tinted to Polar Bear white) and did two coats.
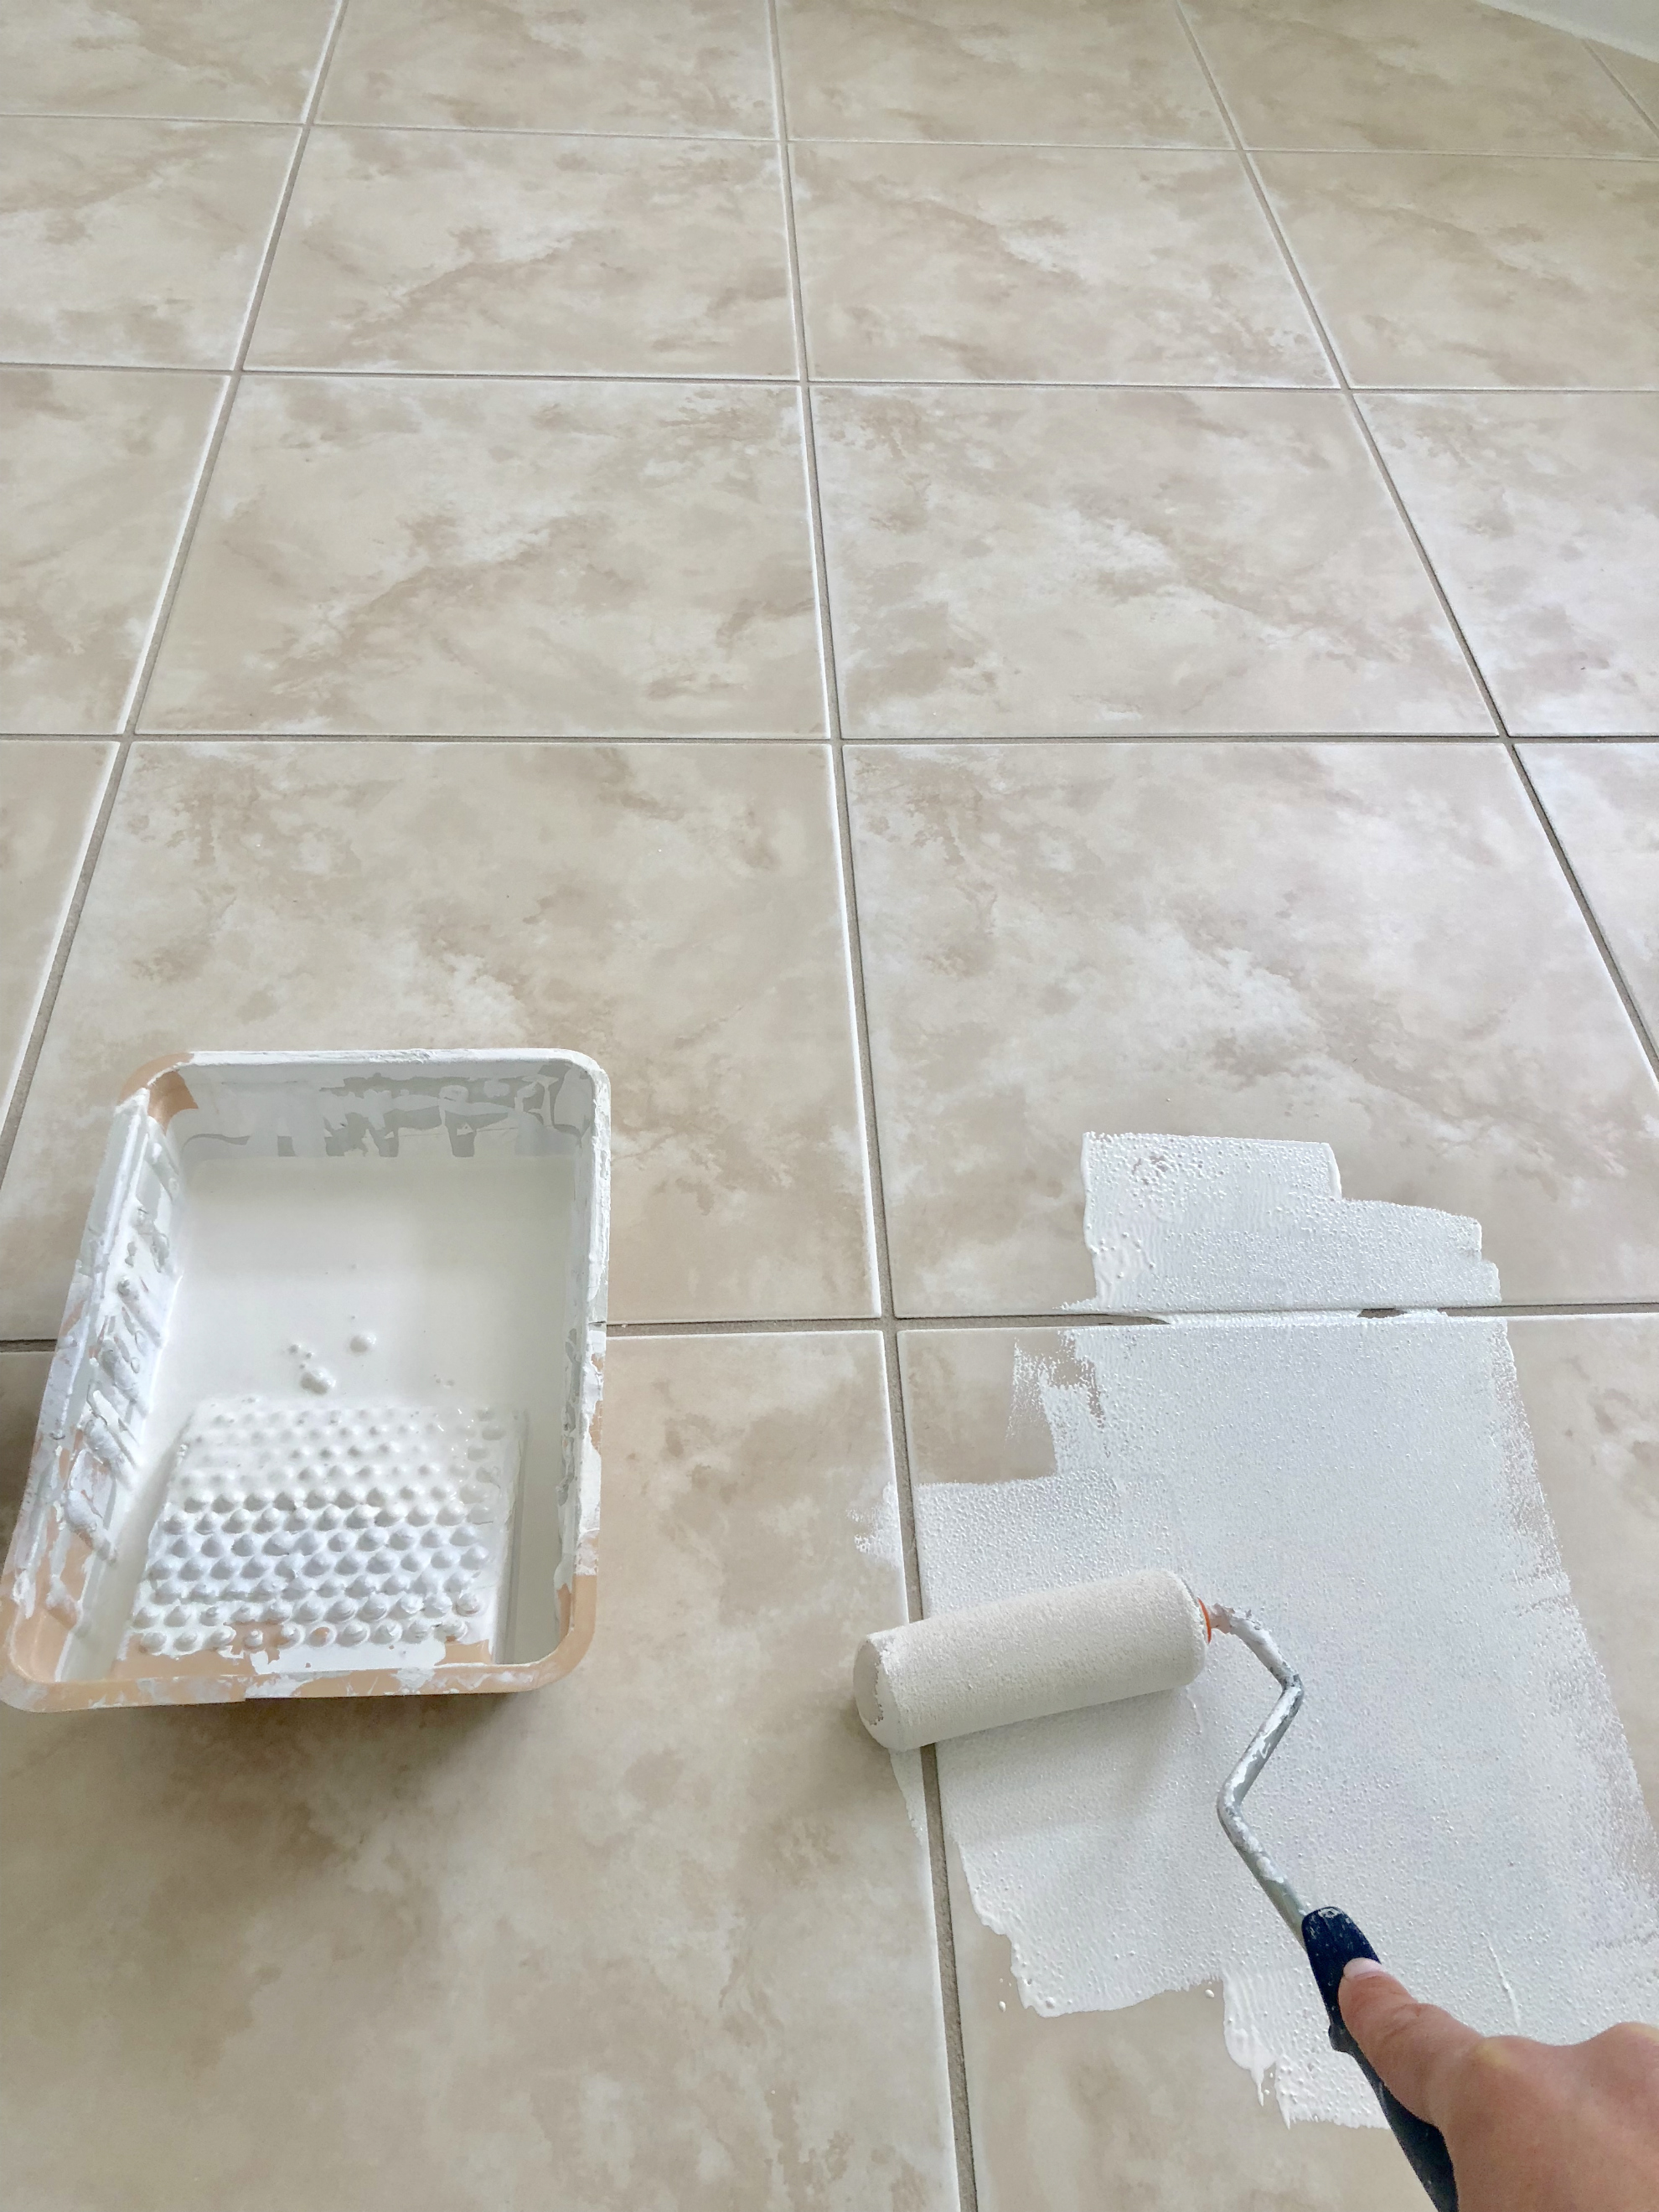
4. Paint your floor with regular latex paint. I did two coats of Behr Polar Bear white paint.
5. Spray a thin coat of spray adhesive to the back of your stencil I used THIS stencil, and place your stencil. (I sprayed the adhesive about every other or every third time using it).
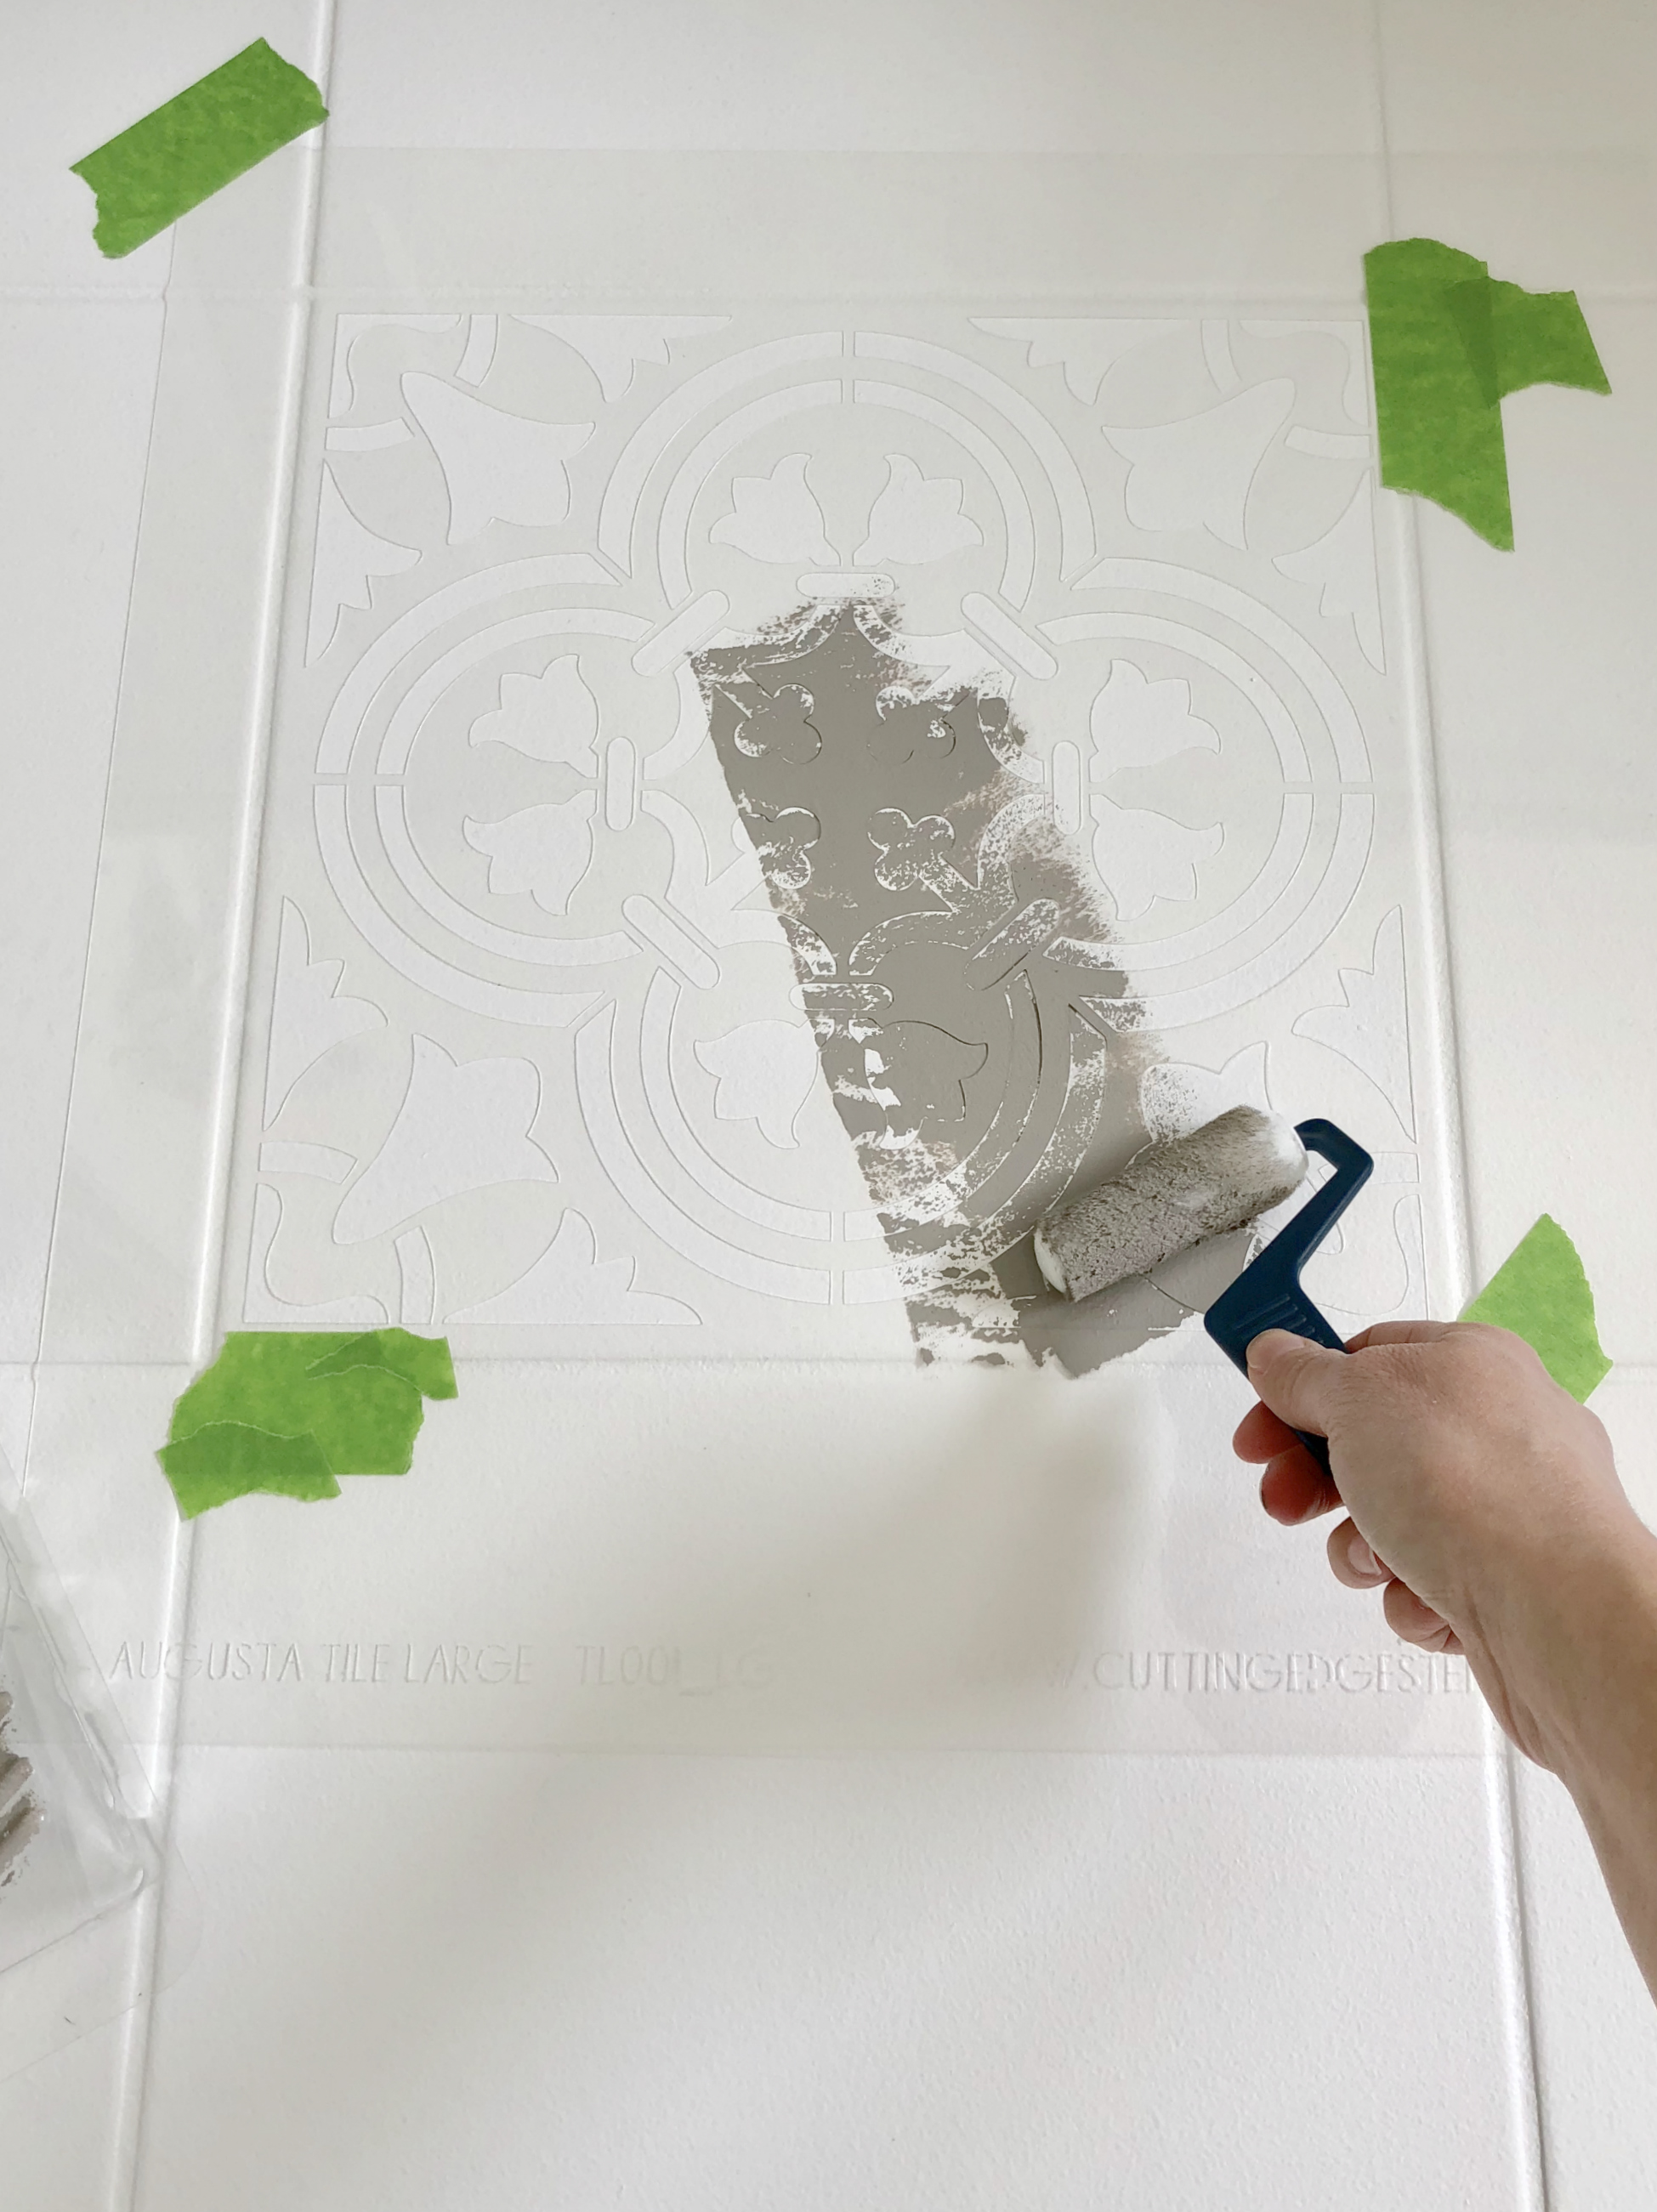
6. Using a smooth surface foam roller, roll on a thin coat of paint over the stencil. I used Behr’s Creek Bend grey.

7. Peel off your stencil.
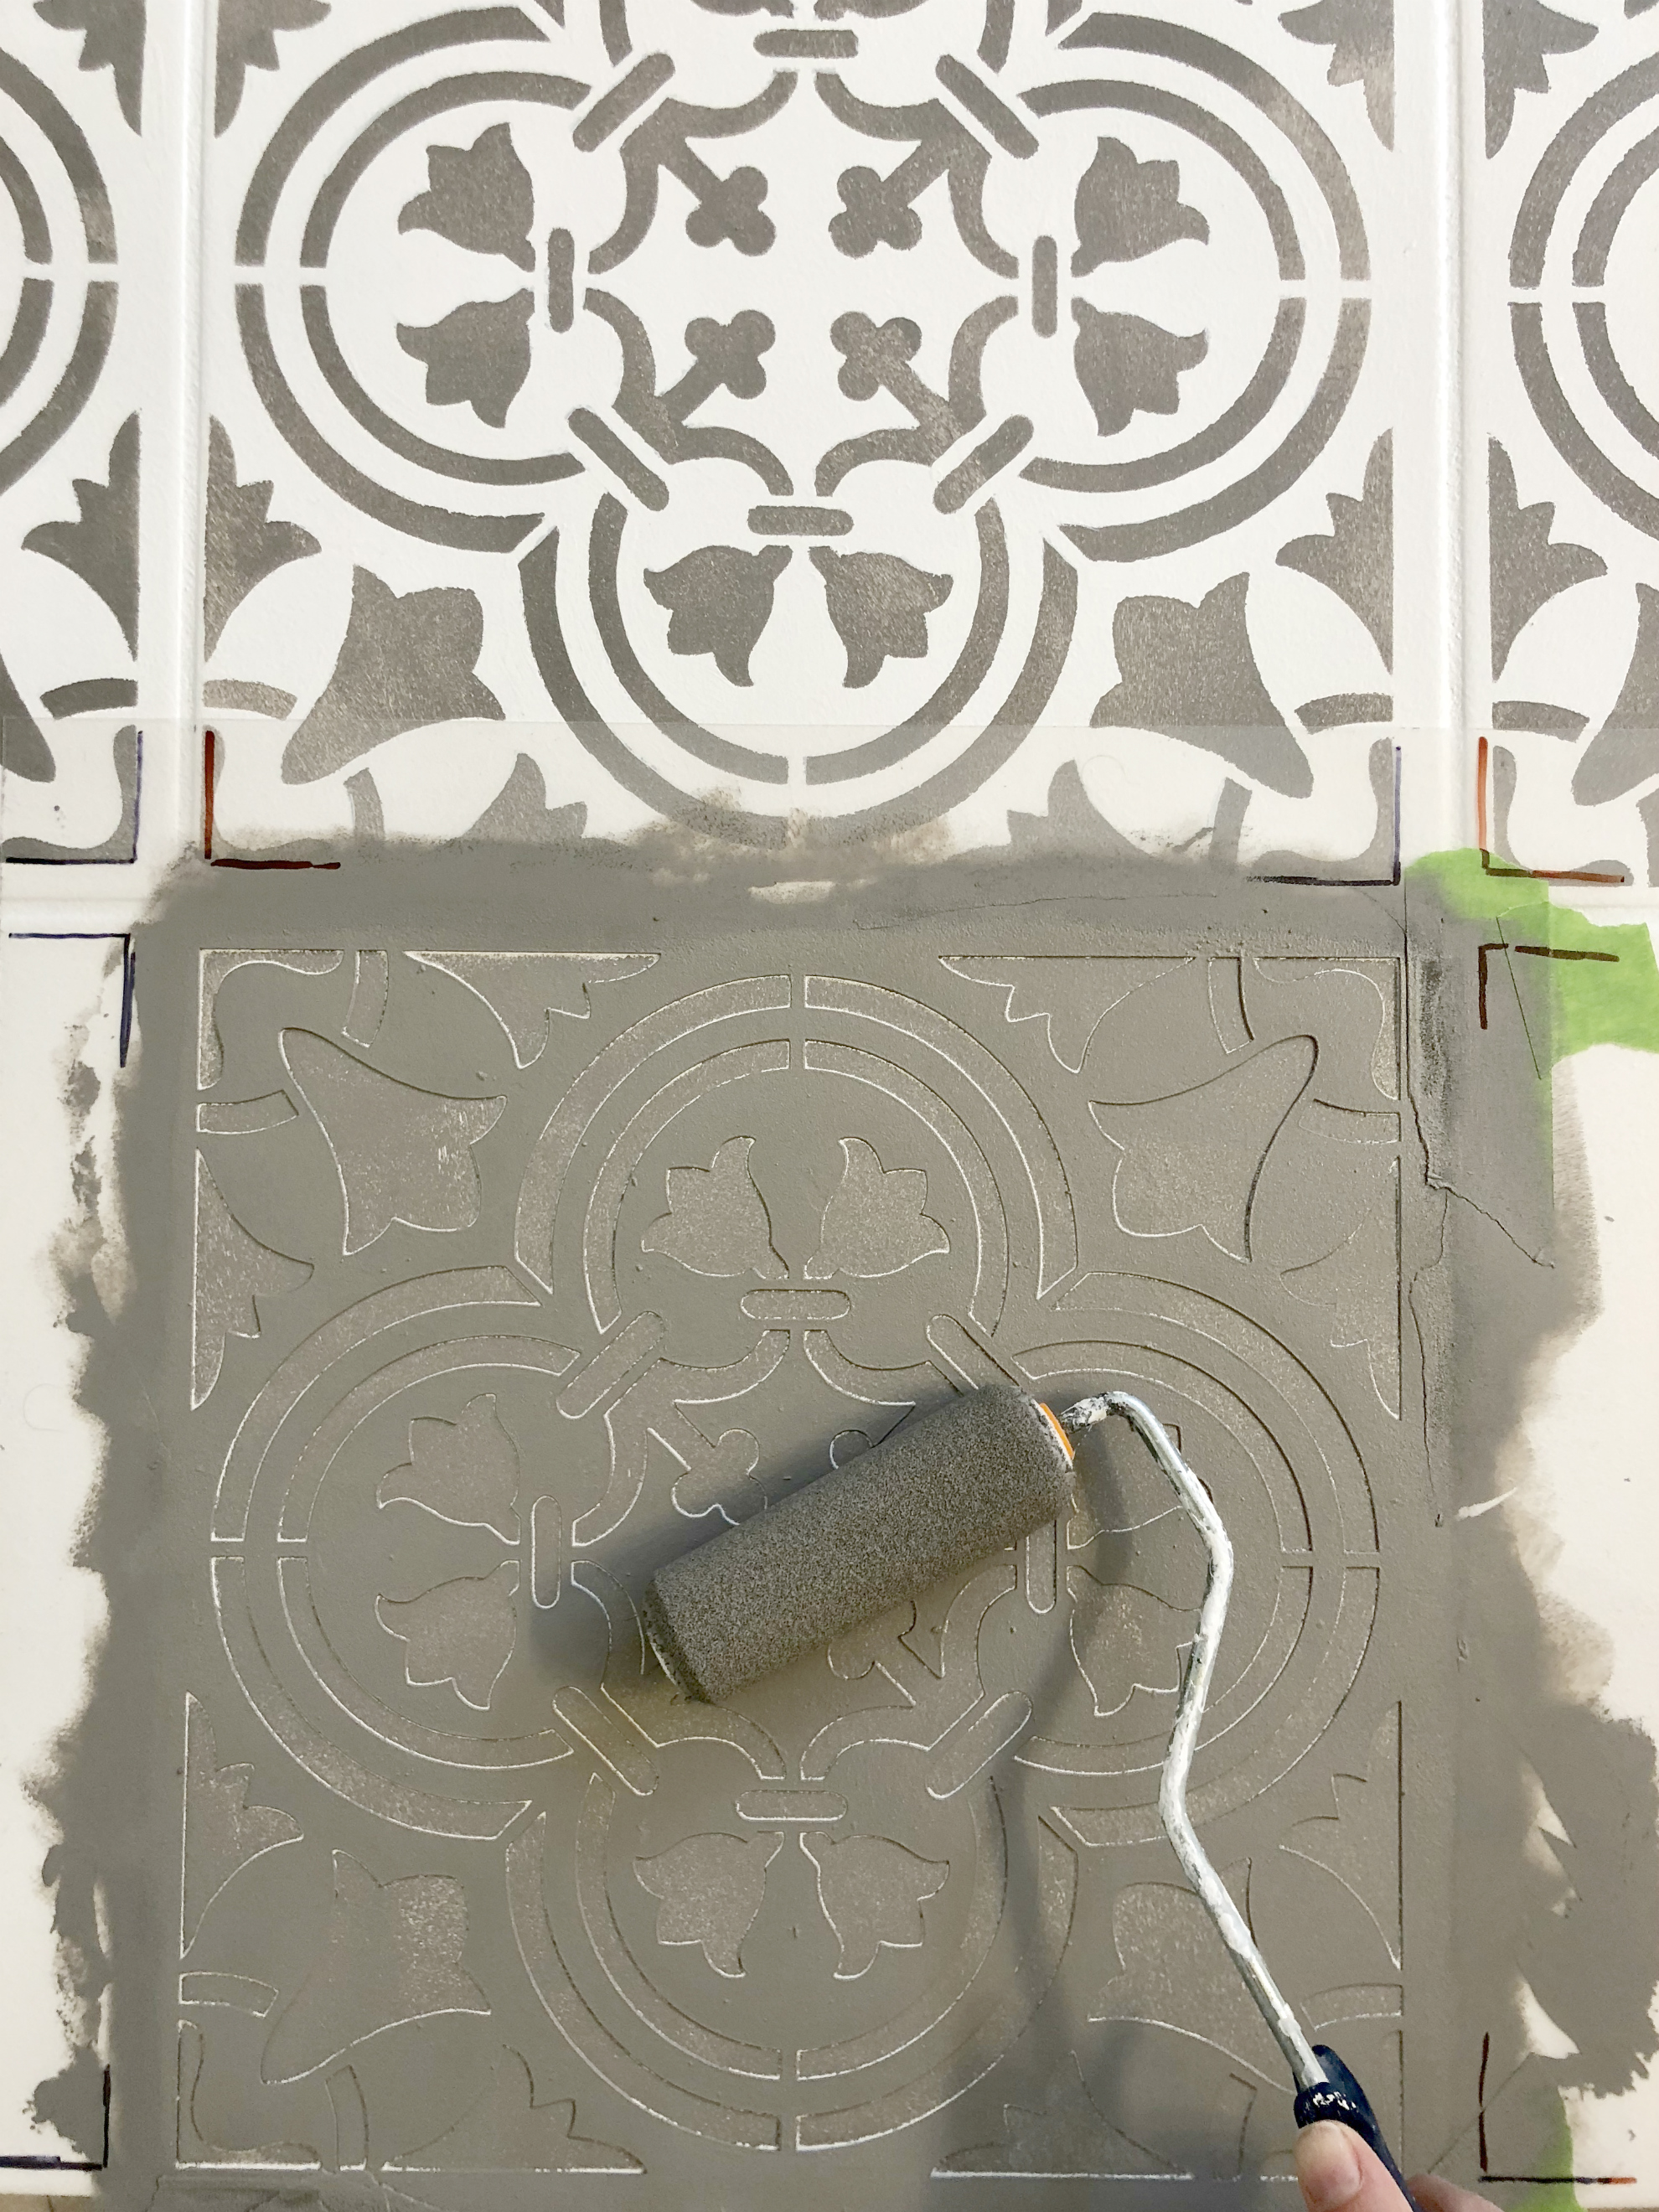
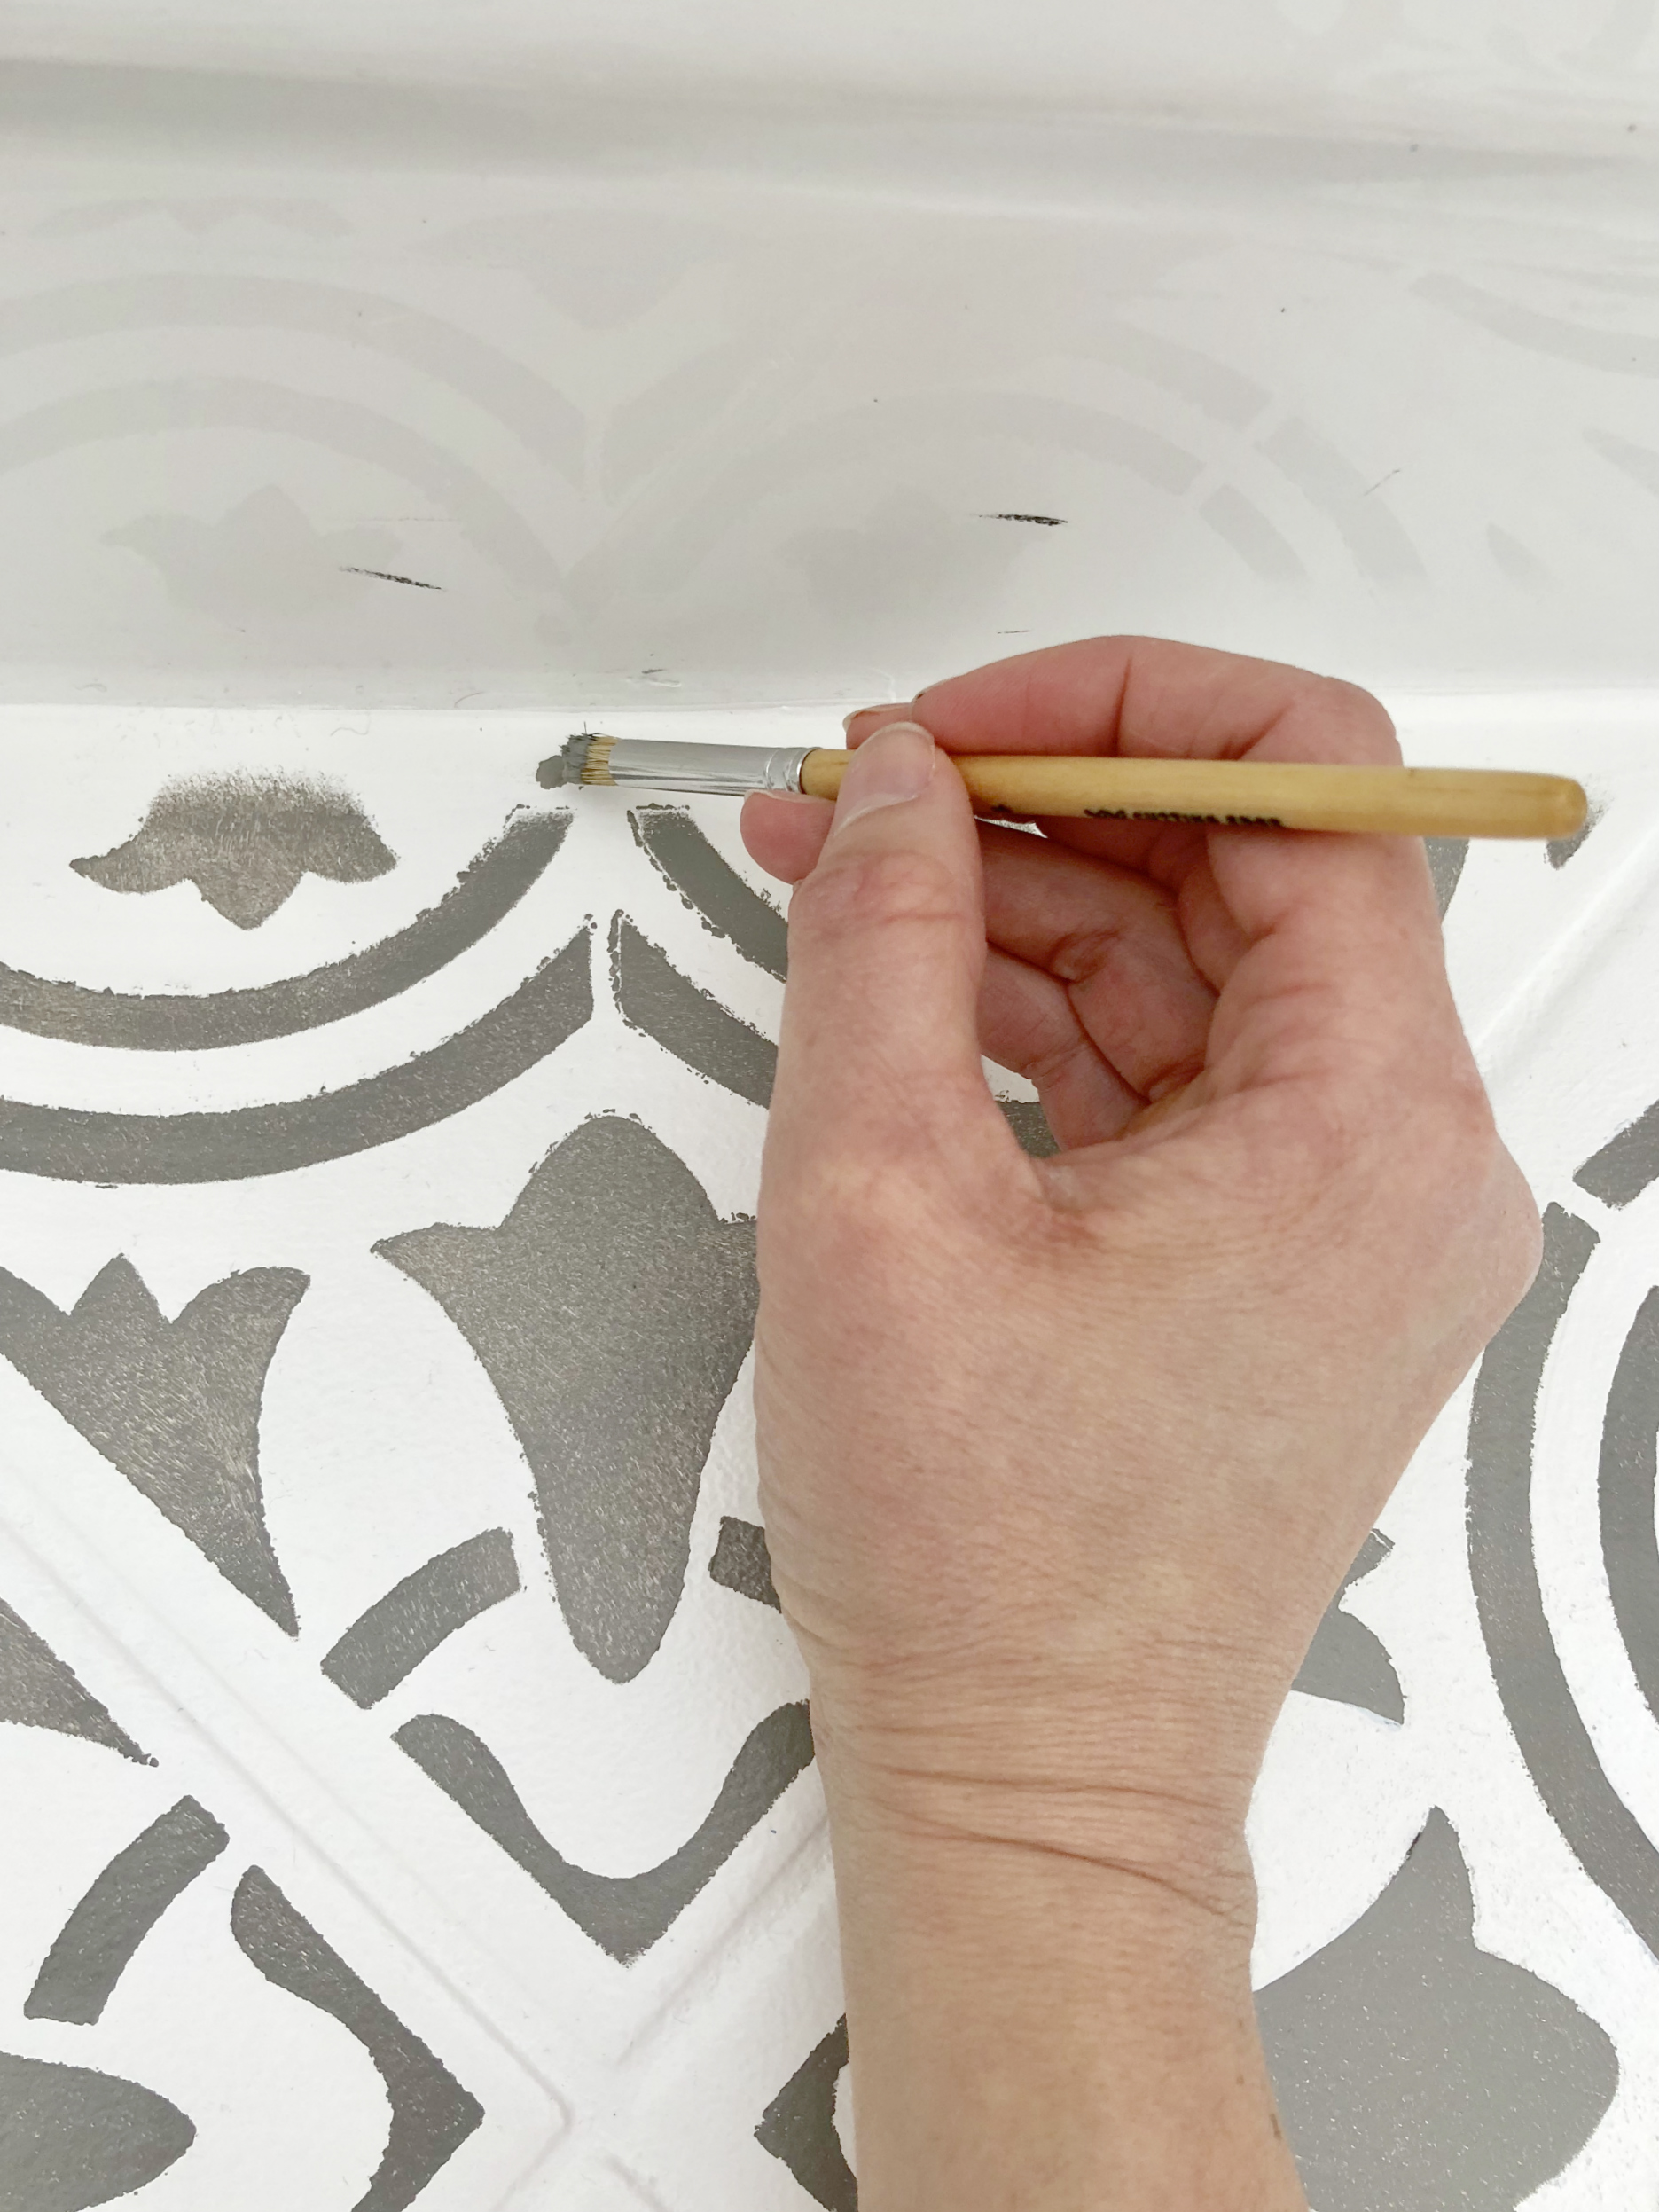
8. Using a small brush, touch up any bumpy lines or fill in any missed spots. You can do as much or as little of this as you want. It depends how much of an attention to detail you have 🙂 For me, I could sit there for hours trying to make it look perfect. See the spillage in the picture below, I first used some grey to fill in the spots the stencil missed right by the tub. I then went over it again with the white paint to smooth out the bumpy lines. The bumpy lines were caused by me either using too much paint or me not spraying enough spray adhesive on the back of the stencil.
9. Spread on your topcoat. Use two to three coats. I used this sealer in a satin finish.
10. Replace your quarter round and vents.
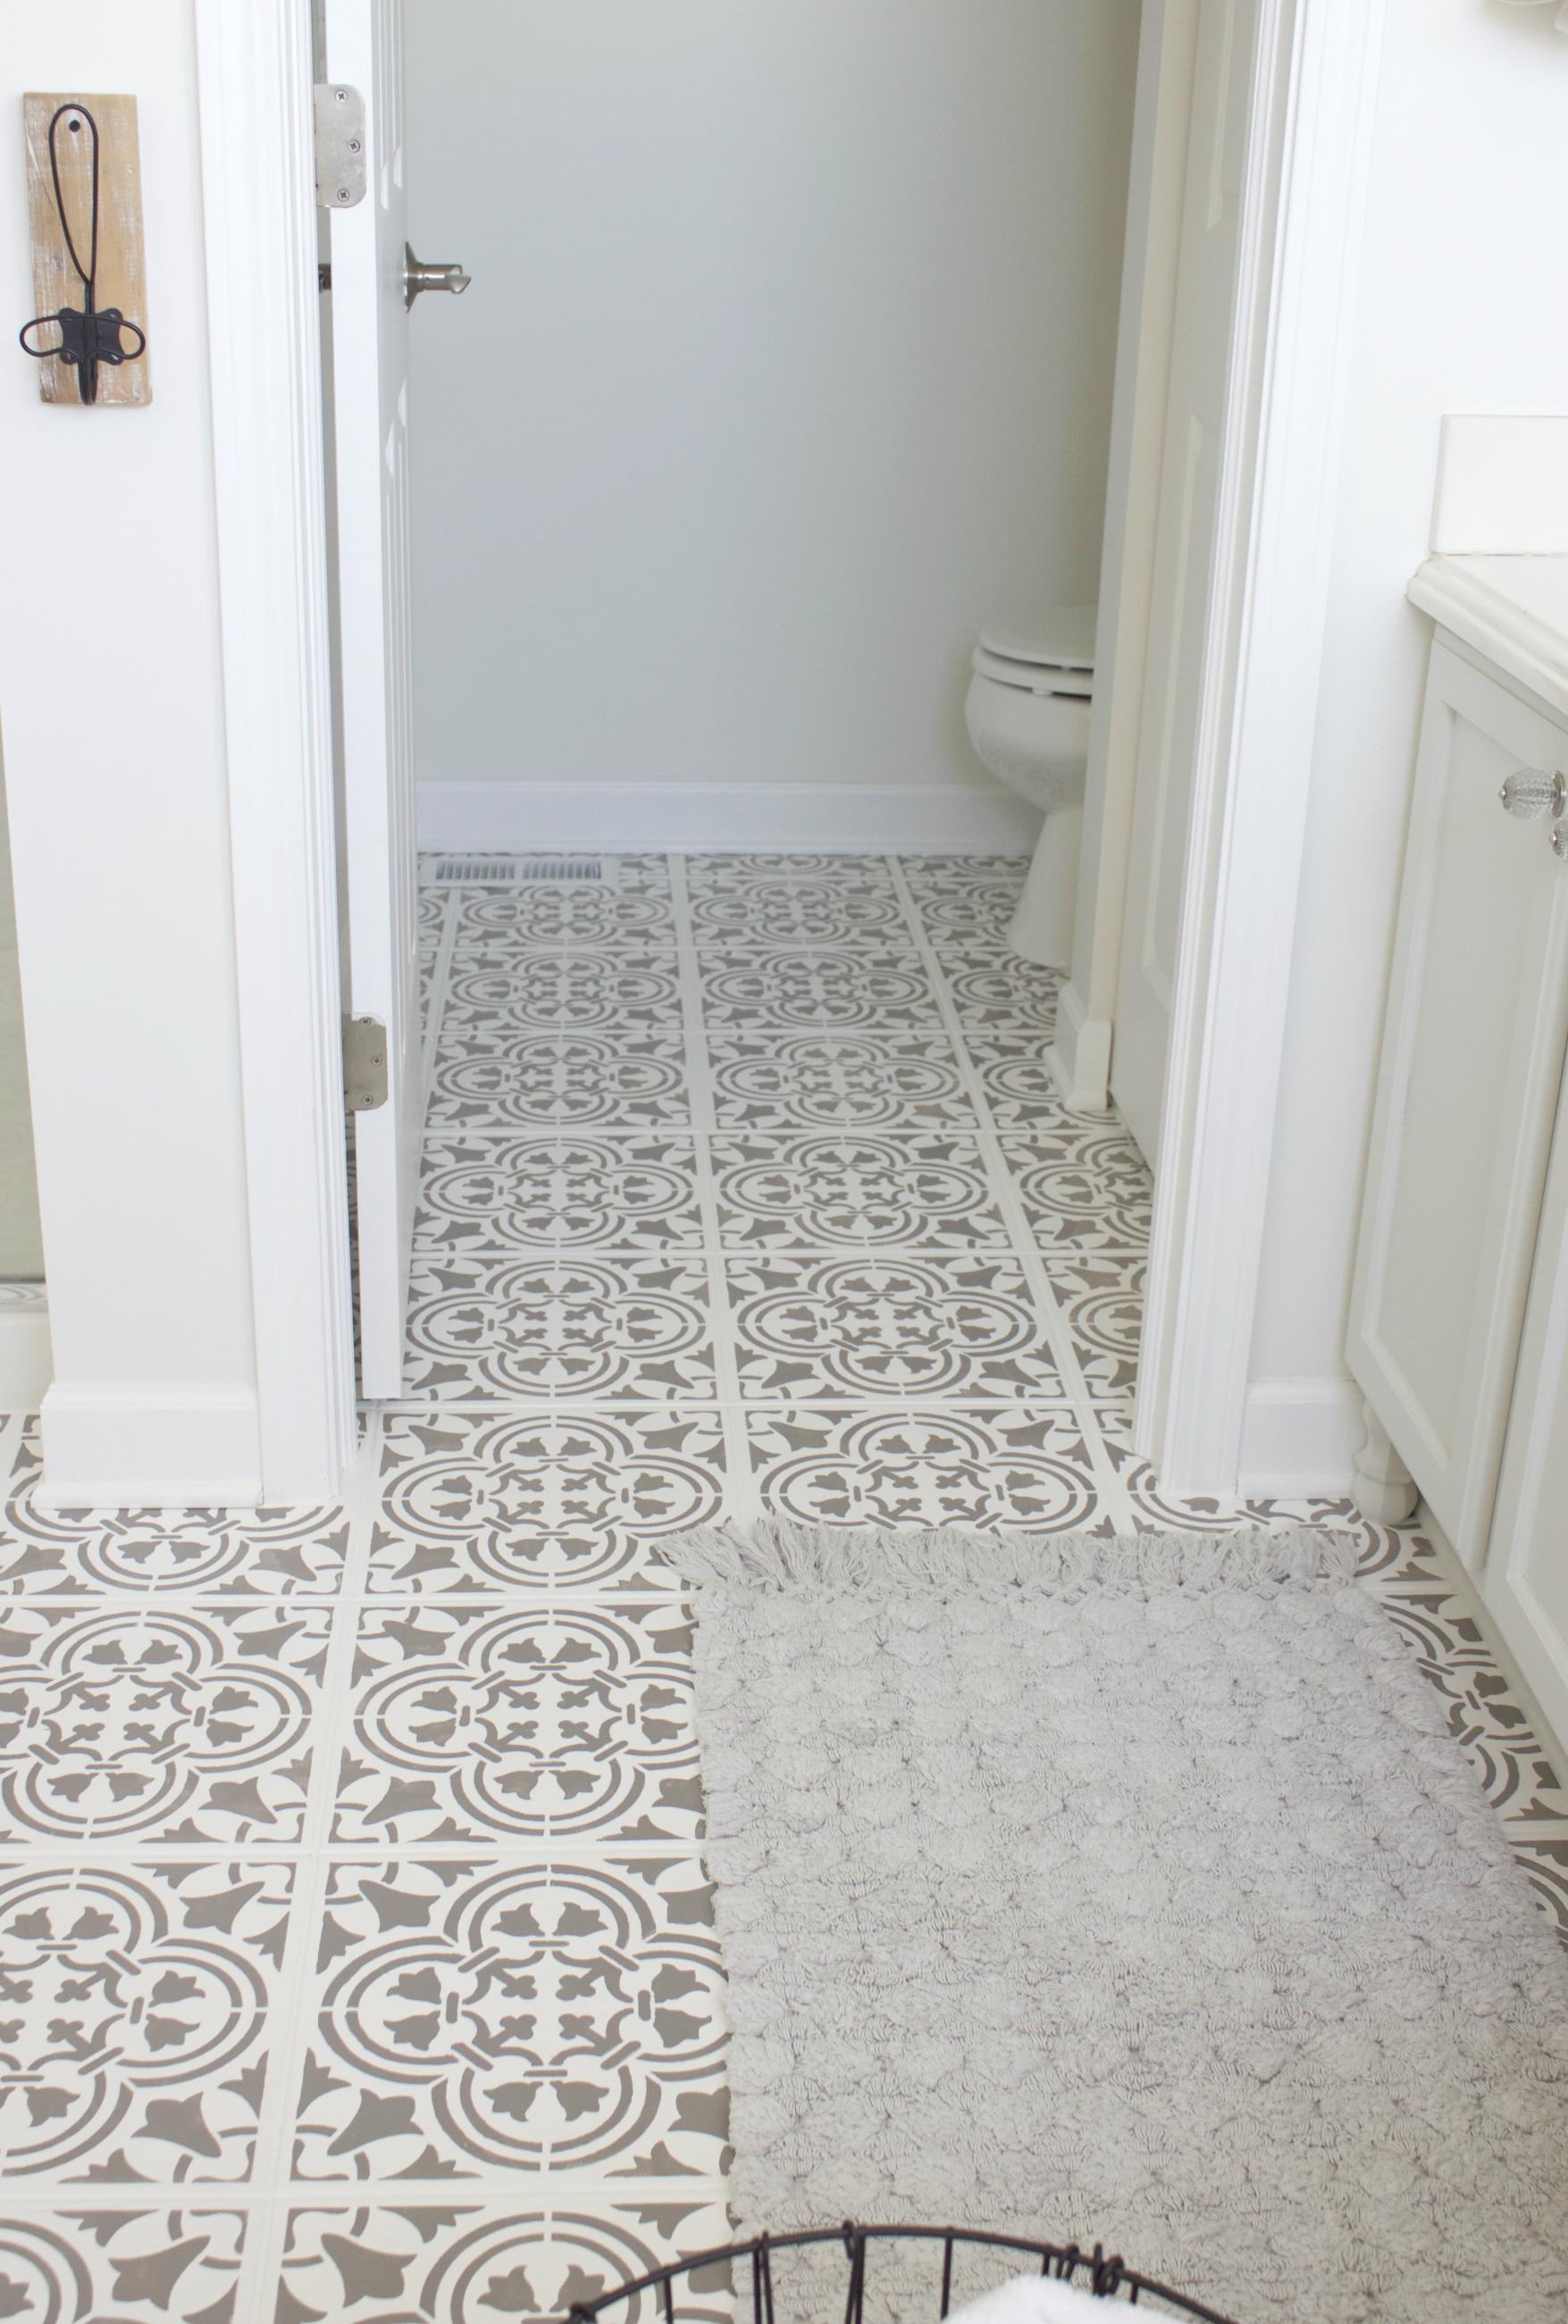

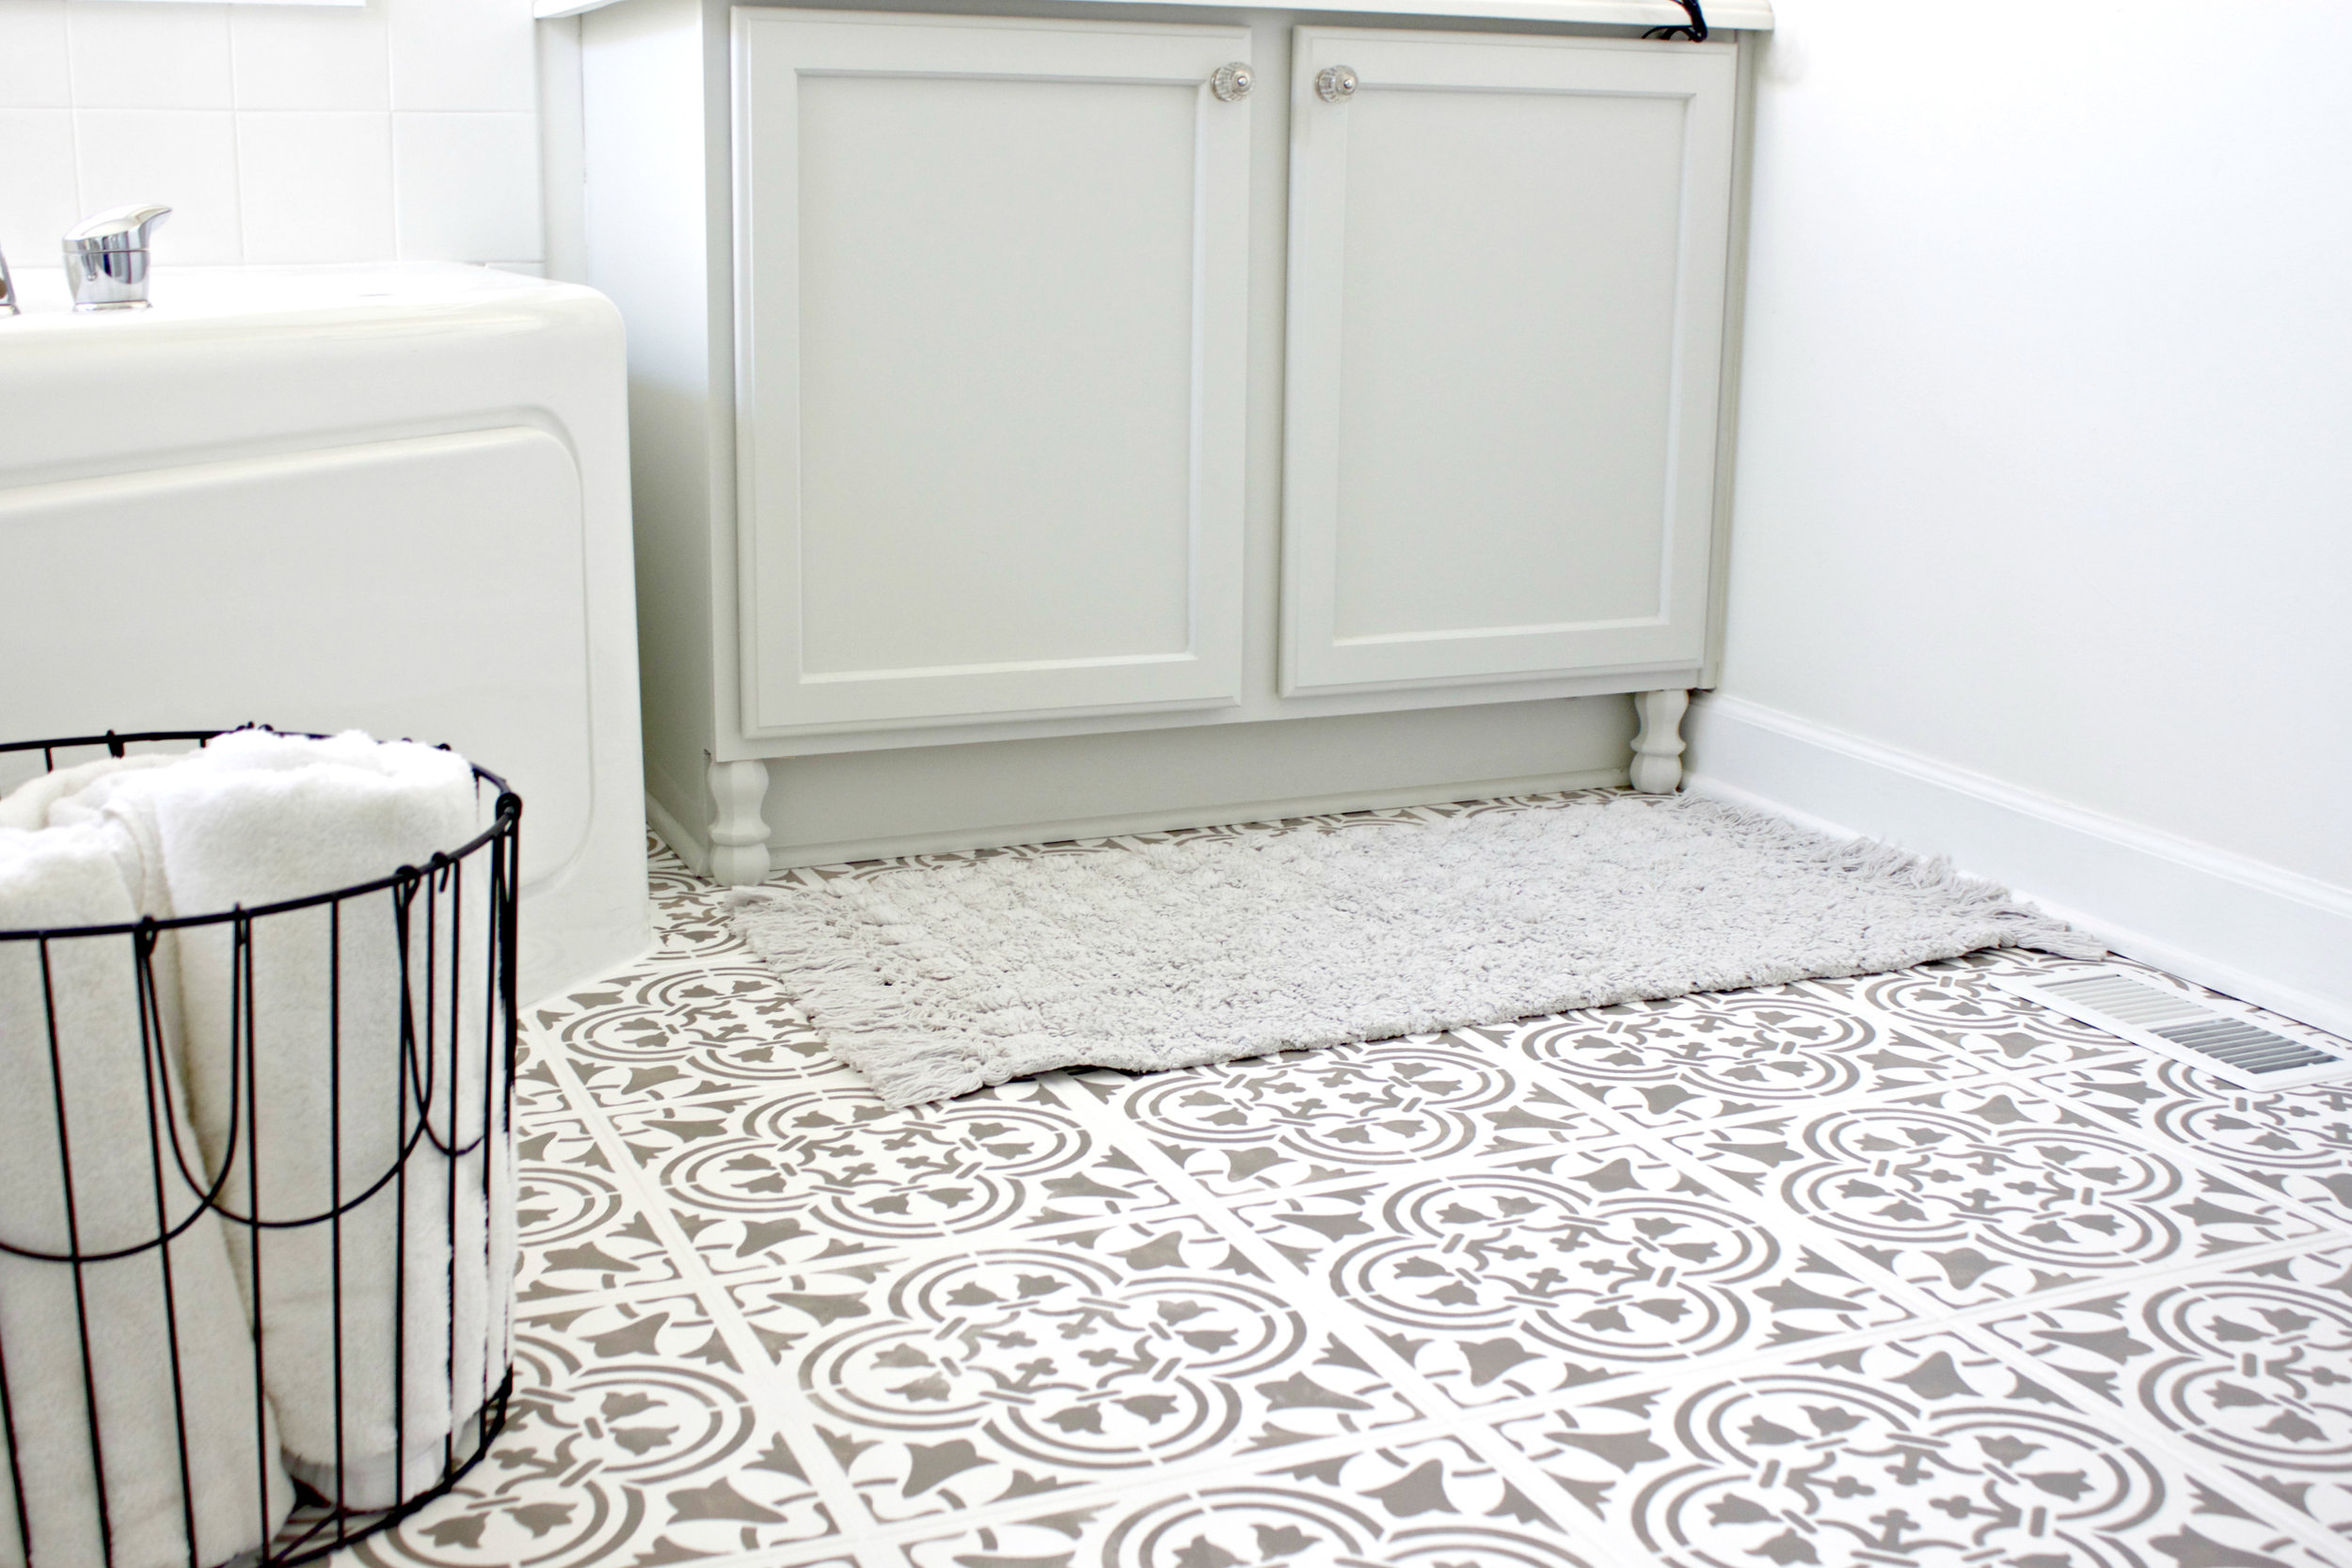
I love how it turned out. It is so much better than before. It was definitely a lot of work. So make sure to get a good audiobook or podcast haha!